
Renesis NC Track Car - In the Build
 05-28-2009, 06:06 PM
#126
Registered User

Join Date: Apr 2005
Location: Canberra
Posts: 745
Likes: 0
Received 0 Likes
on
0 Posts
 05-29-2009, 11:22 PM
#127
Registered User

Join Date: Dec 2006
Posts: 216
Likes: 0
Received 0 Likes
on
0 Posts
05-30-2009, 05:16 AM
#128
Registered
Thread Starter
Join Date: Mar 2007
Location: Brisbane
Posts: 212
Likes: 0
Received 0 Likes
on
0 Posts
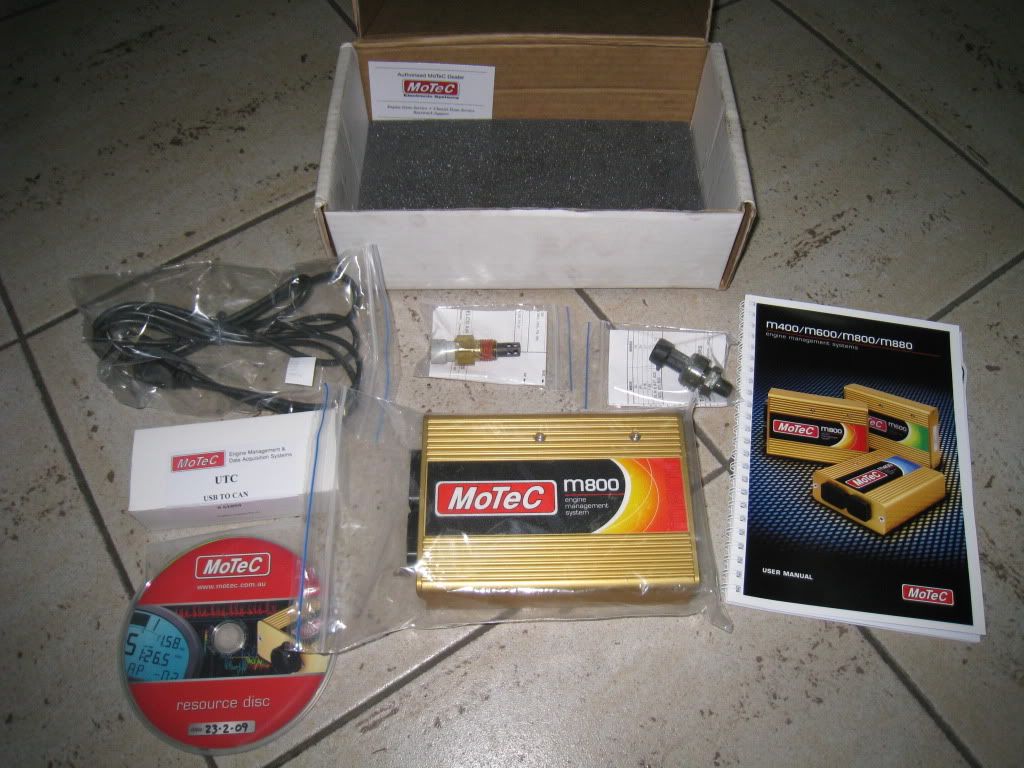
Not much progress to report. Although I did pick up the Motec M800 from Phil Laird last weekend.
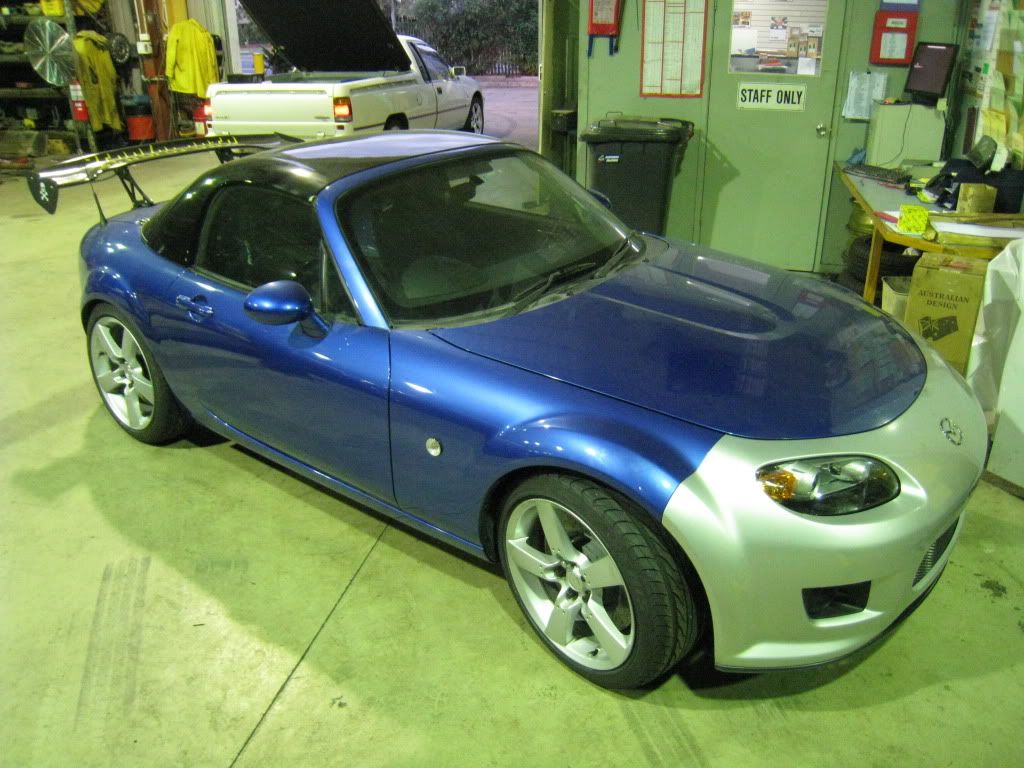
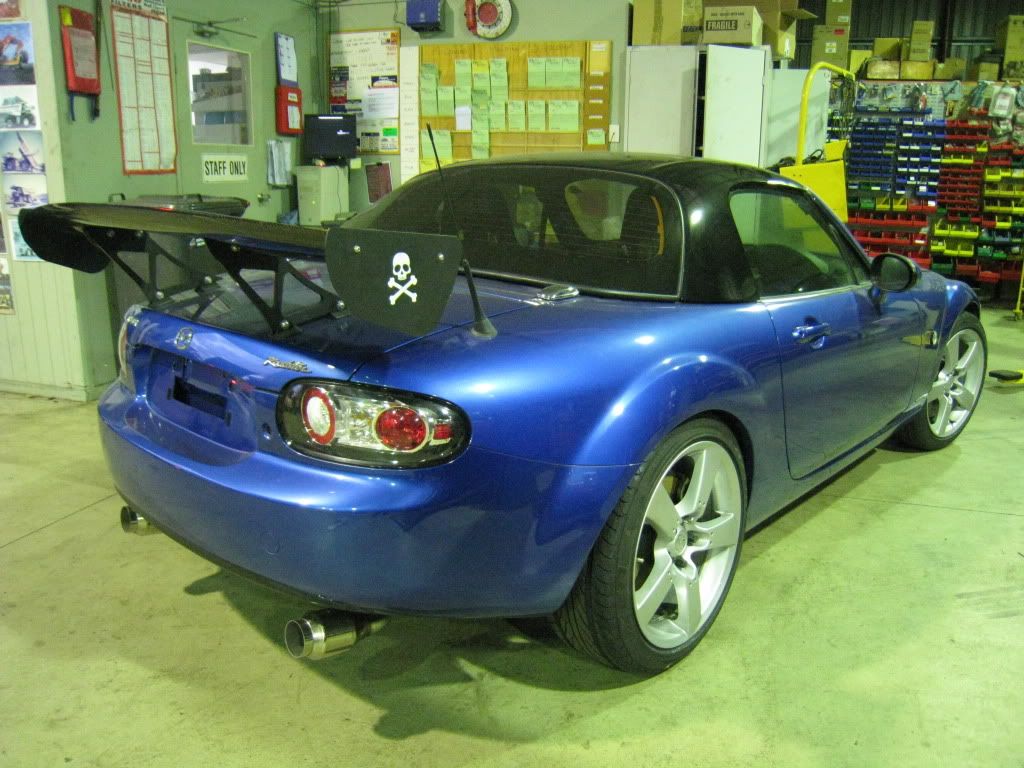
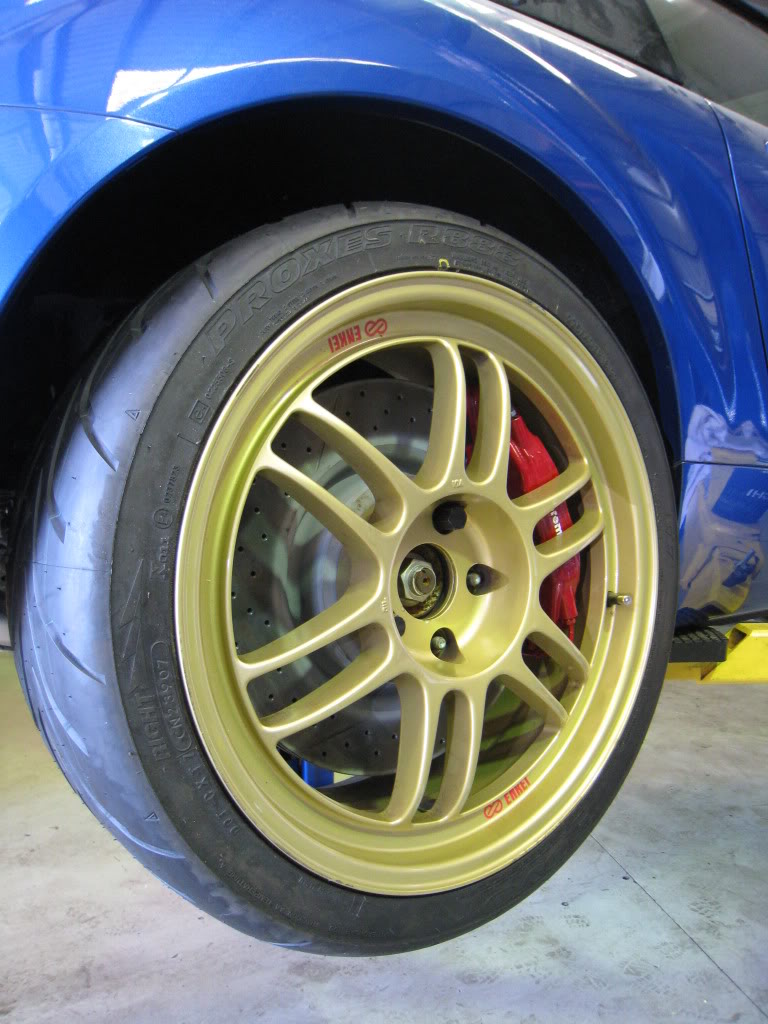
The car got a bit of a wash when I was in Japan. It's back on the RX-8 wheels for the time being.
Cheers,
Danny
The car got a bit of a wash when I was in Japan. It's back on the RX-8 wheels for the time being.
Cheers,
Danny
Last edited by ORX-800; 05-30-2009 at 09:52 PM.
 05-30-2009, 10:16 PM
#130
Registered
Thread Starter
Join Date: Mar 2007
Location: Brisbane
Posts: 212
Likes: 0
Received 0 Likes
on
0 Posts
Cheers,
Danny
 06-14-2009, 06:23 AM
#132
Registered
Thread Starter
Join Date: Mar 2007
Location: Brisbane
Posts: 212
Likes: 0
Received 0 Likes
on
0 Posts

 07-12-2009, 04:37 AM
#133
Registered
Thread Starter
Join Date: Mar 2007
Location: Brisbane
Posts: 212
Likes: 0
Received 0 Likes
on
0 Posts
Besides the birth of a second son and the shenanigans of EOFY, I did make a little progress over the past month. :D
With regards to the supercharger, the layshaft gear(s) have left Italy and are due to arrive in Brisbane within the next week or so. Further to this, I can expect the kit to be ready for me to install by the end of August. 8) From here I'll install the supercharger kit onto a second engine and ship it out to Phil Laird so that the engine dyno tuning can begin whilst I continue to sort out the rest of the car.
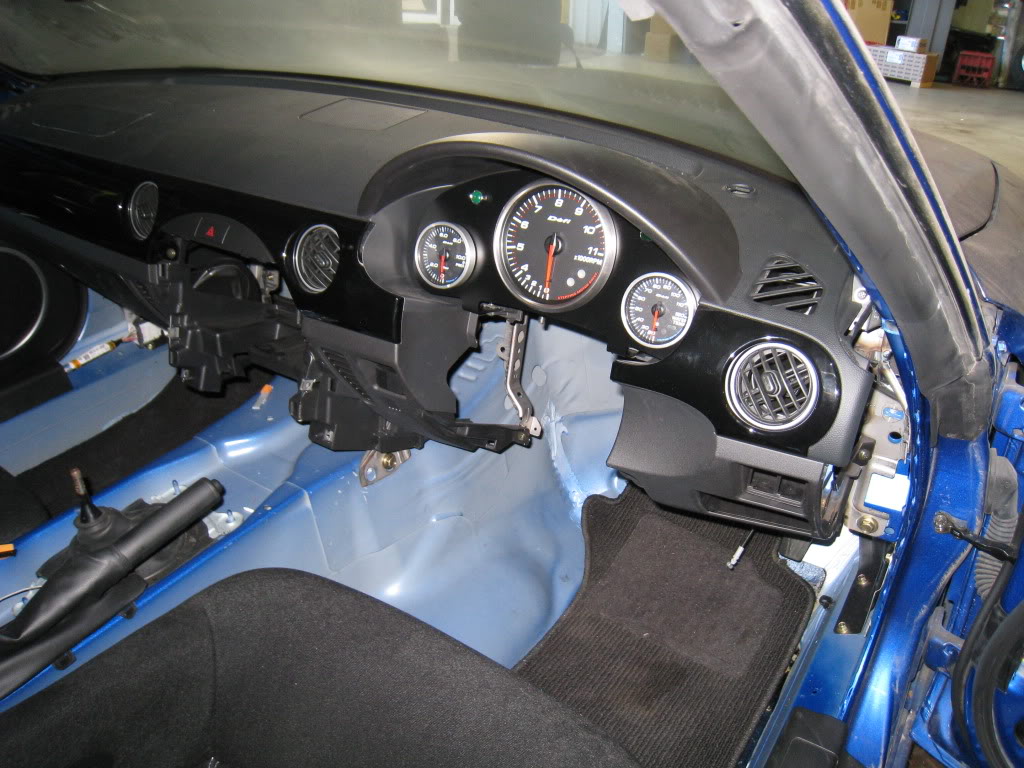
The standard NC instrument cluster only has a 7,500 rpm tacho which is a bit low for the 13B-MSP, so I have now replaced it with a custom arrangement of Defi gauges. The other gauges I have will be housed in a yet-to-be-designed panel where the in-car-entertainment once resided.
This is the solidmodel of the instrument cluster fascia.
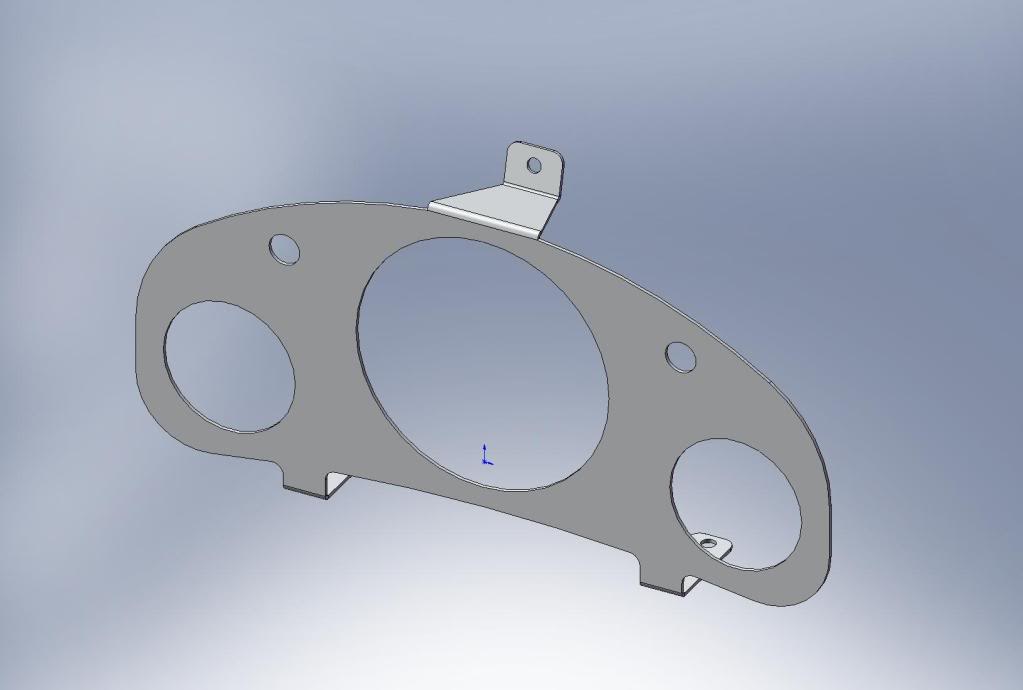
It's development.
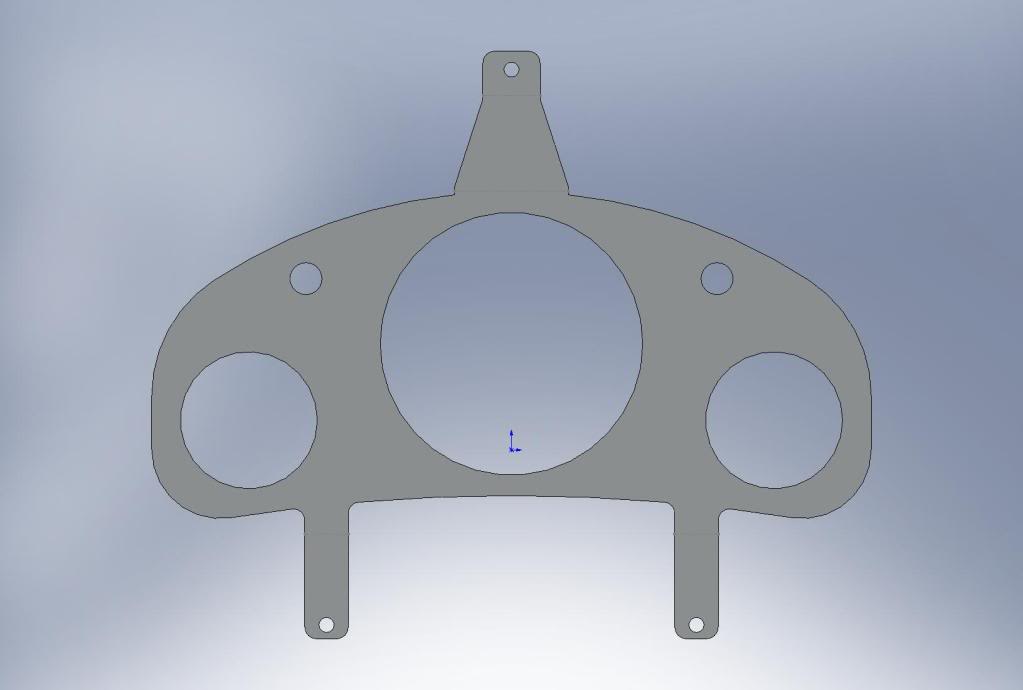
As laser profiled.
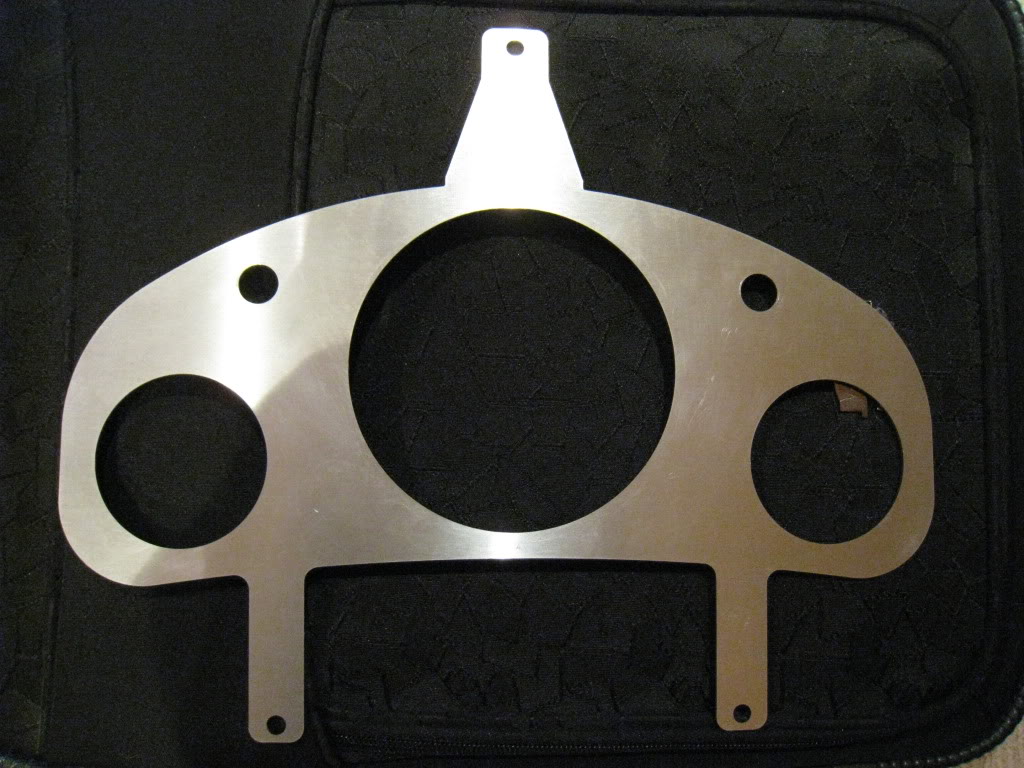
As bent and etch primed.

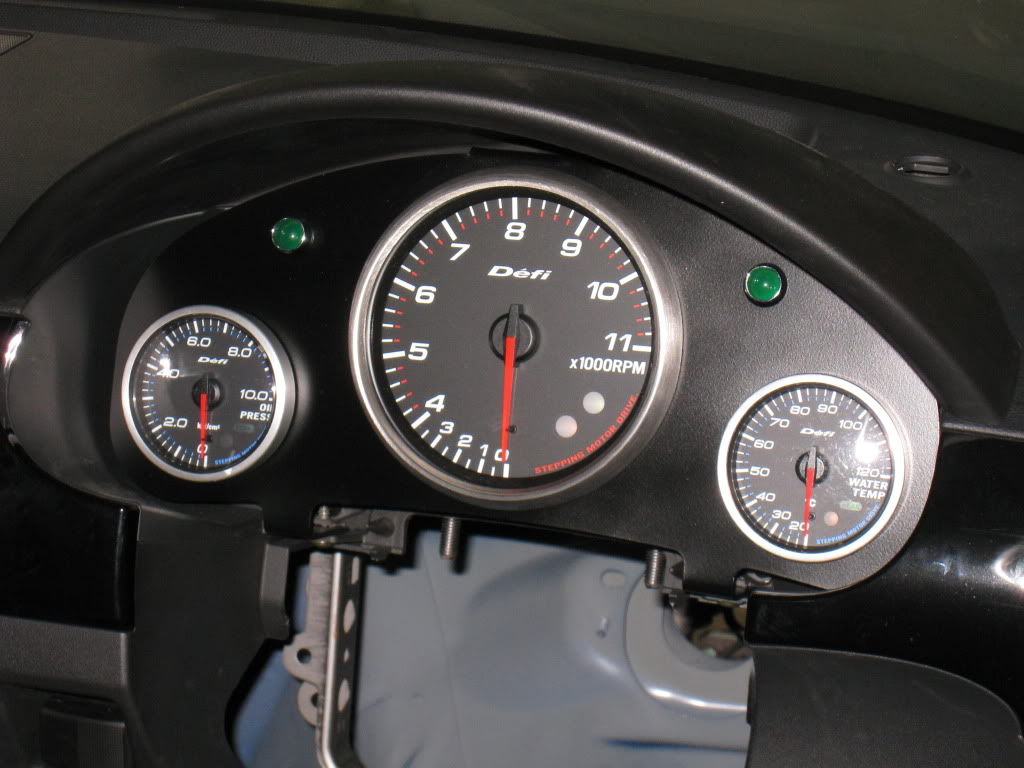
As painted - satin black for low light reflection and to fit in with the surrounding decor.

With the gauges and a pair of turning indicator (chrome bezel green LED's) installed.
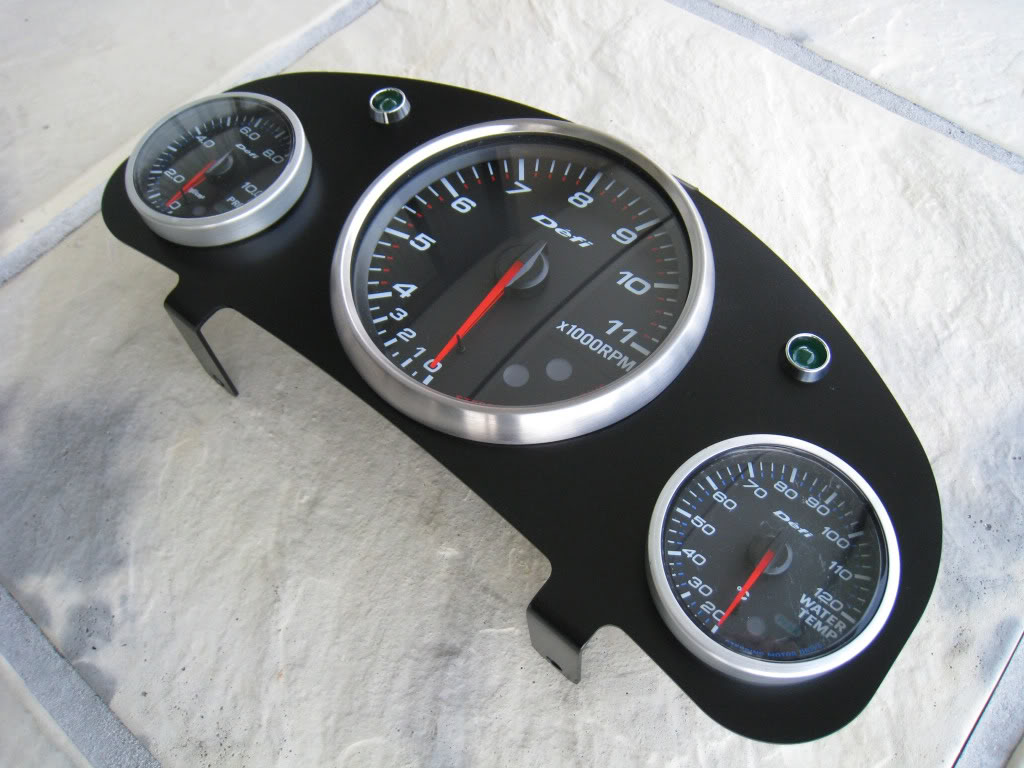

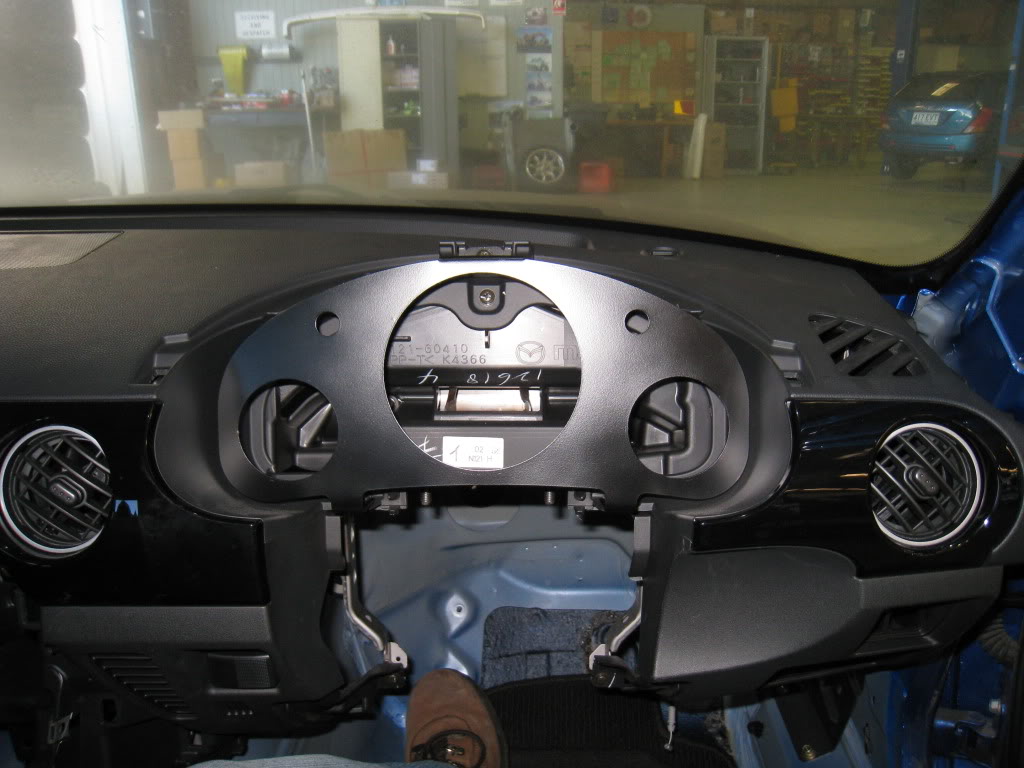
I hope to get a chance to trial fit the assembly in the dash tomorrow....because I can't wait any longer than that.
Cheers,
Danny
With regards to the supercharger, the layshaft gear(s) have left Italy and are due to arrive in Brisbane within the next week or so. Further to this, I can expect the kit to be ready for me to install by the end of August. 8) From here I'll install the supercharger kit onto a second engine and ship it out to Phil Laird so that the engine dyno tuning can begin whilst I continue to sort out the rest of the car.
The standard NC instrument cluster only has a 7,500 rpm tacho which is a bit low for the 13B-MSP, so I have now replaced it with a custom arrangement of Defi gauges. The other gauges I have will be housed in a yet-to-be-designed panel where the in-car-entertainment once resided.
This is the solidmodel of the instrument cluster fascia.
It's development.
As laser profiled.
As bent and etch primed.
As painted - satin black for low light reflection and to fit in with the surrounding decor.
With the gauges and a pair of turning indicator (chrome bezel green LED's) installed.
I hope to get a chance to trial fit the assembly in the dash tomorrow....because I can't wait any longer than that.
Cheers,
Danny
 07-13-2009, 03:08 AM
#137
Registered
Thread Starter
Join Date: Mar 2007
Location: Brisbane
Posts: 212
Likes: 0
Received 0 Likes
on
0 Posts
Thanks Jarl and Dave.

If there's power to be had above 8,000rpm I'll be going there. There's certainly going to be enough airflow available from the supercharger, so if I can keep fuel and spark up to it, I don't see why not.
Cheers,
Danny
 07-24-2009, 05:42 AM
#139
Registered
Thread Starter
Join Date: Mar 2007
Location: Brisbane
Posts: 212
Likes: 0
Received 0 Likes
on
0 Posts
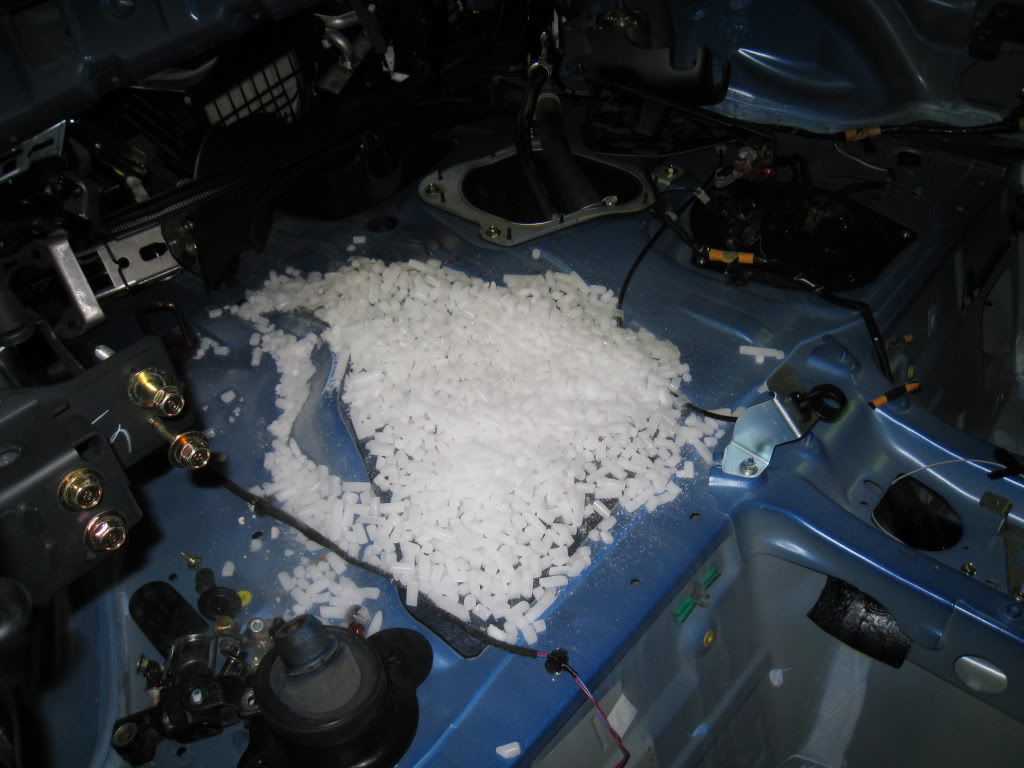
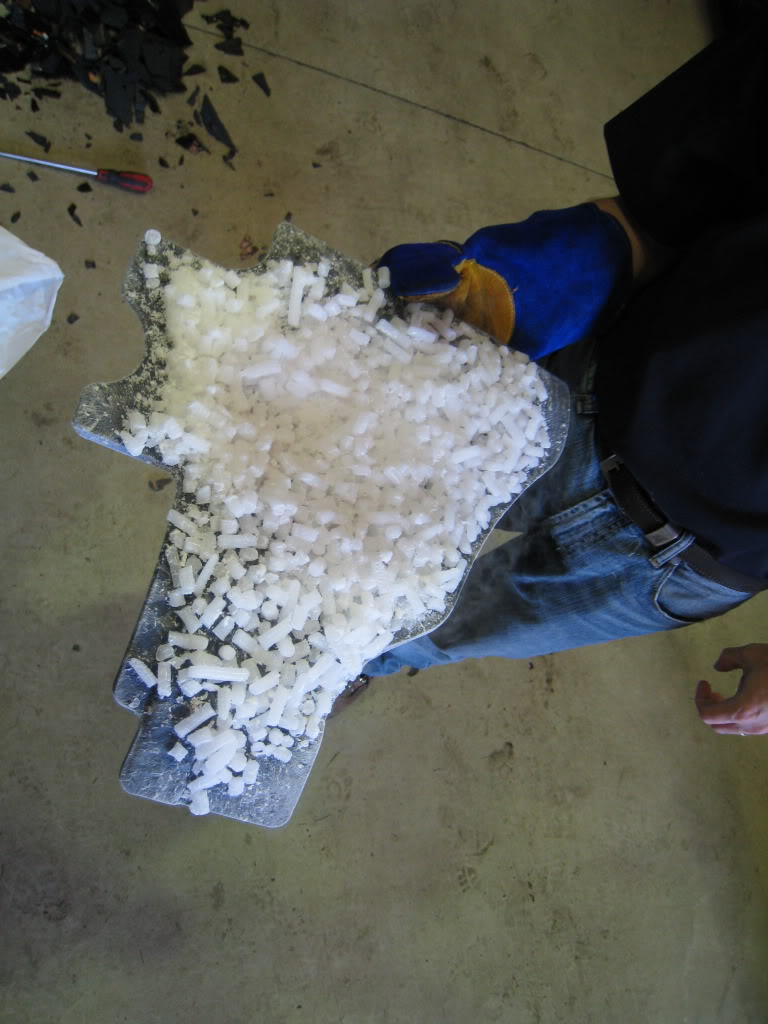
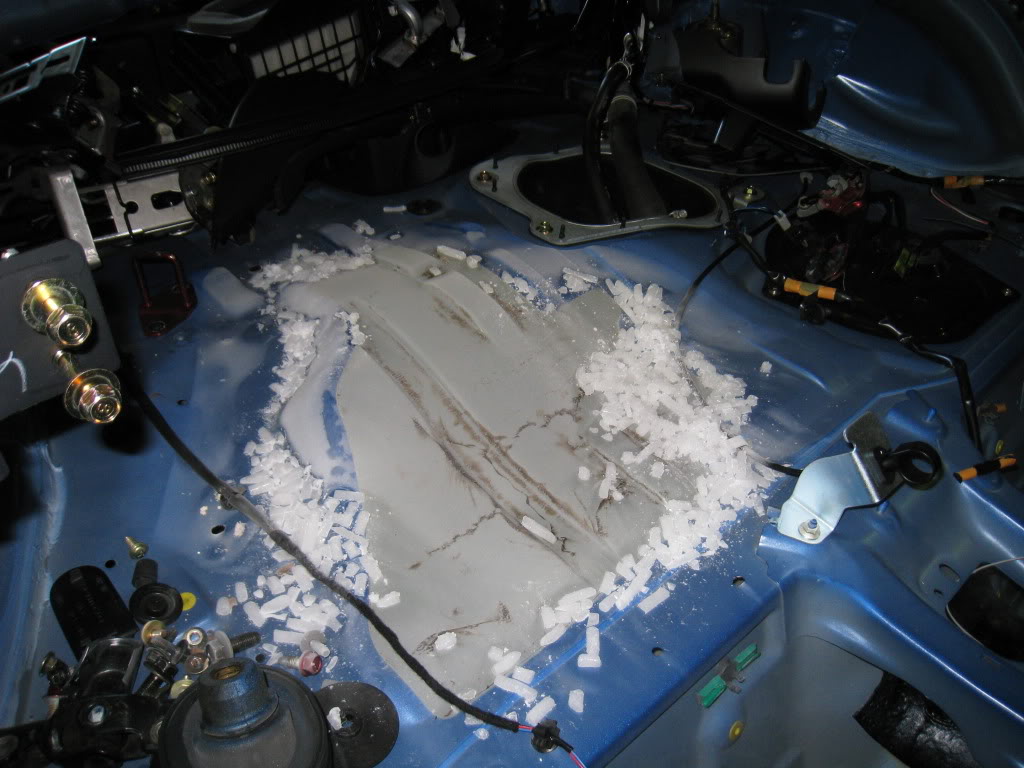
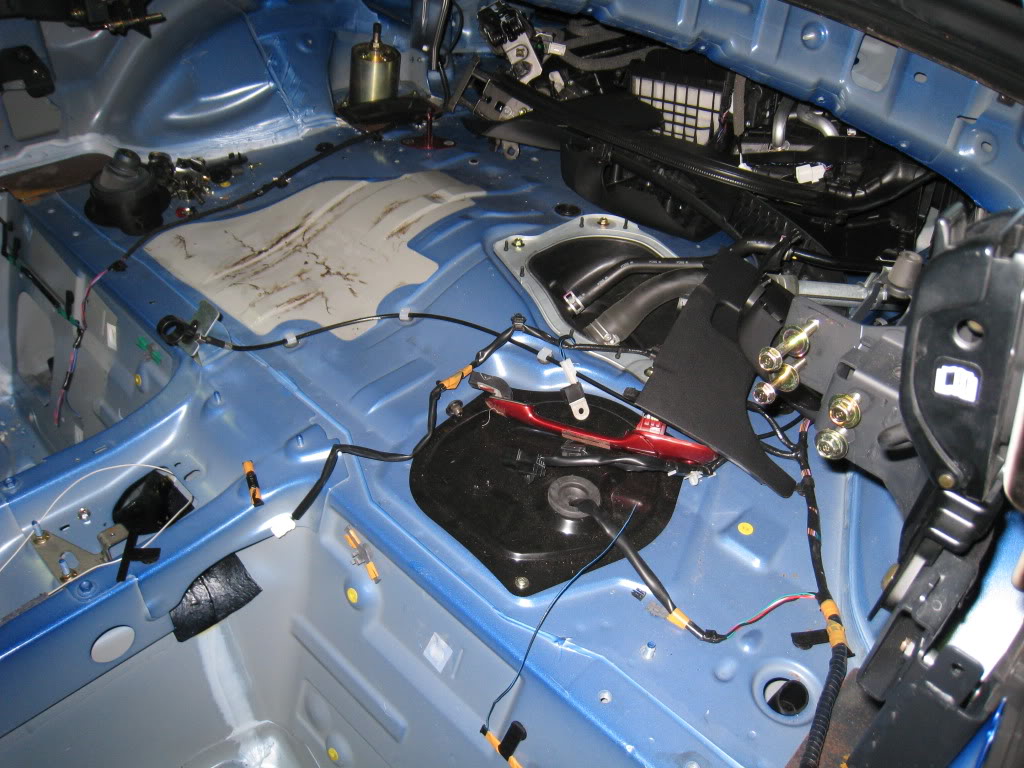
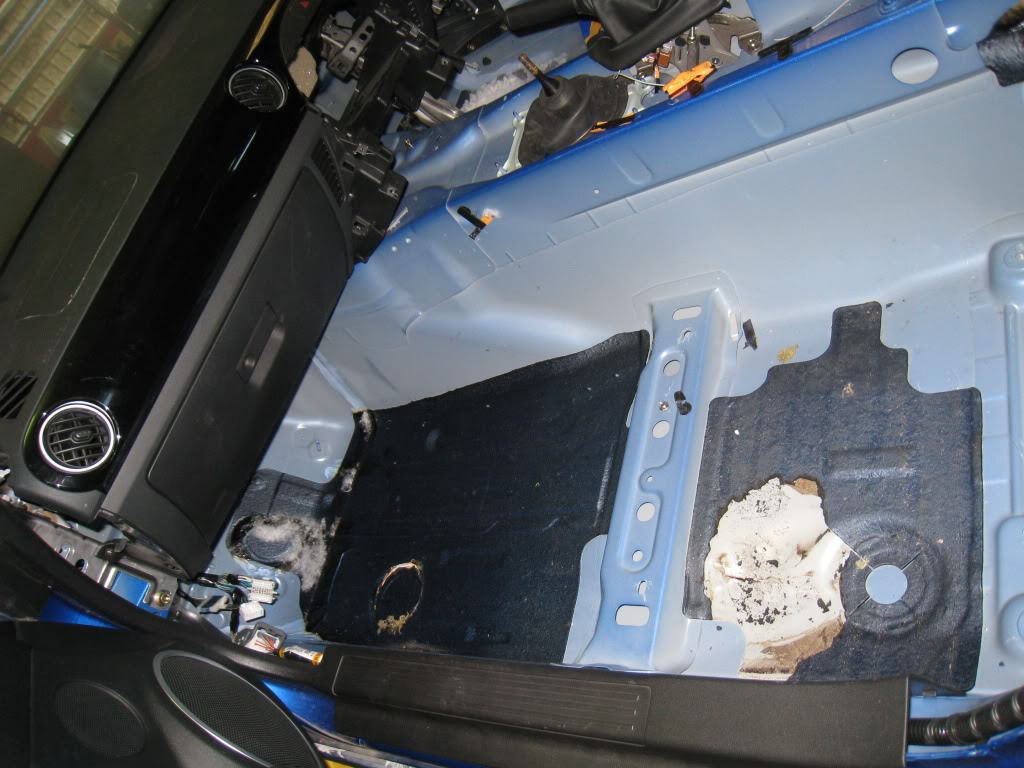
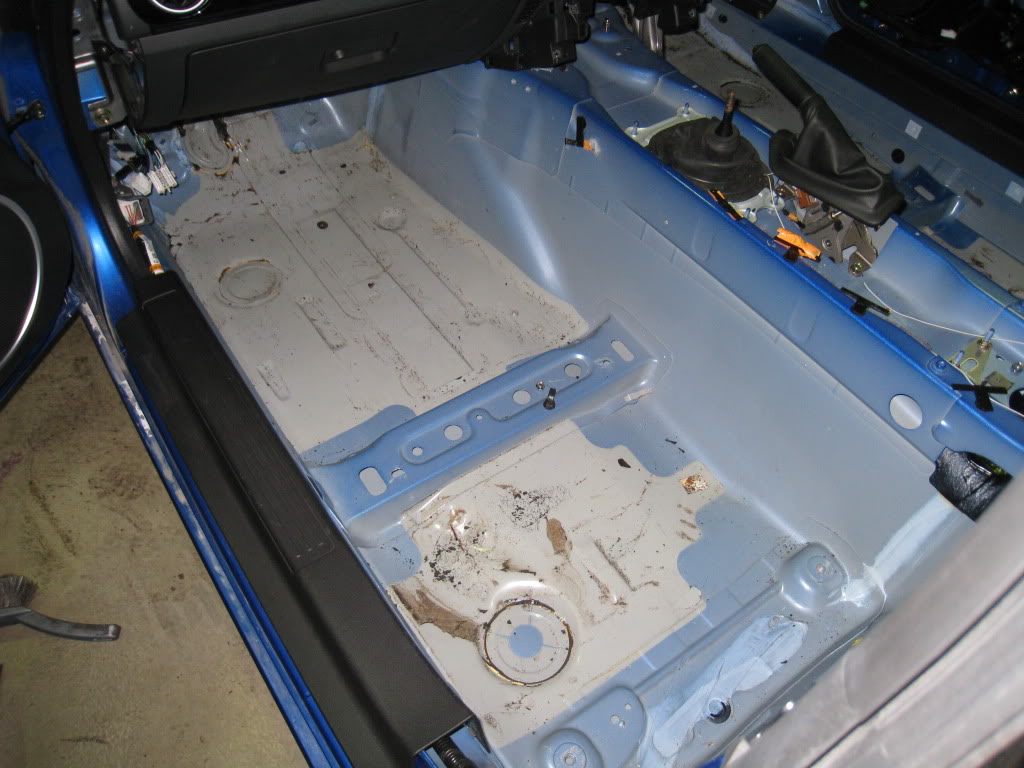
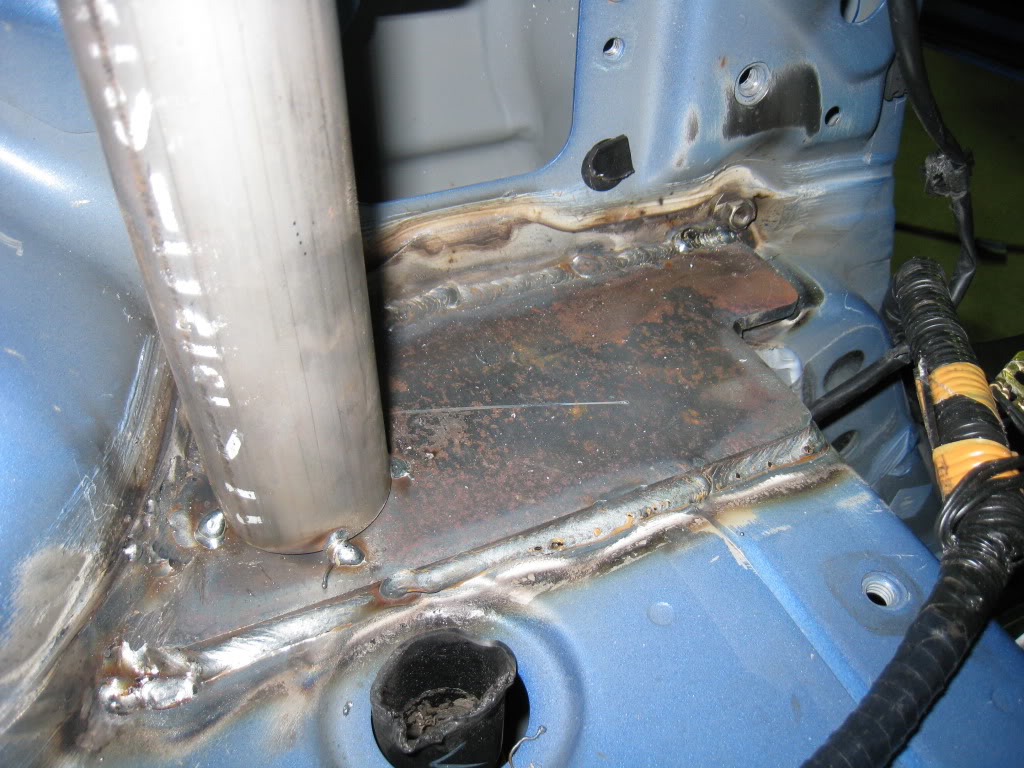
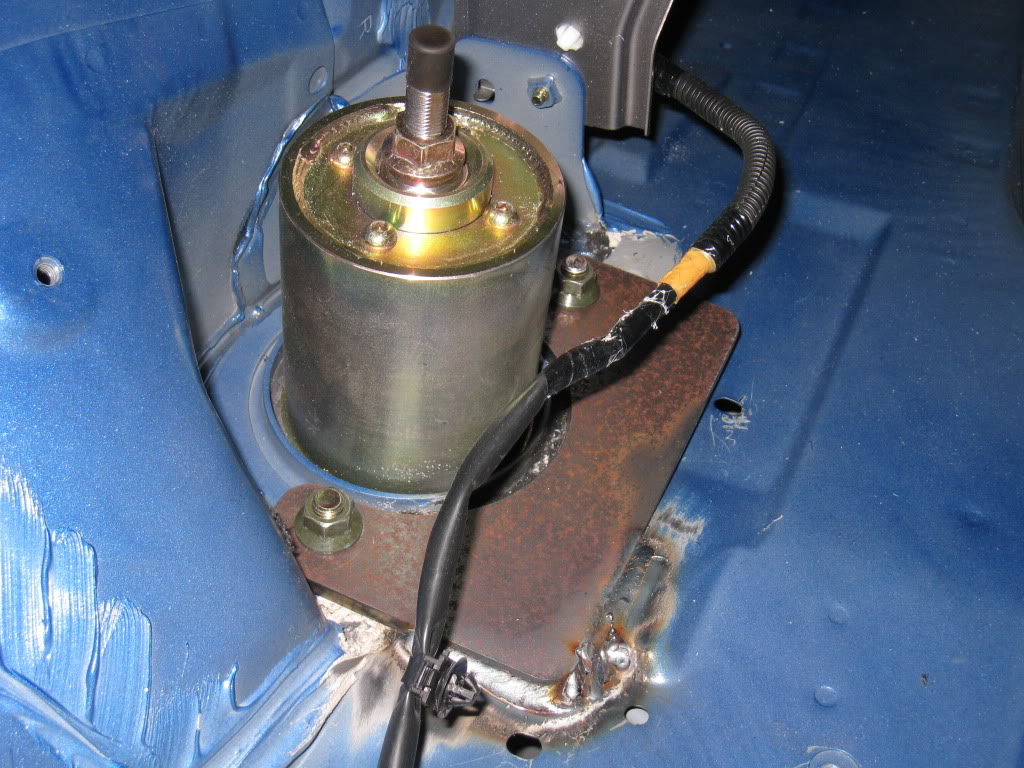
With a view to getting stuck into the car this weekend I had a crack at removing the five sections of sound deadener from the floor pan. This is how it looked before attacking it with dry ice pellets. 

The dry ice pellets worked an absolute treat!!! 8) It was pinch of p155 on horizontal surfaces, but as you'd expect, harder on inclined surfaces. You need to allow around 5 mins of contact to freeze the sound deadener and break the adhesion to the floor pan. Then tap and chip away to your hearts content.

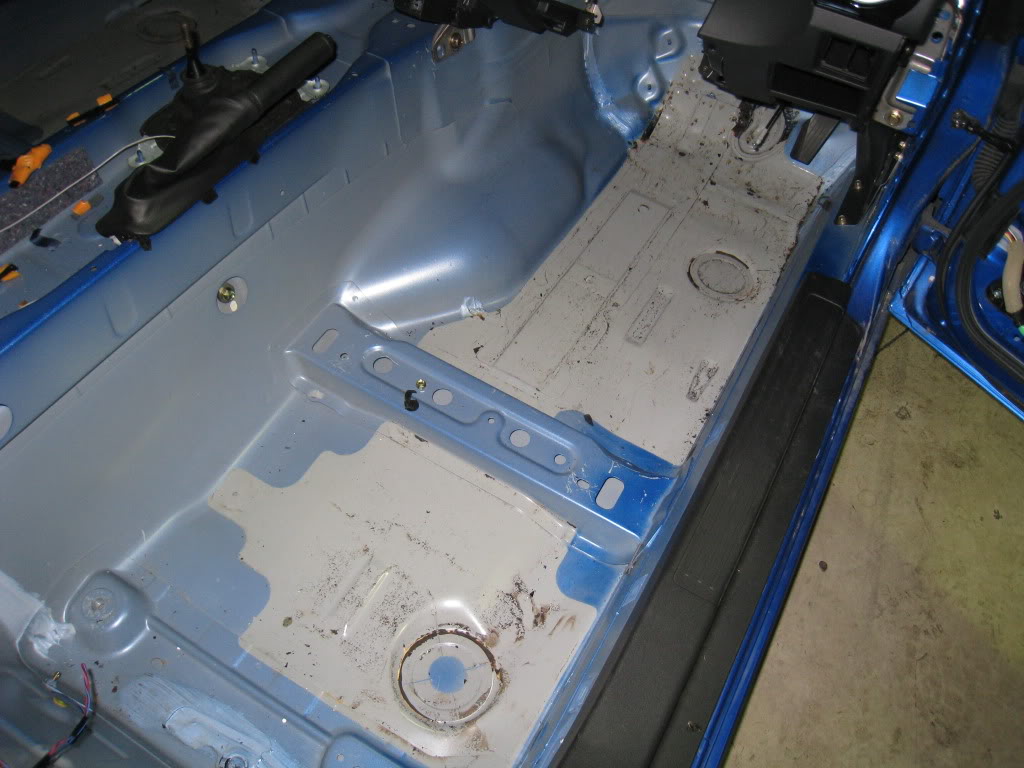
Hopefully the weekend will yield some much needed progress. :D
Cheers,
Danny
The dry ice pellets worked an absolute treat!!! 8) It was pinch of p155 on horizontal surfaces, but as you'd expect, harder on inclined surfaces. You need to allow around 5 mins of contact to freeze the sound deadener and break the adhesion to the floor pan. Then tap and chip away to your hearts content.
Hopefully the weekend will yield some much needed progress. :D
Cheers,
Danny
07-24-2009, 01:41 PM
#140
road warrior

Join Date: Feb 2006
Location: Oakland and Los Angeles, CA
Posts: 1,861
Likes: 0
Received 3 Likes
on
3 Posts
Has anyone told you you're building my dream?
What happened to the oil coolers? And does the NC radiator have enough capacity to adequately cool the car?
What happened to the oil coolers? And does the NC radiator have enough capacity to adequately cool the car?
Last edited by LionZoo; 07-24-2009 at 01:43 PM.
07-25-2009, 06:48 AM
#141
Registered
Thread Starter
Join Date: Mar 2007
Location: Brisbane
Posts: 212
Likes: 0
Received 0 Likes
on
0 Posts
This is my dream as well!

The NC doesn't have an oil cooler and I'm not using the standard NC radiator...but it would be up to the task of cooling a standard 13B MSP. I'll be doing a custom arrangement of radiator, oil cooler(s) and intercooler.
Cheers,
Danny
07-25-2009, 06:51 AM
#142
Registered
Thread Starter
Join Date: Mar 2007
Location: Brisbane
Posts: 212
Likes: 0
Received 0 Likes
on
0 Posts
Well today was quite successful. I was able to check a few bits and pieces and got a good start on the rollcage.
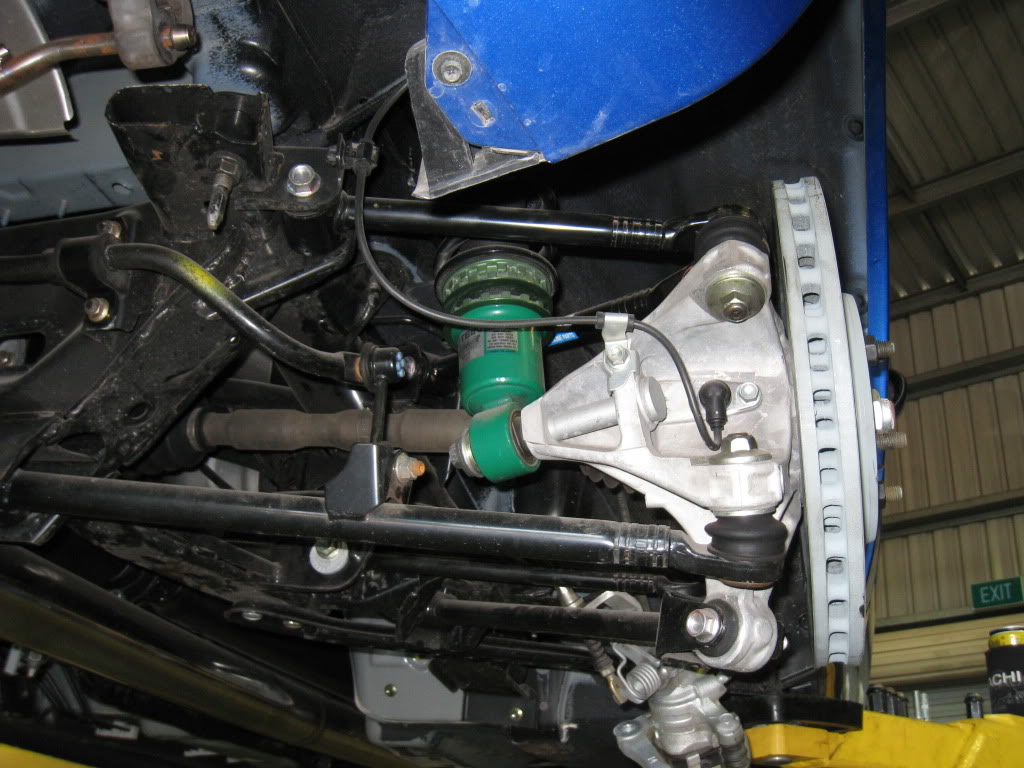
First job of the day was to see if converting the rear brakes to 4-piston Brembo was doable. Some initial cross-referencing of brake rotor key dimensions highlighted that the brake rotors I've used on the front may well fit the rear.
It's quite a beefy upright that Mazda use on the multi-link rear end!
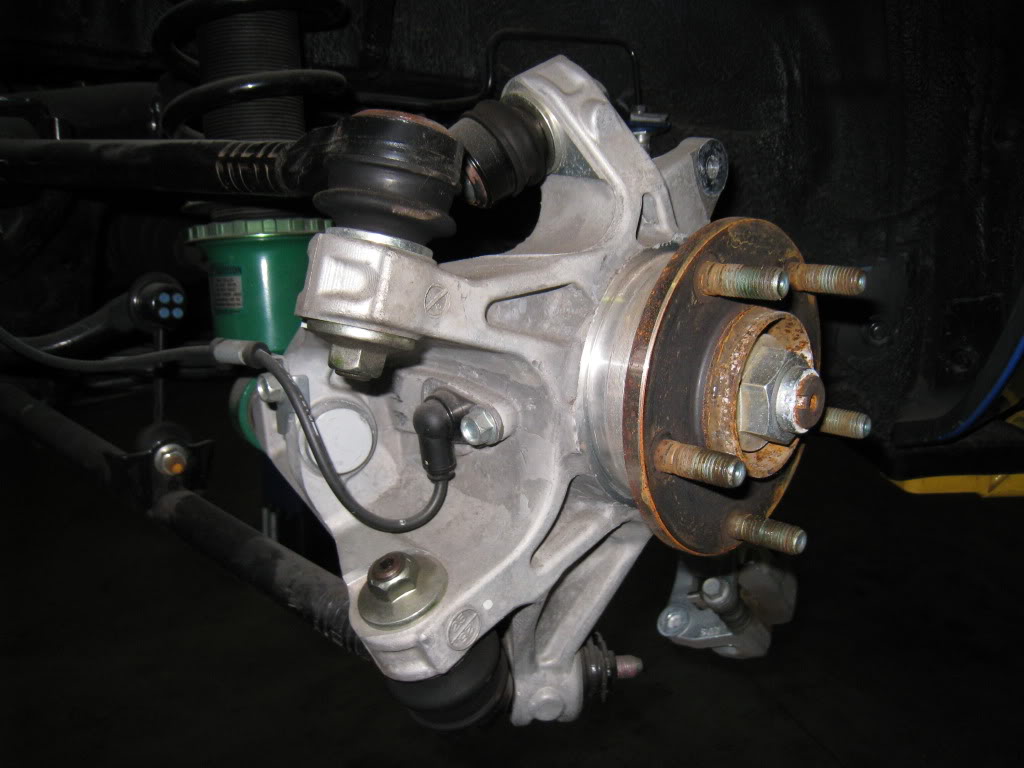
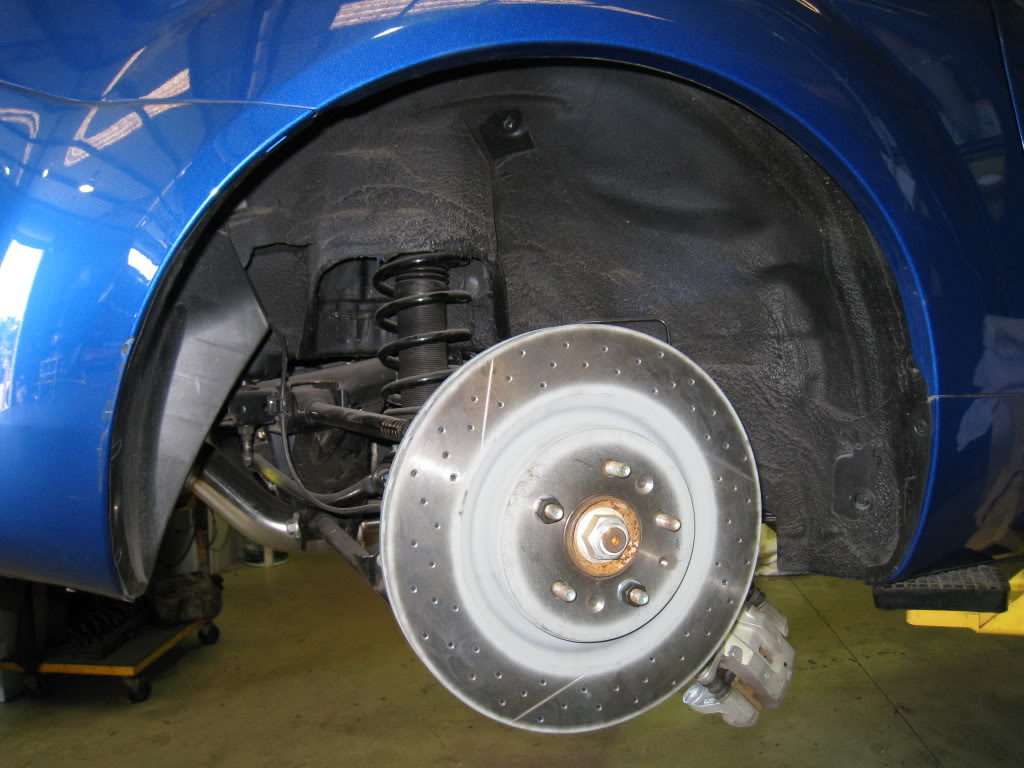
....and the rotor fits perfectly.

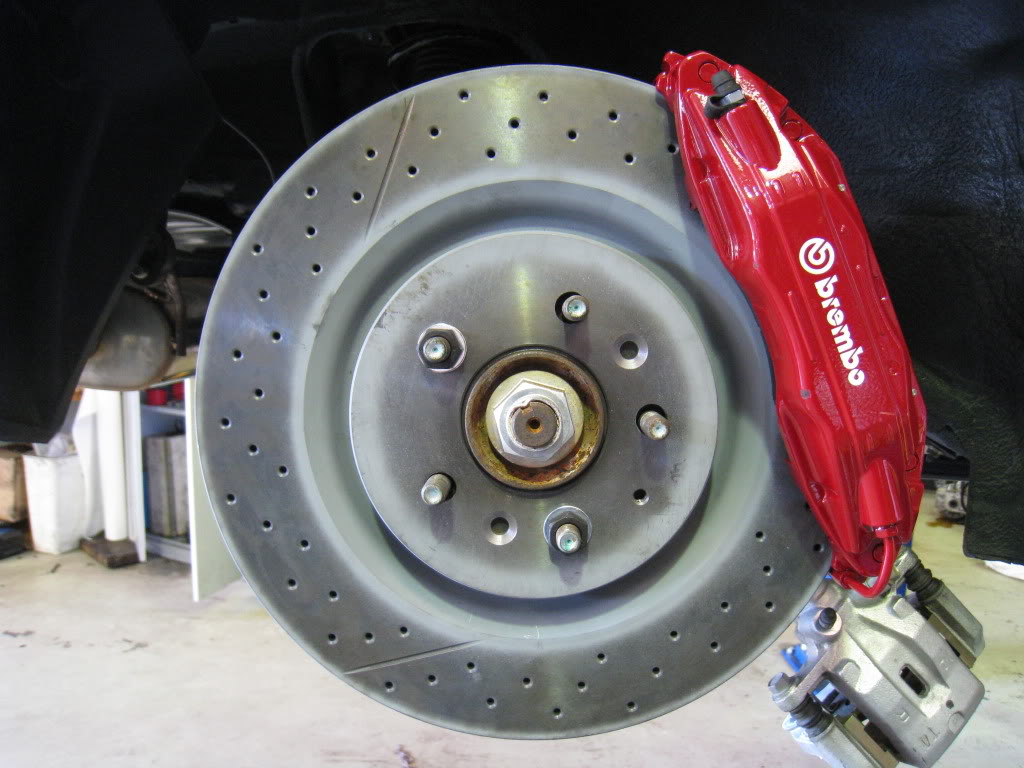
Next was to see how the 4-piston Brembo interacts with the upright. It appears that the caliper bracket will just be a suitably sized rectangular block of T6061 with 4 tapped holes.
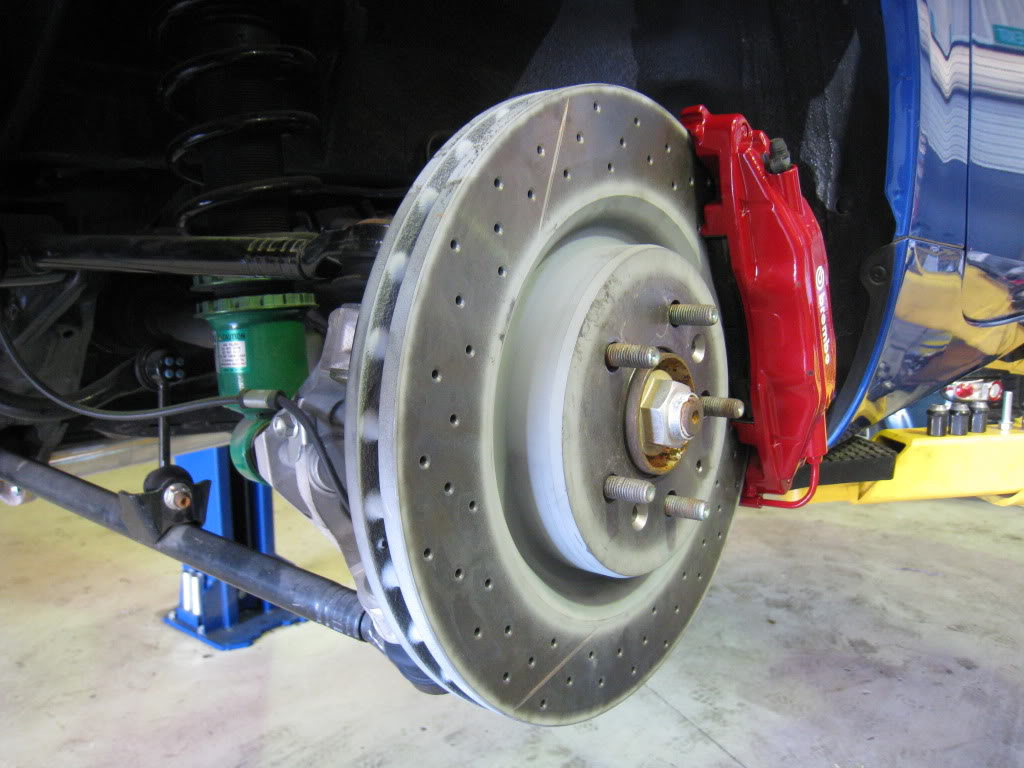
The final check was the clearance between the caliper and the RPF1 wheel. Clearance was on par with what I've got on the front.
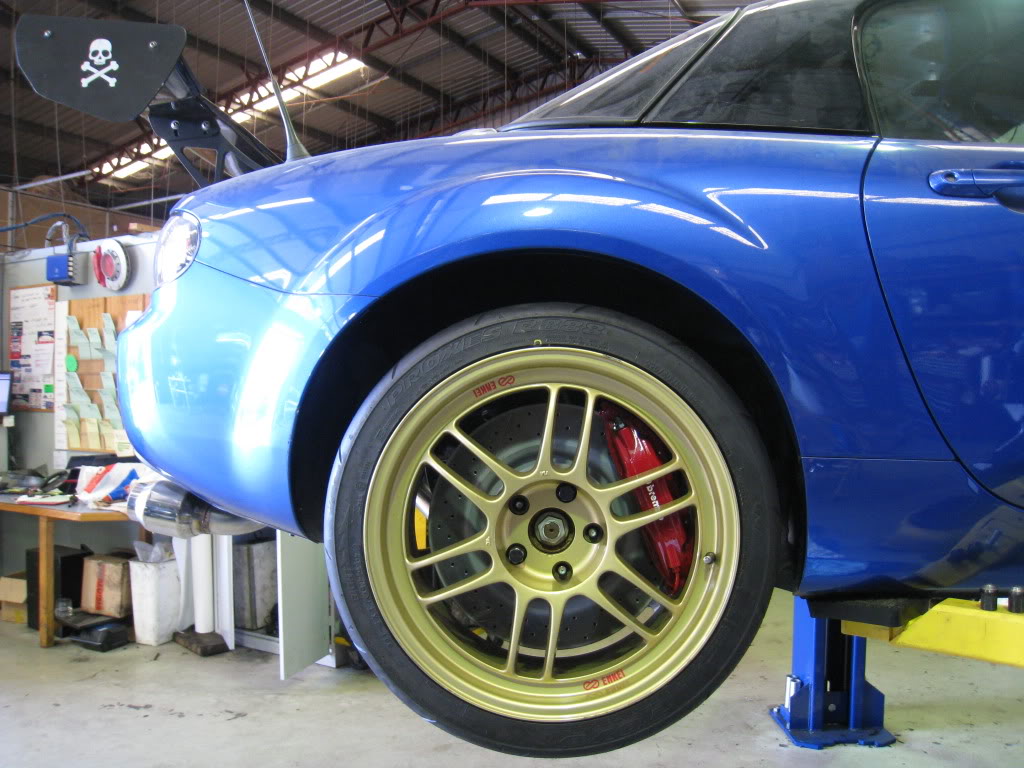
At this stage upgrading the rear brakes isn't a high priority as I will need to sort out a hydraulic handbrake arrangement to work with it. We'll see what happens over the next few months.
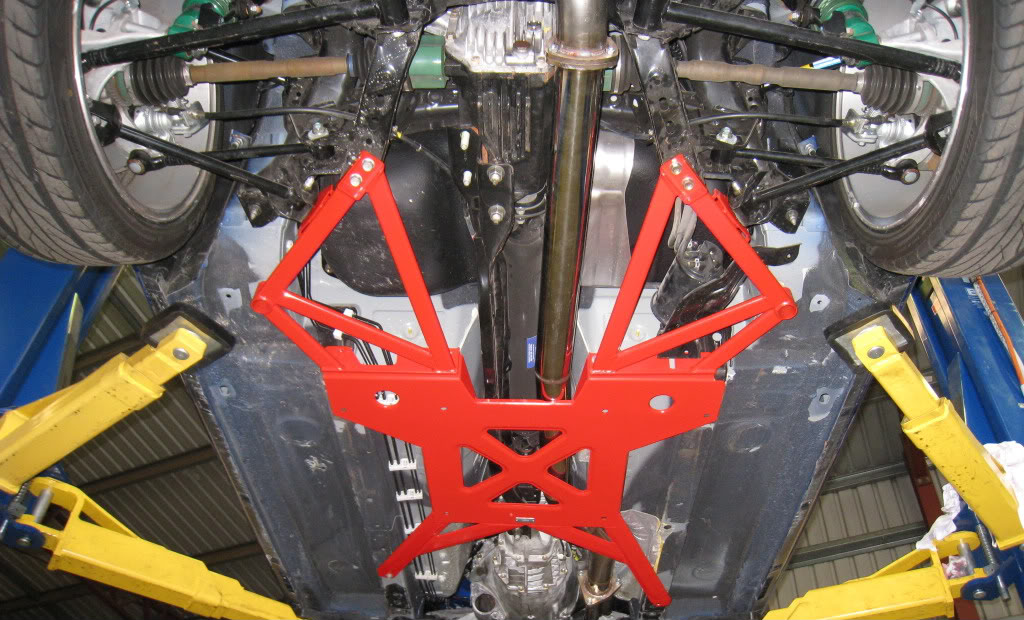
Next on the list was to also trial fit an Autoexe chassis bracing kit for the NC. I won't be using it on this car as my intention is to flat sheet the underbody, however I wanted to look at what they did and why. If my exhaust and PPF wasn't sooo big it would've fitted much better. Looks pretty cool too! ...it would want to, IIRC it retails for over $1,500!
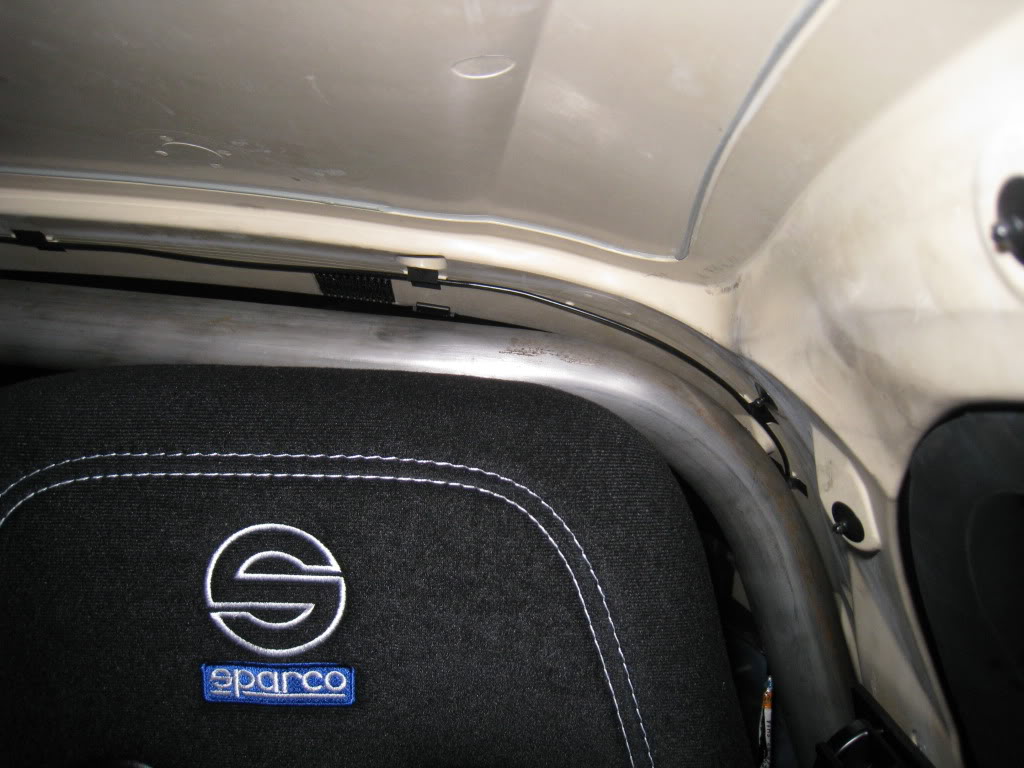
Last an most important part of the day was to get the roll cage underway. After a couple of main hoop variations...mainly in width between the vertical legs...I finally got the geometry right. The key was to have the main hoop fit as close to the inside of the hard top, but still have enough clearance to allow the hardtop to slide rearward for the rear brackets to disconnect from the frankstein bolts.
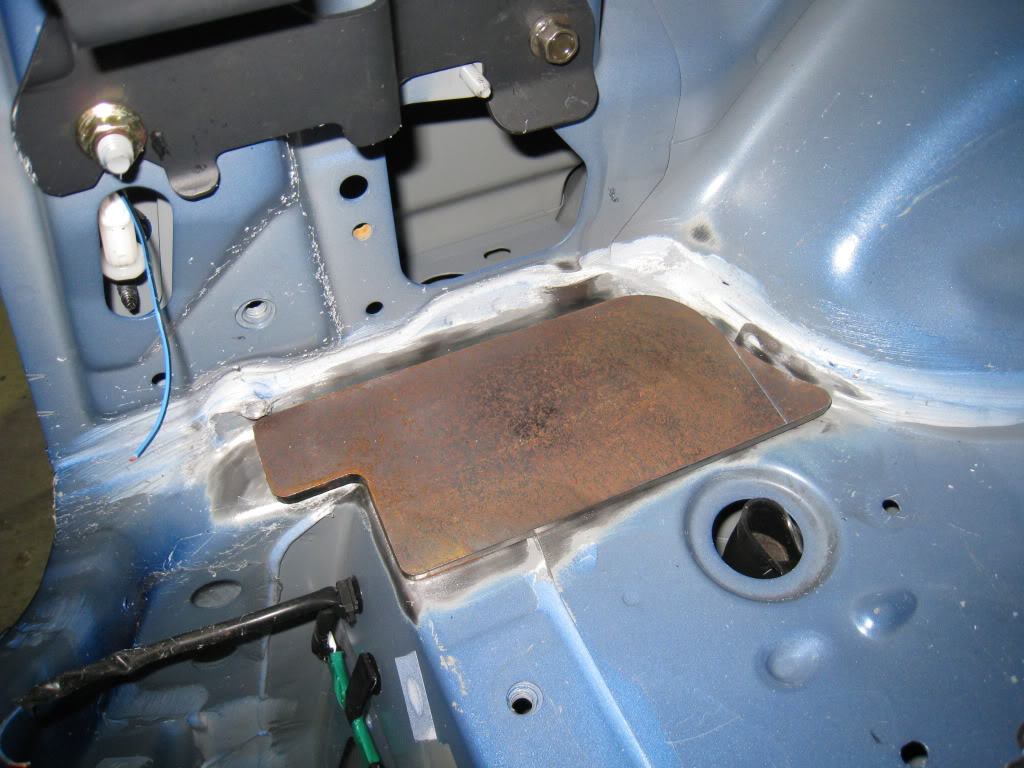
RH main hoop foot plate ready for welding out.
LH rear leg foot plate ready for welding out.
The RH main hoop foot plate welded out and the main hoop tacked in place.
RH rear leg fott plate stitched in place. It will be fully welded out after the Tien Flex's are removed.
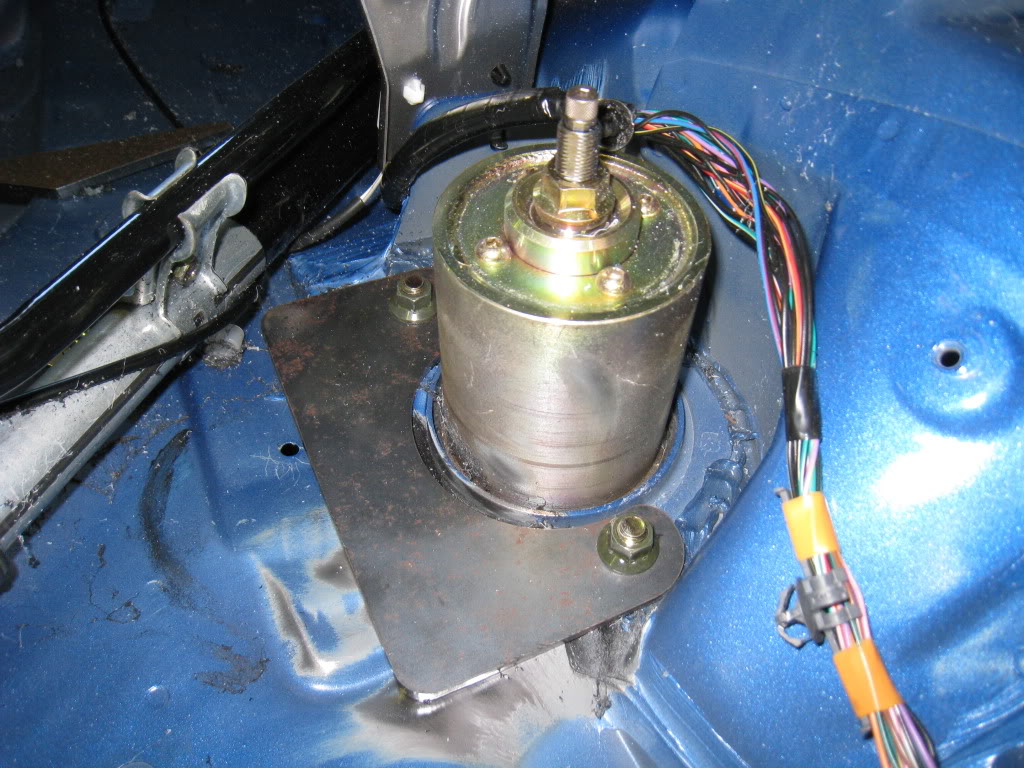
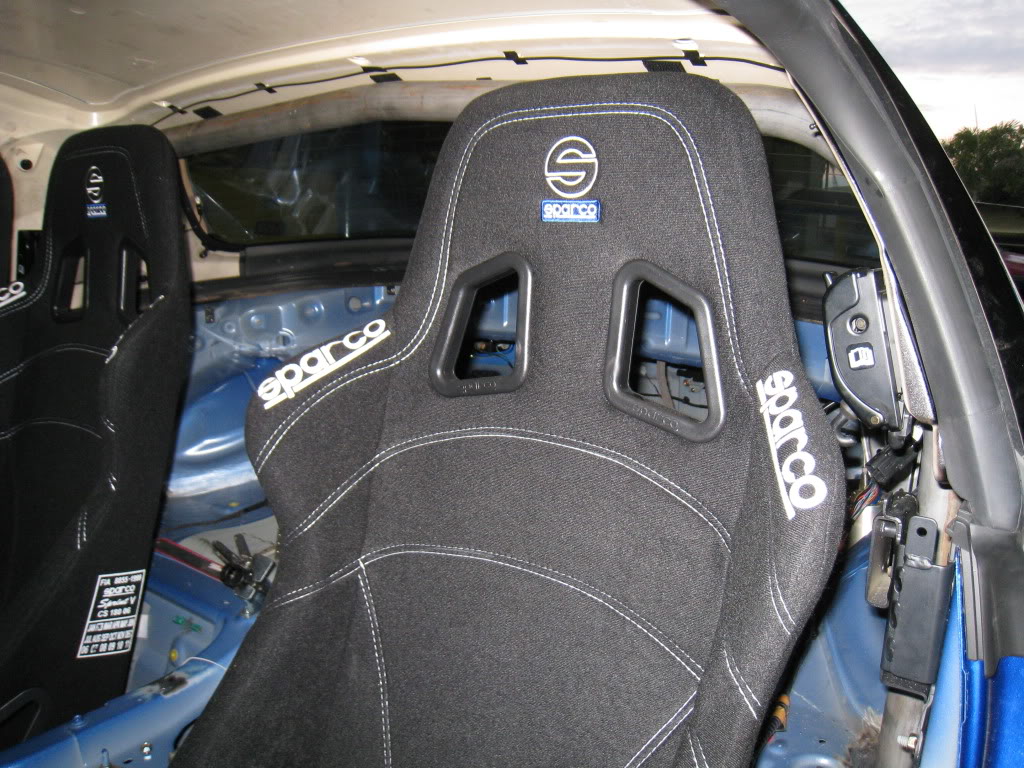
Main hoop tacked in position. The seats are in their rearmost positions.
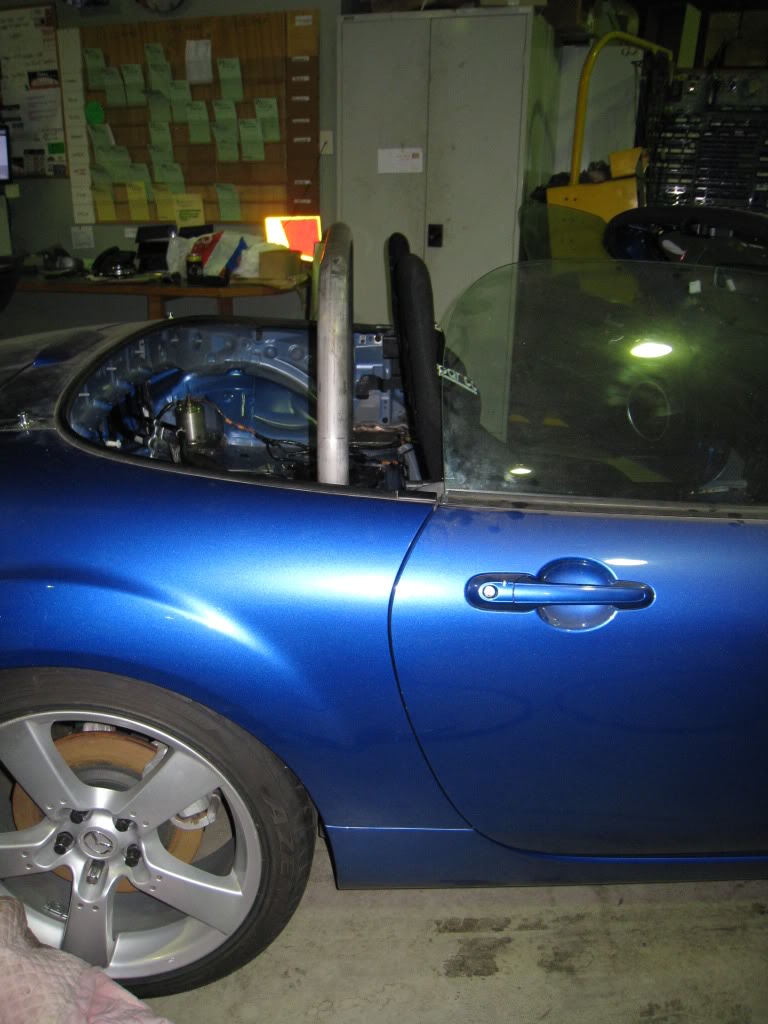
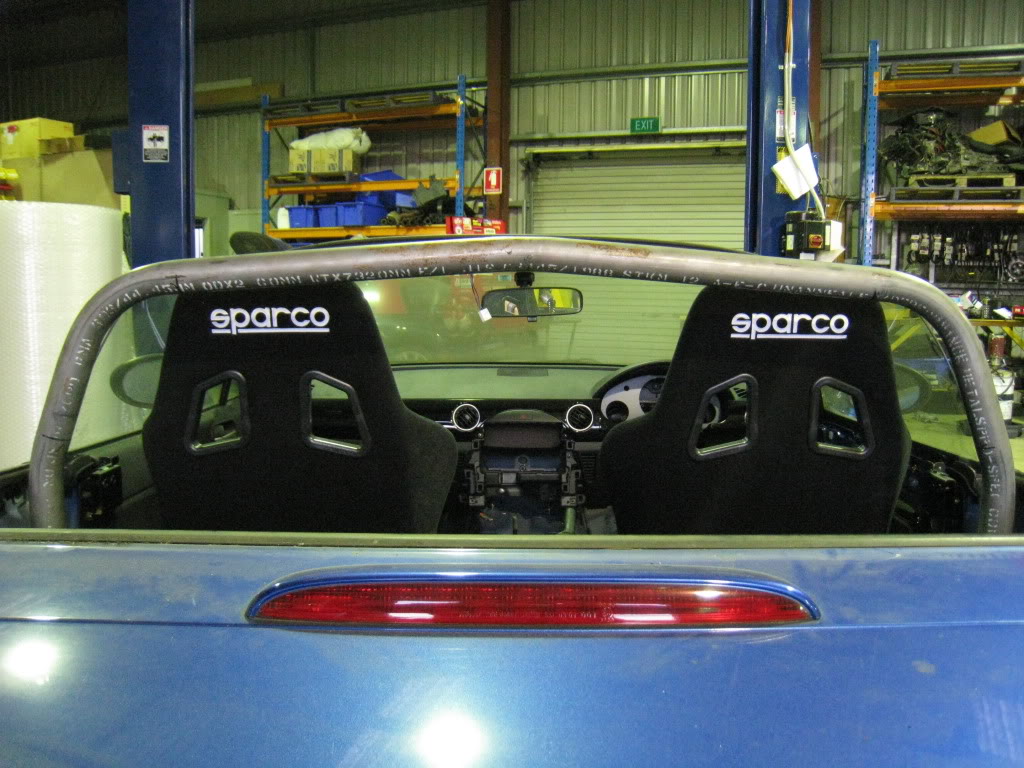
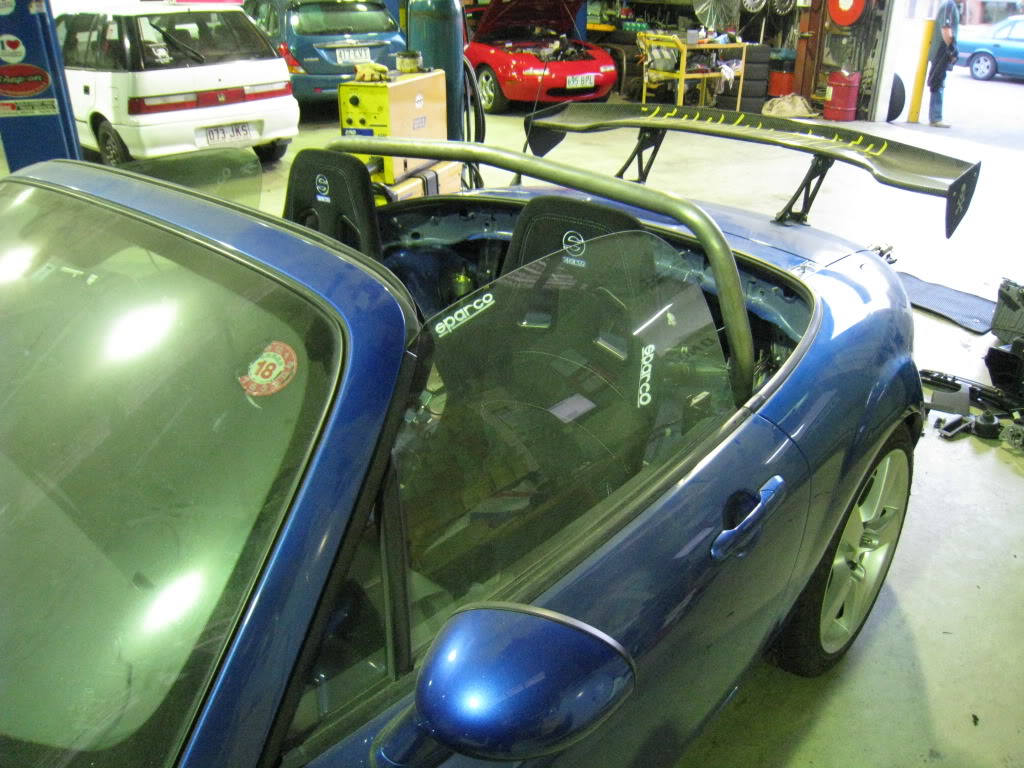
....and with the hard top on.
Hopefully tomorrow goes as well as today. Now that the main hoop is in its final positon, I can adjust the key dimensions in the solidworks model and have all the straight members required in the main hoop and rear sections laser cut over the next week or so.
Cheers,
Danny
First job of the day was to see if converting the rear brakes to 4-piston Brembo was doable. Some initial cross-referencing of brake rotor key dimensions highlighted that the brake rotors I've used on the front may well fit the rear.
It's quite a beefy upright that Mazda use on the multi-link rear end!
....and the rotor fits perfectly.
Next was to see how the 4-piston Brembo interacts with the upright. It appears that the caliper bracket will just be a suitably sized rectangular block of T6061 with 4 tapped holes.
The final check was the clearance between the caliper and the RPF1 wheel. Clearance was on par with what I've got on the front.
At this stage upgrading the rear brakes isn't a high priority as I will need to sort out a hydraulic handbrake arrangement to work with it. We'll see what happens over the next few months.
Next on the list was to also trial fit an Autoexe chassis bracing kit for the NC. I won't be using it on this car as my intention is to flat sheet the underbody, however I wanted to look at what they did and why. If my exhaust and PPF wasn't sooo big it would've fitted much better. Looks pretty cool too! ...it would want to, IIRC it retails for over $1,500!
Last an most important part of the day was to get the roll cage underway. After a couple of main hoop variations...mainly in width between the vertical legs...I finally got the geometry right. The key was to have the main hoop fit as close to the inside of the hard top, but still have enough clearance to allow the hardtop to slide rearward for the rear brackets to disconnect from the frankstein bolts.
RH main hoop foot plate ready for welding out.
LH rear leg foot plate ready for welding out.
The RH main hoop foot plate welded out and the main hoop tacked in place.
RH rear leg fott plate stitched in place. It will be fully welded out after the Tien Flex's are removed.
Main hoop tacked in position. The seats are in their rearmost positions.
....and with the hard top on.
Hopefully tomorrow goes as well as today. Now that the main hoop is in its final positon, I can adjust the key dimensions in the solidworks model and have all the straight members required in the main hoop and rear sections laser cut over the next week or so.
Cheers,
Danny
07-26-2009, 12:44 AM
#143
road warrior
Join Date: Feb 2006
Location: Oakland and Los Angeles, CA
Posts: 1,861
Likes: 0
Received 3 Likes
on
3 Posts
Since I'm hoping to do this build in a few years, I'm wondering if maybe sometime I can pick your brain. This is close to the exact setup I want, except a bit more extreme. The difference is I'm looking more for mine to be a street car. The main issue is I love small lightweight sports cars, but I hate that the Miata is a convertible. Therefore I'm looking to cage it so that it'll have body rigidity close to that of a closed coupe and integrate the cage into the interior as cleanly as possible, ala Ruf. This will probably require the cage to be tied into the windshield header. And then of course I'll be looking to drop a rotary into it, but this is all a few years down the line. Though if I loes my sanity, I might try to make it a coupe first and then do the rotary project when I have more disposable money in my bank account...
07-26-2009, 05:20 AM
#144
Registered
Thread Starter
Join Date: Mar 2007
Location: Brisbane
Posts: 212
Likes: 0
Received 0 Likes
on
0 Posts
Since I'm hoping to do this build in a few years, I'm wondering if maybe sometime I can pick your brain. This is close to the exact setup I want, except a bit more extreme. The difference is I'm looking more for mine to be a street car. The main issue is I love small lightweight sports cars, but I hate that the Miata is a convertible. Therefore I'm looking to cage it so that it'll have body rigidity close to that of a closed coupe and integrate the cage into the interior as cleanly as possible, ala Ruf. This will probably require the cage to be tied into the windshield header. And then of course I'll be looking to drop a rotary into it, but this is all a few years down the line. Though if I loes my sanity, I might try to make it a coupe first and then do the rotary project when I have more disposable money in my bank account...
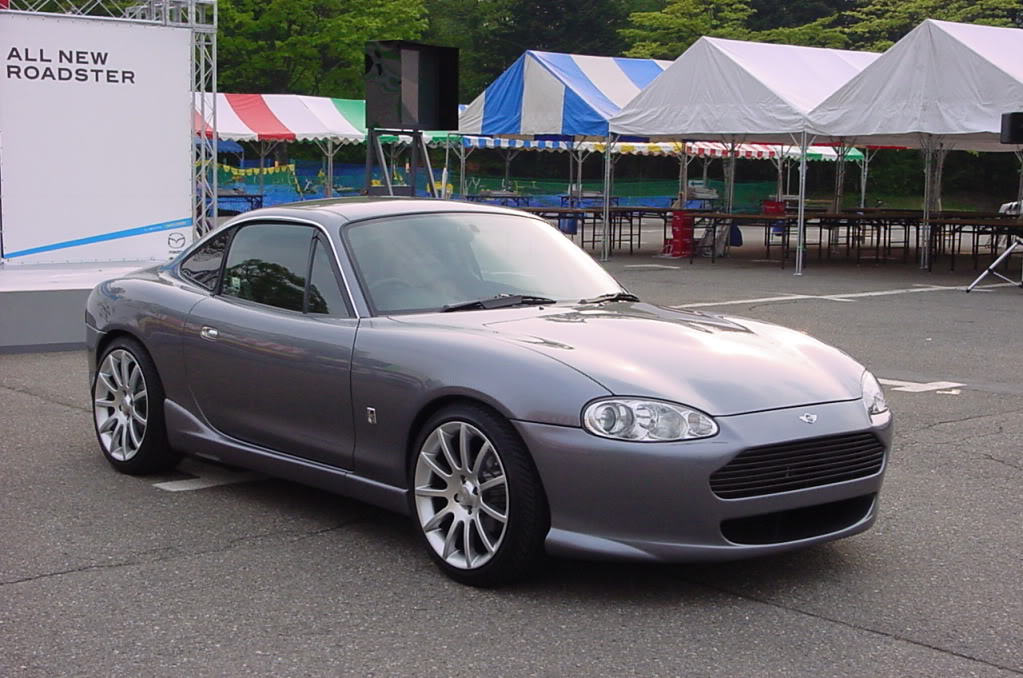
The problem was that the only thing it could offer over the NC was the integral hardtop design. So I dropped that idea.
All the best with your project once you get your recipe sorted.
Cheers,
Danny
07-26-2009, 05:54 AM
#145
Registered
Thread Starter
Join Date: Mar 2007
Location: Brisbane
Posts: 212
Likes: 0
Received 0 Likes
on
0 Posts
Not a lot pretty pictures today. It was really a day of sorting out the way forward with the roll cage. Dimensionally every looks fine with the structure from the main hoop rearward. So I hope to have all the materials for it with in a couple of weeks. I got in and etch primed the welding that was done yesterday to keep that nasty surface rust at bay whilst the rest of the cage comes together. Here are some pics with the seats removed.

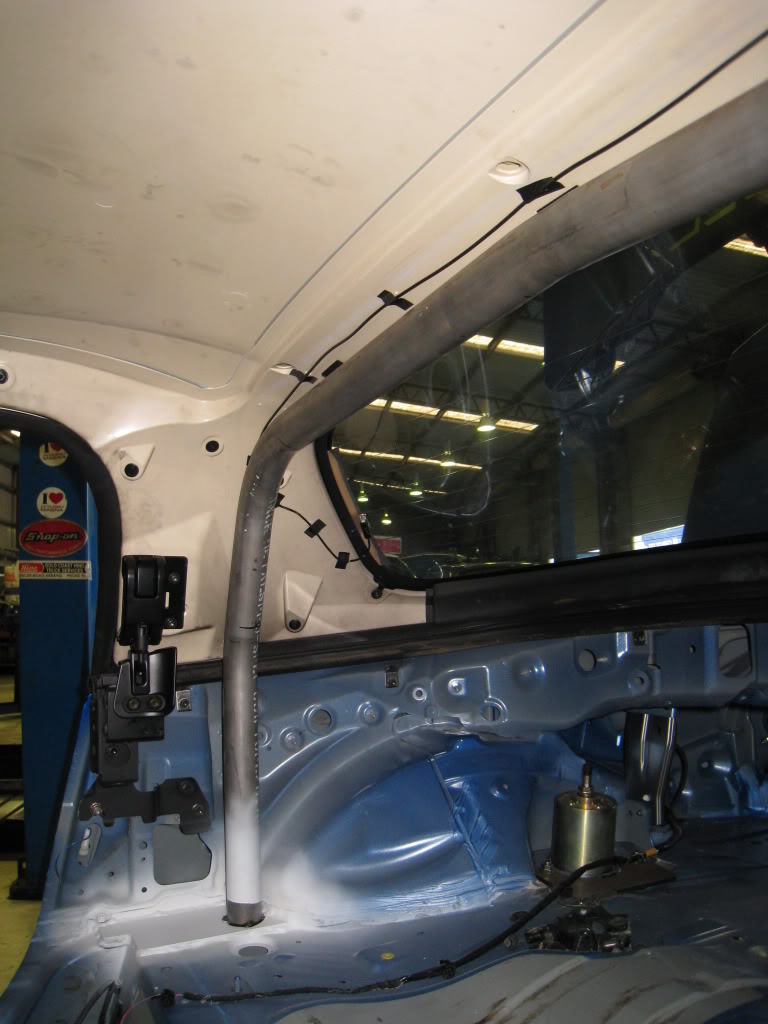
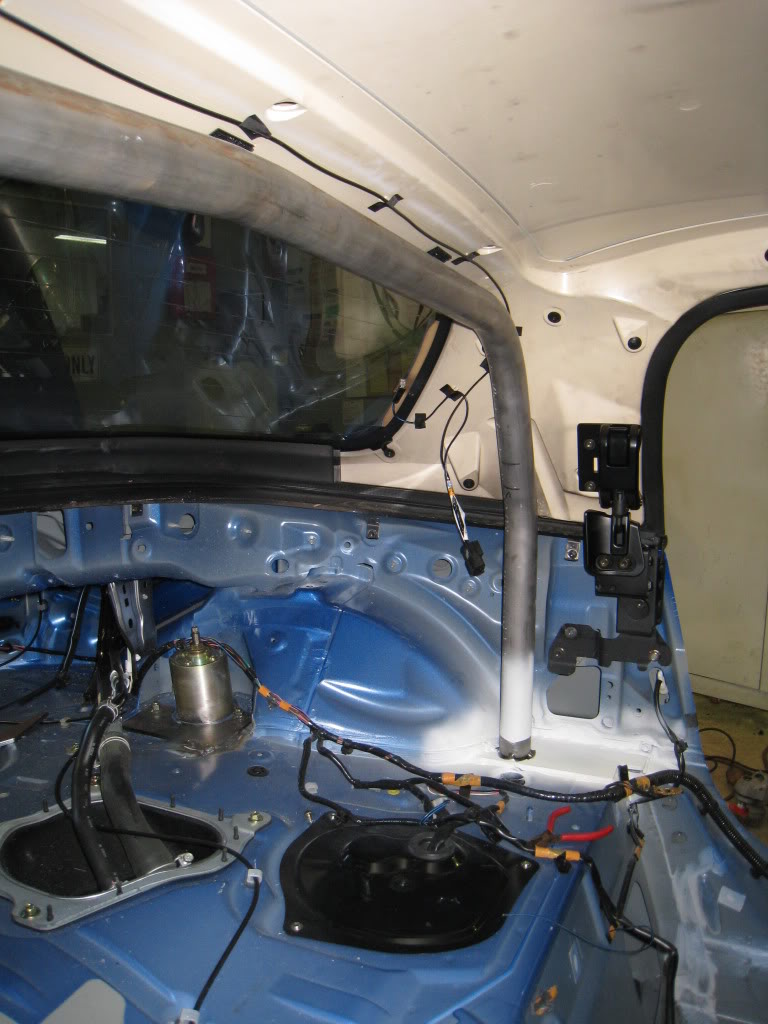
I spent some time working through details for the front legs and then removed the dash once again.

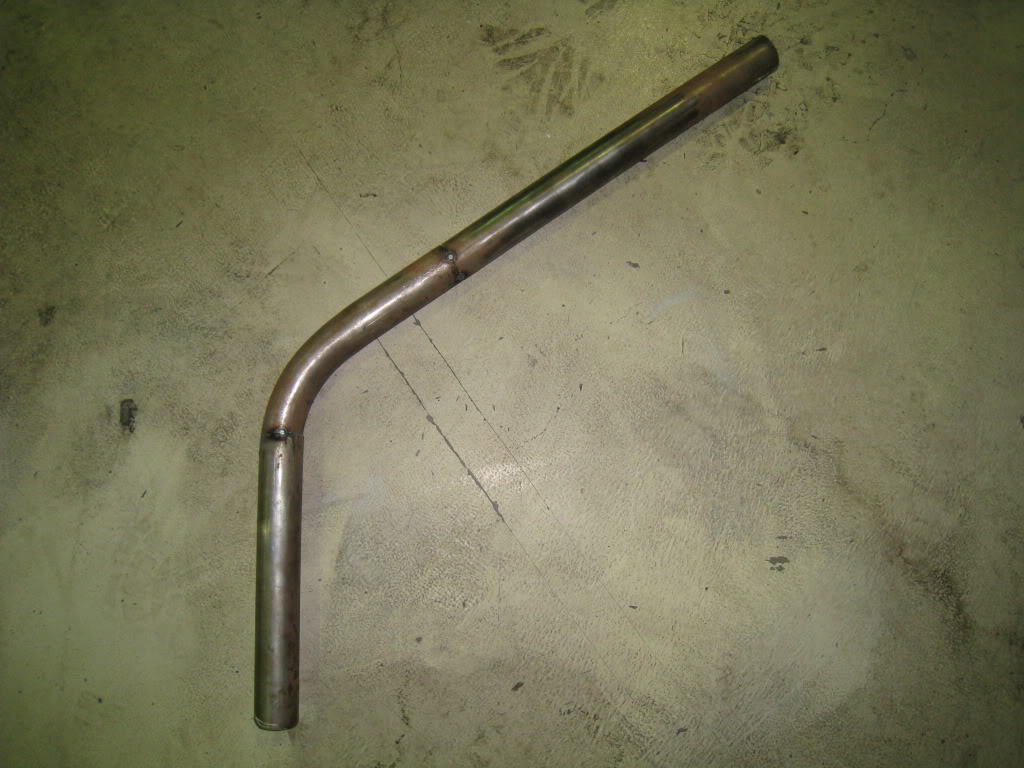
Due to the complexity of the bends that are required for the front legs to be continuous I'm knocking up a prototype member from a whole lot of part pieces. This is as far as I got on the right front leg. Once I'm happy with the prototype I'll have it made in one continuous piece.
Cheers,
Danny
I spent some time working through details for the front legs and then removed the dash once again.
Due to the complexity of the bends that are required for the front legs to be continuous I'm knocking up a prototype member from a whole lot of part pieces. This is as far as I got on the right front leg. Once I'm happy with the prototype I'll have it made in one continuous piece.
Cheers,
Danny
07-26-2009, 03:23 PM
#146
road warrior
Join Date: Feb 2006
Location: Oakland and Los Angeles, CA
Posts: 1,861
Likes: 0
Received 3 Likes
on
3 Posts
I too prefer a hardtop coupe. Prior to deciding on using the NC chassis I was going to source an NB Roadster Coupe.

The problem was that the only thing it could offer over the NC was the integral hardtop design. So I dropped that idea.
All the best with your project once you get your recipe sorted.
Cheers,
Danny
The problem was that the only thing it could offer over the NC was the integral hardtop design. So I dropped that idea.
All the best with your project once you get your recipe sorted.
Cheers,
Danny
I'll be following your build with great interest. It's not the rotary swap that really has me worried at the moment, it's the building of the cage to a degree where it significantly improves rigidity while being positioned in such a way that I won't accidentally kill myself from hitting the members.
07-28-2009, 07:06 AM
#148
Registered
Thread Starter
Join Date: Mar 2007
Location: Brisbane
Posts: 212
Likes: 0
Received 0 Likes
on
0 Posts
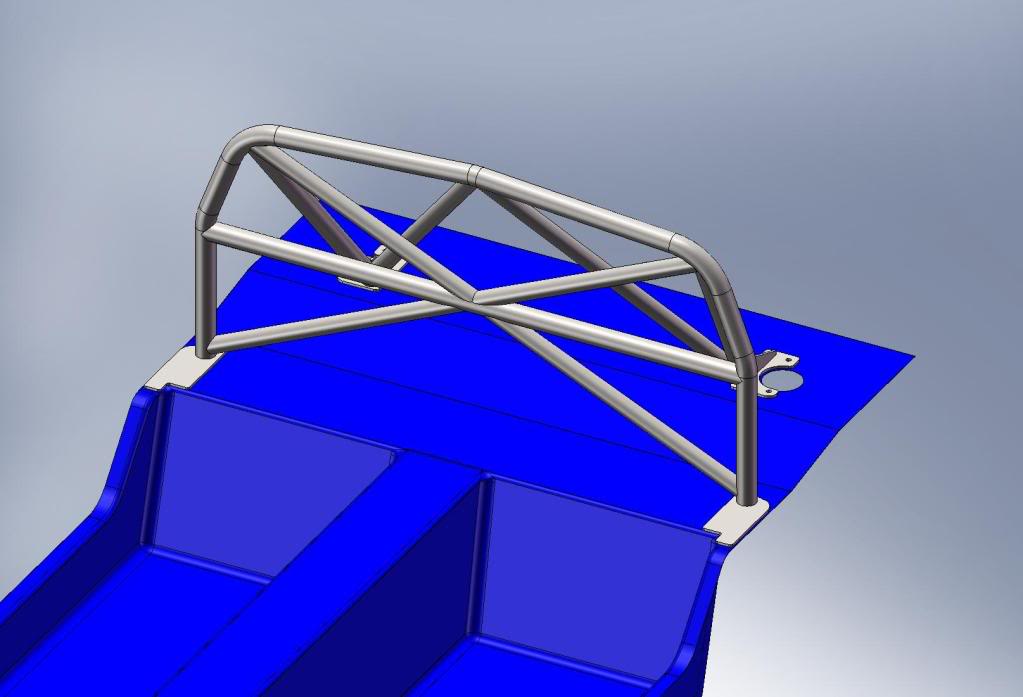
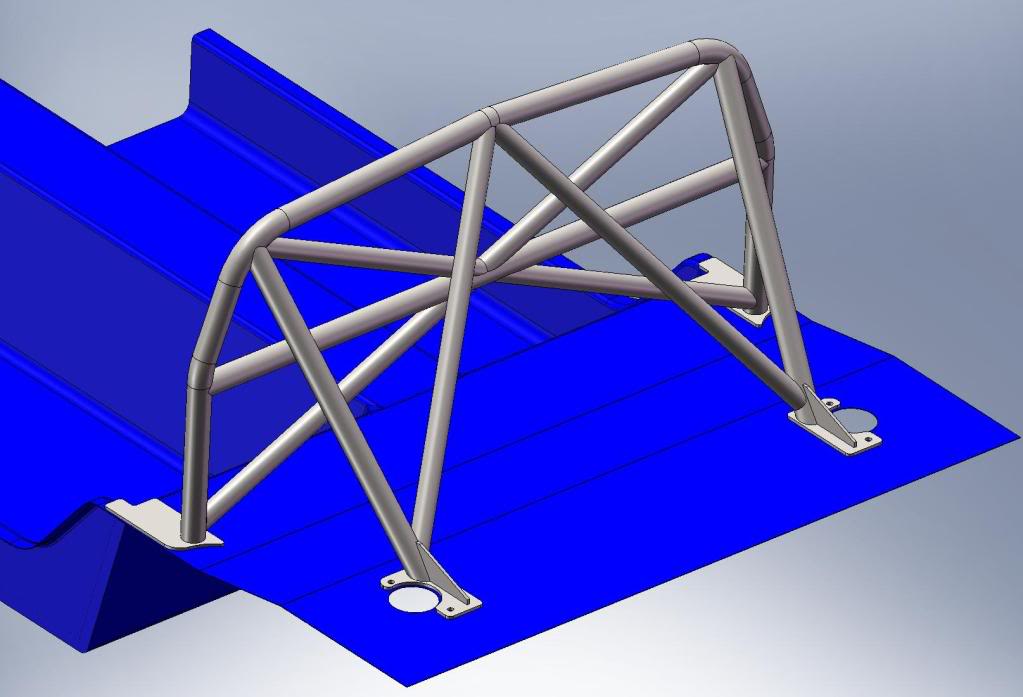
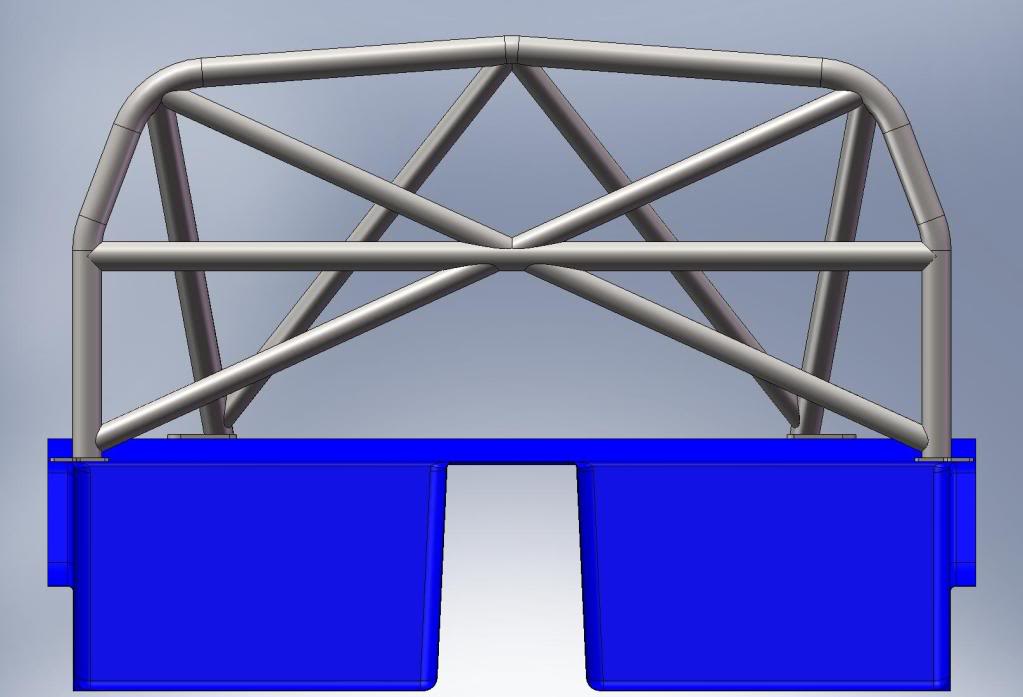
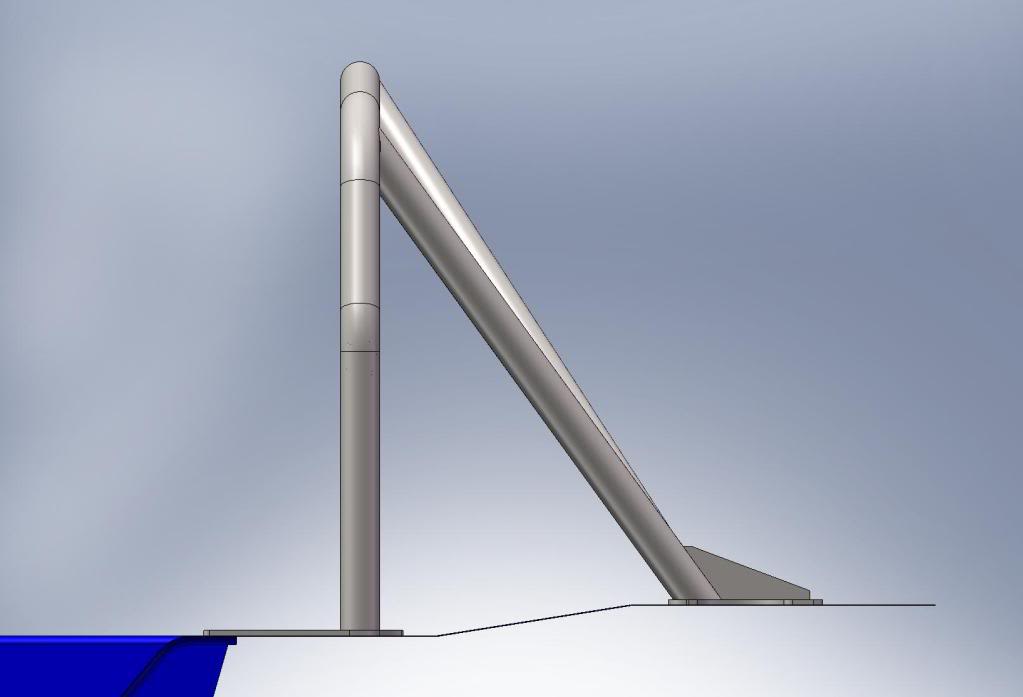
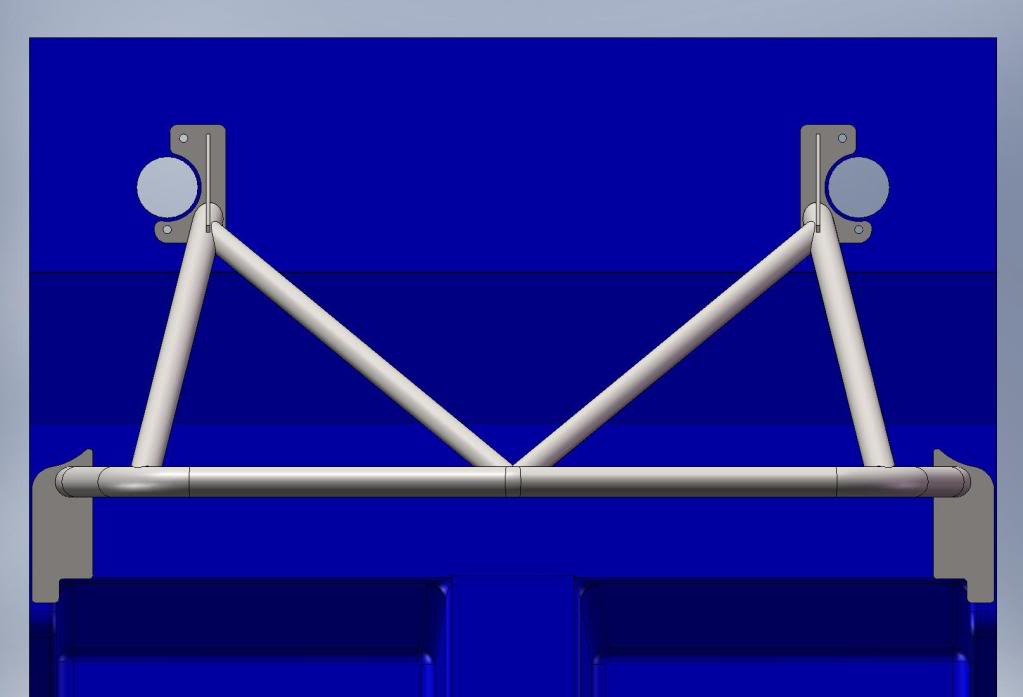
Continuing on from the weekend.....the solid model of the cage has been updated to reflect the "as installed" dimensions of the main hoop and rear foot plates. Roll bar materials have been ordered and should be with the laser cutter tomorrow. The IGES files for each of the members will be e-mailed tomorrow as well. Here's hoping I have the bits back by the end of next week.
Cheers,
Danny
Cheers,
Danny
07-28-2009, 04:37 PM
#150
Registered
Thread Starter
Join Date: Mar 2007
Location: Brisbane
Posts: 212
Likes: 0
Received 0 Likes
on
0 Posts
I'm definitely doing a full cage. I should have clarified....the above is the section of cage that I have dimensionally confirmed for manufacture. Once the main hoop and rear section is complete I'll move forward and complete the front legs and associated members. There is no way I'd be building a car like this without a comprehensive cage design.
Cheers,
Danny
Cheers,
Danny