OEM Ignition Coil install this weekend
#52
Ignition coil removal
So for everyone that missed it here it is:
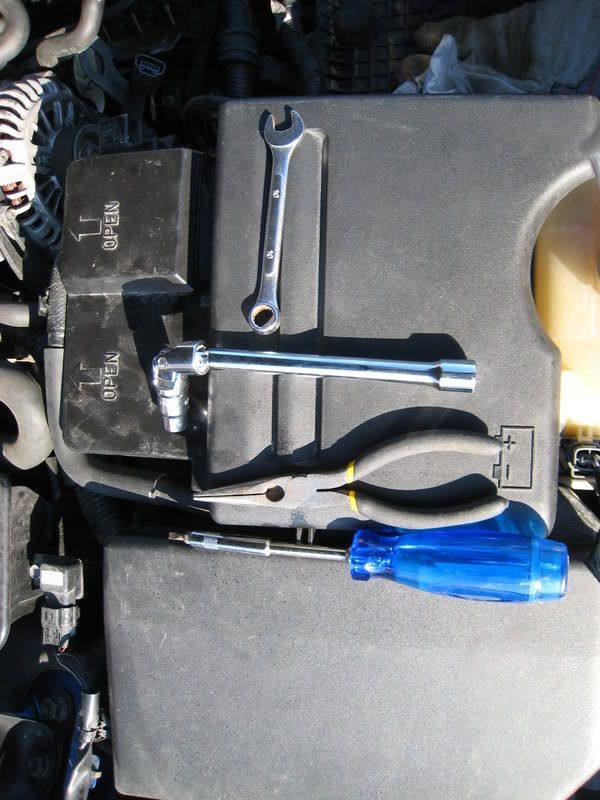
The 4 tools needed. The bendable elbow socket attachment work perfectly. Not one banged up hand I sprayed WD40 on all the nuts last night. Don't forget to disconnect the battery.
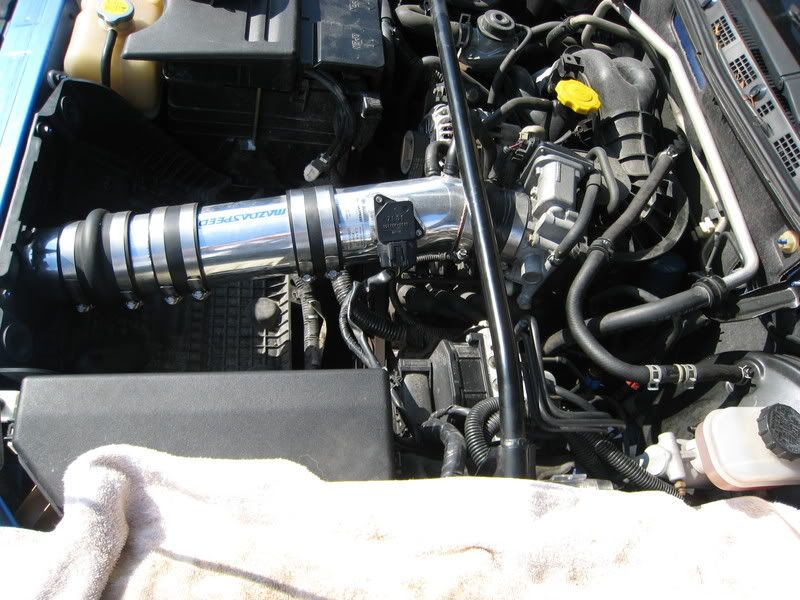
MS CAI I decided to remove it. It could be done without removing it, but wanted more room to work and easy enough.
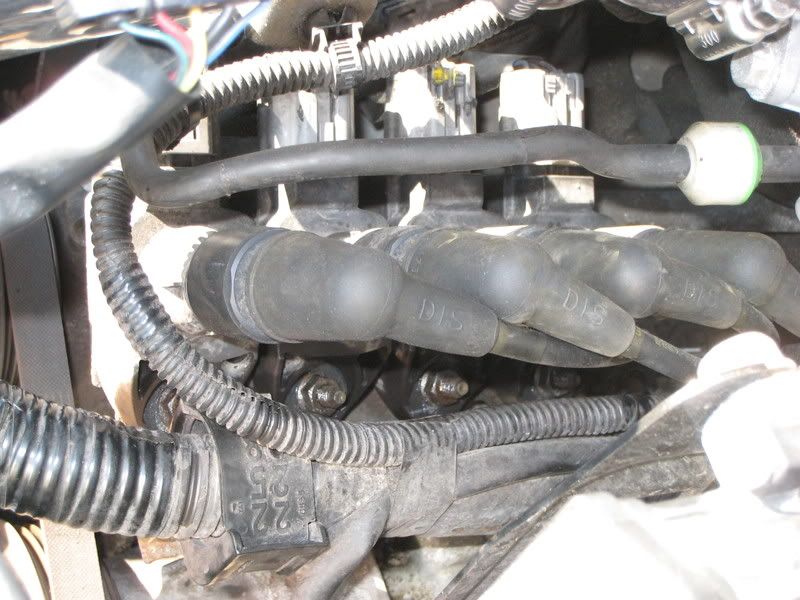
The ignition coils being removed, still with the plugs and wiring attached.
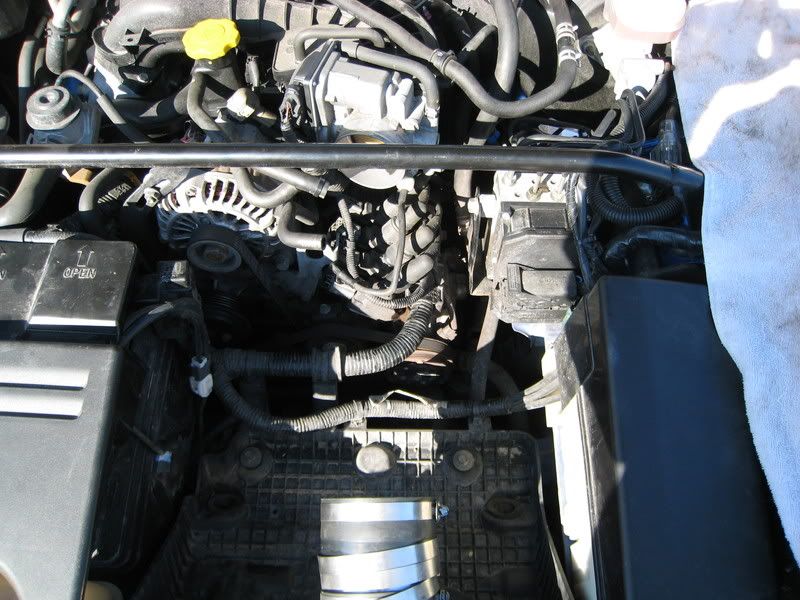
CAI removed.
This nut was a bit of a problem, as you can see with the main lead wire right next to it not much room to work. That plastic strap holding it comes off I'm sure but didn't want to screw around with it. A 10mm closed ended wrench fits in there with a little work.
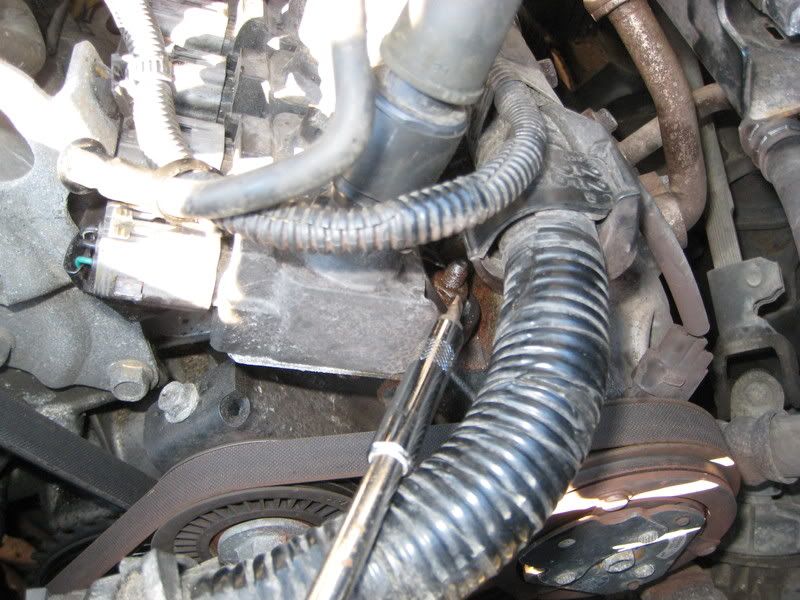
Also unclipped this wire since it is in the way of one of the wiring harnesses and the rest of the wire gets in the way. Use needle nose pliers to pinch the back side and pull out.
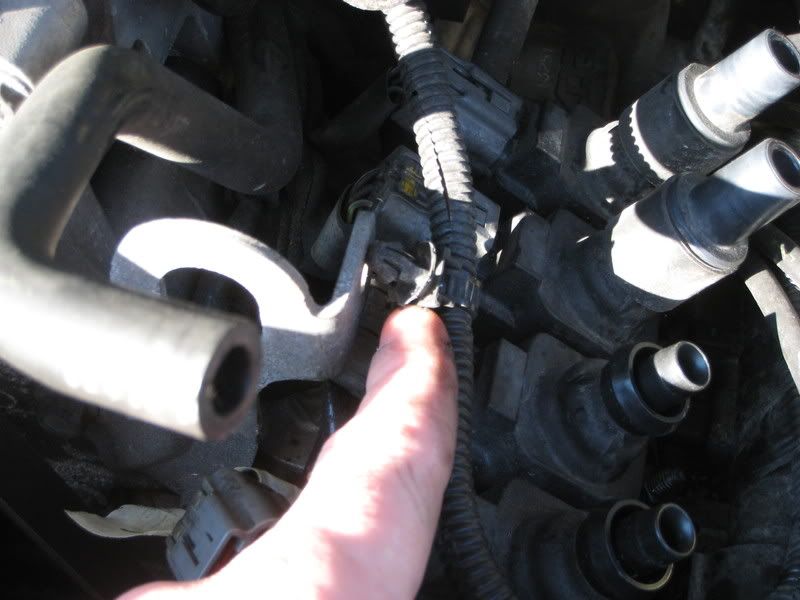
Now just pull the plugs off and wiring harnesses. I labeled them with tape, but make sure they are labeled so they go back together the right way. TIP Yesterday I was having trouble getting the plugs off the coils, RotaryGreg and phobi mentioned to just run your finger in and around the rubber part of the plug. Basically the plugs with age, heat, etc...are just seized on. You can kind of hear the plugs peal off the plastic coils and pull. Very easy and you don't even have to pull that hard. Thx RotaryGreg and phobi!!
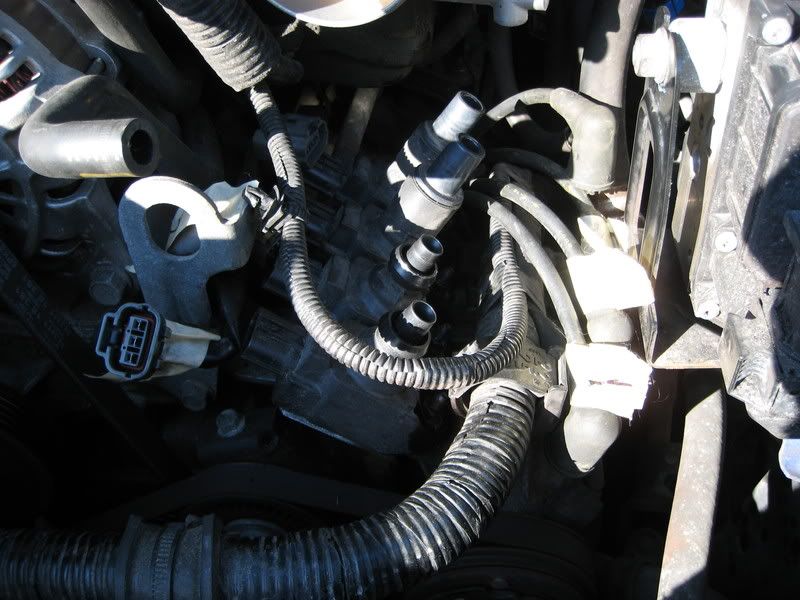
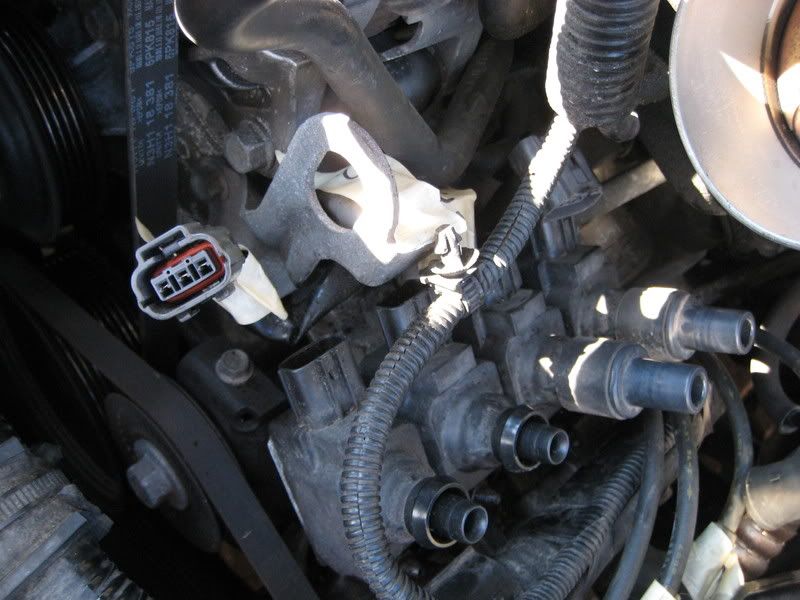
The 4 tools needed. The bendable elbow socket attachment work perfectly. Not one banged up hand
 I sprayed WD40 on all the nuts last night. Don't forget to disconnect the battery.
MS CAI I decided to remove it. It could be done without removing it, but wanted more room to work and easy enough.

The ignition coils being removed, still with the plugs and wiring attached.

CAI removed.

This nut was a bit of a problem, as you can see with the main lead wire right next to it not much room to work. That plastic strap holding it comes off I'm sure but didn't want to screw around with it. A 10mm closed ended wrench fits in there with a little work.

Also unclipped this wire since it is in the way of one of the wiring harnesses and the rest of the wire gets in the way. Use needle nose pliers to pinch the back side and pull out.

Now just pull the plugs off and wiring harnesses. I labeled them with tape, but make sure they are labeled so they go back together the right way. TIP Yesterday I was having trouble getting the plugs off the coils, RotaryGreg and phobi mentioned to just run your finger in and around the rubber part of the plug. Basically the plugs with age, heat, etc...are just seized on. You can kind of hear the plugs peal off the plastic coils and pull. Very easy and you don't even have to pull that hard. Thx RotaryGreg and phobi!!


Last edited by Thumper3322; 11-10-2008 at 06:35 PM.
#53
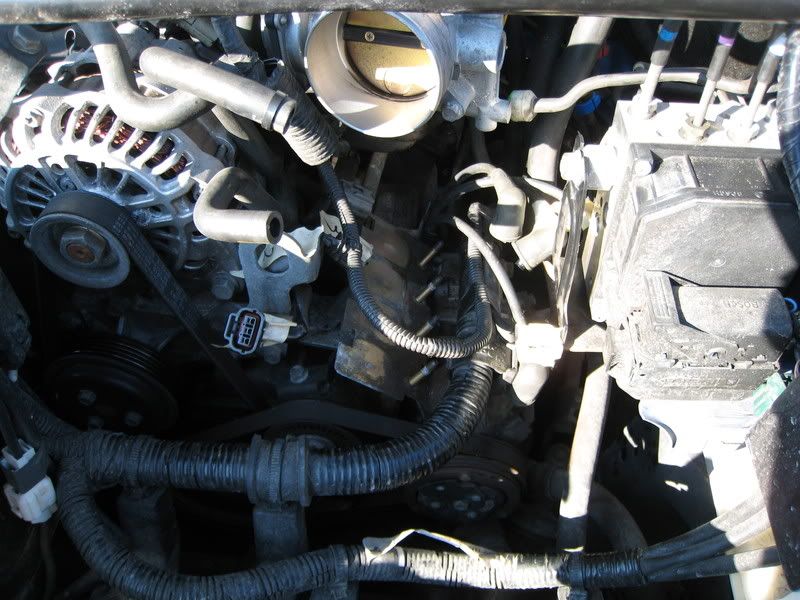
Now that every thing is unplugged, use the 10mm socket, with the elbow and extender, it fits onto the back 3 coils with no problems. Use the closed ended wrench and take off the first one. Be careful not to lose any nuts. And then you have this.
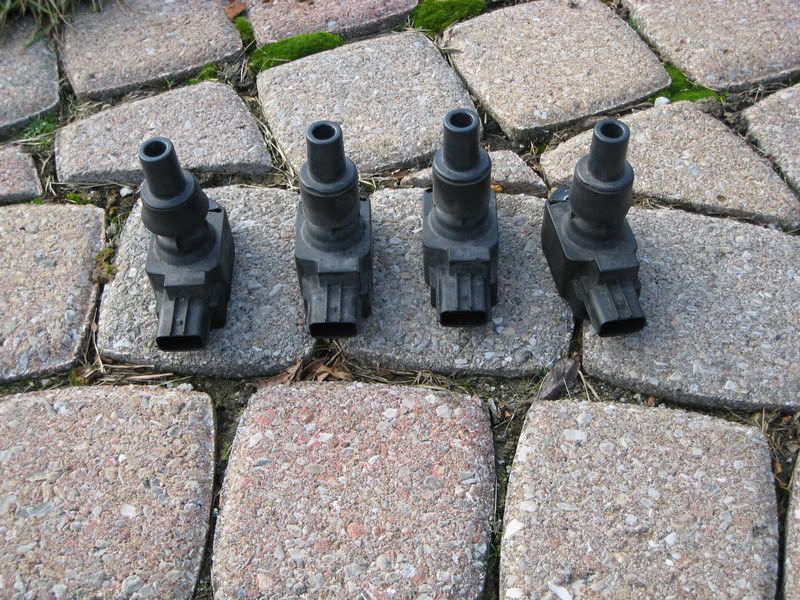
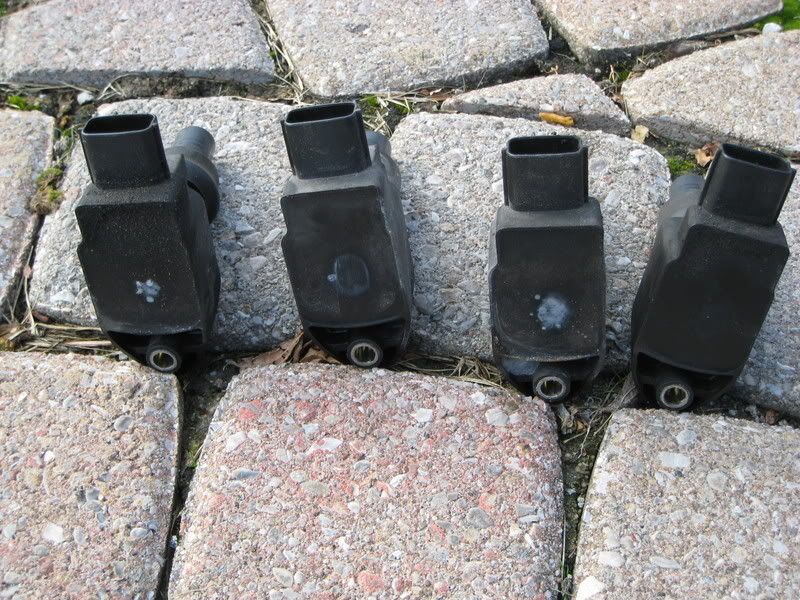
My coils, second picture you can see all them had the white spot on the bottom except one.
Now just need the new ones to put back in.
Cheers!!

My coils, second picture you can see all them had the white spot on the bottom except one.


Now just need the new ones to put back in.
Cheers!!
#55
Thx again for the tip on the plugs, SOOOOO much easier!!
#56
Great write up.
I think even if we were to show up, it would be too many hands. I think 2 people at the most would be able to work on the area at any given time.
So now the waiting game begins.
I think even if we were to show up, it would be too many hands. I think 2 people at the most would be able to work on the area at any given time.
So now the waiting game begins.
#57
Thx man! Yup urg!!! I think lots of ppl will be coming to the BHR install tho, that one could use an extra hand I think.
#59
Got my used OEM coils tonight. Hurray! Installed and she is alive again. But man was she smokey. I'm guess it is from the new CAT?
I let her idle for awhile before I went for drive. Hit the hwy and wot up to 4th redlined the whole way, and got a CEL let off the gas and the CEL went away. Turned around and came back down the hwy wot, no CEL but felt a bit of hesitation in higher rmp. Drove to my bro's house and back, some 1s and 2nd gear wot and all seemed good. Will see how the next few days go, since the computer has to reprogram I guess. The upgrade is gonna be nice!!
I let her idle for awhile before I went for drive. Hit the hwy and wot up to 4th redlined the whole way, and got a CEL
 let off the gas and the CEL went away. Turned around and came back down the hwy wot, no CEL but felt a bit of hesitation in higher rmp. Drove to my bro's house and back, some 1s and 2nd gear wot and all seemed good. Will see how the next few days go, since the computer has to reprogram I guess. The upgrade is gonna be nice!!
#62
ya marc, glad your back on the road. that first time when you had the CEL, was the car completely warmed up? like no doubt about it at operating temp before you went to redline. just wondering. mine was getting sort of finikie lately, if it wasnt 100% at operating temperature when it was cold outside, i would miss when i got on it. if it was really cold it would happen as low as 4500, when it was almost at OT, it could happen as late as 8000rpm. I changed my plugs and damn, what a difference. i can start the car and slam it in gear and go no worries now (i dont make a habbit of that, i just wanted to see if it was really the plugs). i know you said you just recently changed the plugs, but it might be worth changing them now too. after all that missing from the dead coils the plugs are bound to be fouled up pretty bad. Although, if this CEL was a one time thing and it doesnt happen again, then i wouldnt worry about it. if you want to do the plugs, let me know man. im sure i can help you out there.
Greg
also, can you be more specific about the smoke? where was it coming from, smell, colour?
Greg
also, can you be more specific about the smoke? where was it coming from, smell, colour?
#63
Ya once i got her started (and she started right up), I let her idle for I don't know 15 minish, she was at normal operating temp. via the gauge, drove up to the highway and hammered it and got the CEL.
Good to know about the plugs! I was wondering about them myself, after everything my car went thru, it couldn't have been good on them. I feel like I blew $500 bucks on plugs an wires a few months ago now. That would have been the only reason I would have paid Mazda to do the coils for me. What a JOKE can't believe $426 for that job.
Been talking the Charles Hills bout the coil upgrade and he has a great deal on plugs so I might be picking some up anyways. And the upgrade comes with new wires so all is good. Ya, Thx!! I would need help with the plugs for sure, never done them on the 8. Love learning more and more about the 8.\
The smoke, thicker black, stank smoke. No blue or white. Again new CAT so could just be from that? It was much much less when I got home, could only kinda smell it. Will be keeping an eye on that as well.
Last edited by Thumper3322; 11-12-2008 at 10:13 PM.
#64
alot of exhaust parts come shipped with stickers on them that usually dont get removed upon installation. that could be some of what was buring off, unless you mean the smoke was coming out of the end of the exhaust...hmm...
and as for doing the plugs, not hard at all. it took me 10 mins to do on my hoist at work. could be a bit of a pain on your back though, the front leading plug you need to use a wrench for because of the way the motor mount is, so you have to be really sure your on it good or you will round off the edges of the plug and then you wont be getting it off period. the front trailing plug is easy enough if you crank the stearing wheel all the way to the right before you shut the car off, then use a really long extension and go in from the wheel well. both rear plugs are cake and no special tricks needed. although i dont know how easy this would be without a hoist. seems like it would be a huge PITA.
Greg
#65
I should correct my other post, wasn't too black, more grayish, but more than normal. Seemed much better this morning. Car started much faster as well.
10min eh lol...and they charge an arm and a leg for that as well. I figured as much, taking off the wheel and the inner liner to get at them. Always wondered, do you have to space the plugs? I think that only goes for two plugs, or do they always come spaced properly.
10min eh lol...and they charge an arm and a leg for that as well. I figured as much, taking off the wheel and the inner liner to get at them. Always wondered, do you have to space the plugs? I think that only goes for two plugs, or do they always come spaced properly.
#66
I should correct my other post, wasn't too black, more grayish, but more than normal. Seemed much better this morning. Car started much faster as well.
10min eh lol...and they charge an arm and a leg for that as well. I figured as much, taking off the wheel and the inner liner to get at them. Always wondered, do you have to space the plugs? I think that only goes for two plugs, or do they always come spaced properly.
10min eh lol...and they charge an arm and a leg for that as well. I figured as much, taking off the wheel and the inner liner to get at them. Always wondered, do you have to space the plugs? I think that only goes for two plugs, or do they always come spaced properly.
Greg
#67
if you buy the plugs from mazda theres nothing to do but install them. two plugs have an L on them for leading, and the other two have a T on them for trailing, but the electrode end of the plugs looks very different from eachother so theres no question which goes where if you pay attention when you take the old ones out. for the record, leading plugs are the bottom two, trailing plugs are the top two. also, you dont need to take the wheel off or take the fender liner out. you just need to turn the wheels all the way to the right. the fender liner isnt in the way at all.
Greg
Greg
BTW...my car is running sweet now!
 Hammered in getting onto the 401 again 1-3 rdline the whole way and no problems at all. So glad she is back
  Thx again for everyone's input!!
#68
sorry, the mazda plugs do not need to be spaced. period. thats why i like them. i trust them. i dont know about charles hill....if his are just mazda plugs then i would assume no spacing necessary, if they are RX7 plugs then ive heard they need to be spaced. with a car as finicky as the rx8 can be, im not inclined to buy spark plugs from anyone accept mazda....they have the rights to the plugs the rx8 needs for the next couple years at least, so everyone elses plugs are just the next best thing IMO. i havent tried the others myself personally, but it seems that way to me, i have my reasons.
Greg
Greg
#69
sorry, the mazda plugs do not need to be spaced. period. thats why i like them. i trust them. i dont know about charles hill....if his are just mazda plugs then i would assume no spacing necessary, if they are RX7 plugs then ive heard they need to be spaced. with a car as finicky as the rx8 can be, im not inclined to buy spark plugs from anyone accept mazda....they have the rights to the plugs the rx8 needs for the next couple years at least, so everyone elses plugs are just the next best thing IMO. i havent tried the others myself personally, but it seems that way to me, i have my reasons.
Greg
Greg
Thread
Thread Starter
Forum
Replies
Last Post
whitelight42
RX-8 Parts For Sale/Wanted
0
08-06-2015 02:10 AM
MolecularConcept
New Member Forum
15
08-05-2015 05:43 PM


