
DIY: Aux-in port install via Grom adapter
 01-12-2011, 10:50 AM
#1
Registered User
Thread Starter
iTrader: (1)

Join Date: Jan 2011
Location: Indianapolis
Posts: 16
Likes: 0
Received 0 Likes
on
0 Posts
DIY: Aux-in port install via Grom adapter
First off if anyone can tell me how to get the pictures inline that would help. Usually on most boards it is just
I had to have an aux-in port in my RX-8 but didn't want the shady CD hack. So i went with the GROM audio adapter. It mimics a CD changer so you can just hit the CD button a second time and have an aux in. They have ipod and other adapters as well but i just wanted a 3.5mm jack
Items needed:
First off you need to get behind the radio. there are tons of guides out there for that and i don't want to have to rehash that so for now here is a link. Follow it thru step 6 and that is all you need.
http://www.whatsmyip.org/ipodrx8/
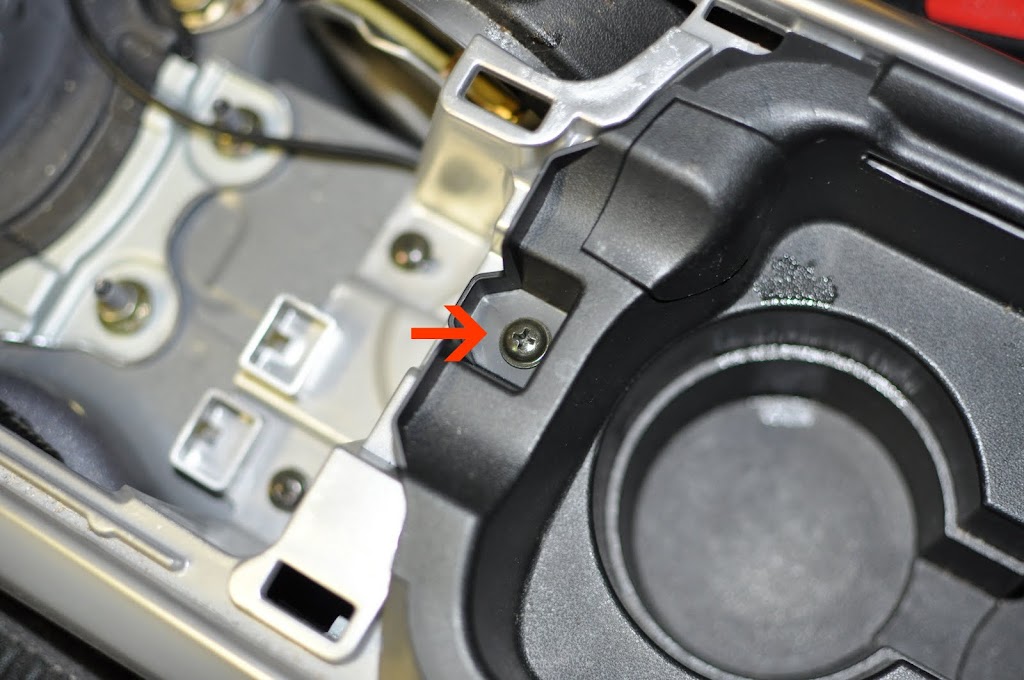
Then also you will need to remove the entire center console. Start with this first screw in front of the cup holders.
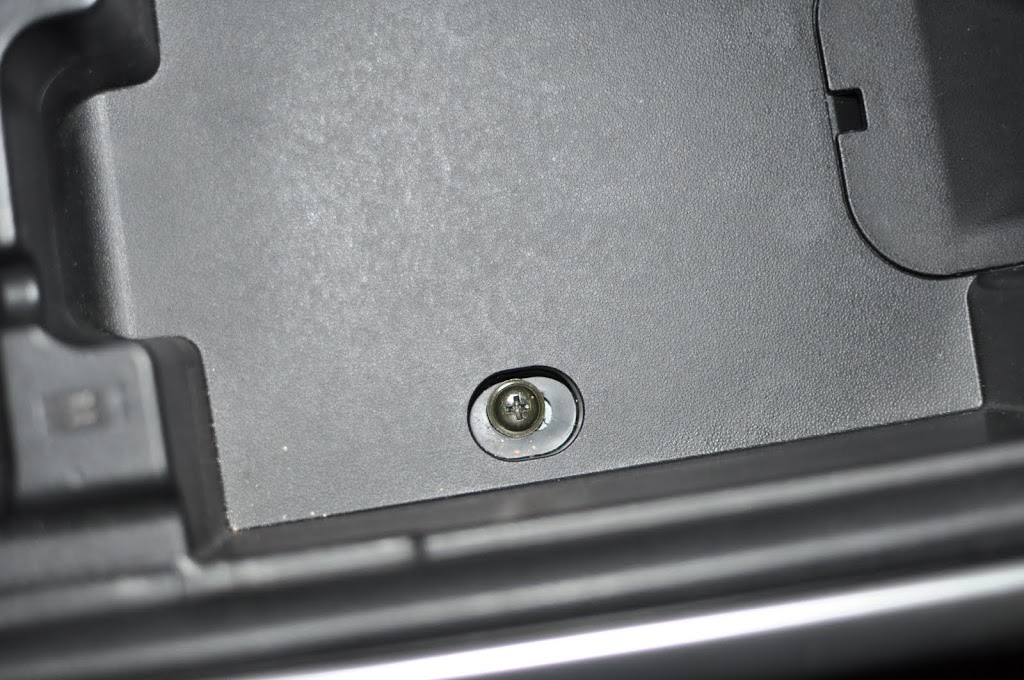
Then remove the felt in the cellphone area and remove the one screw there.
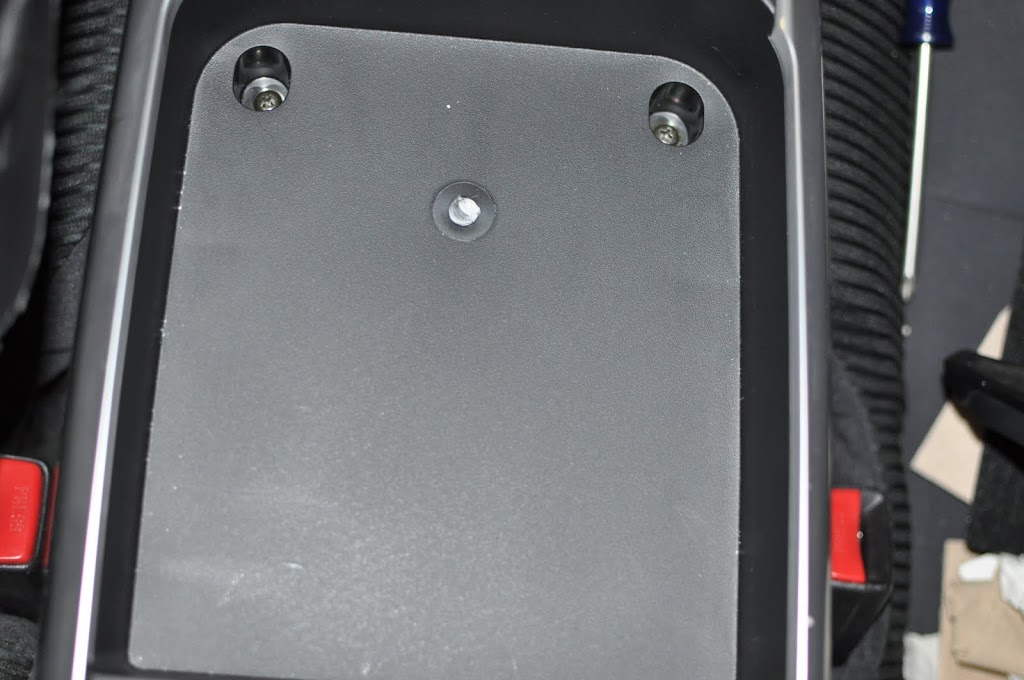
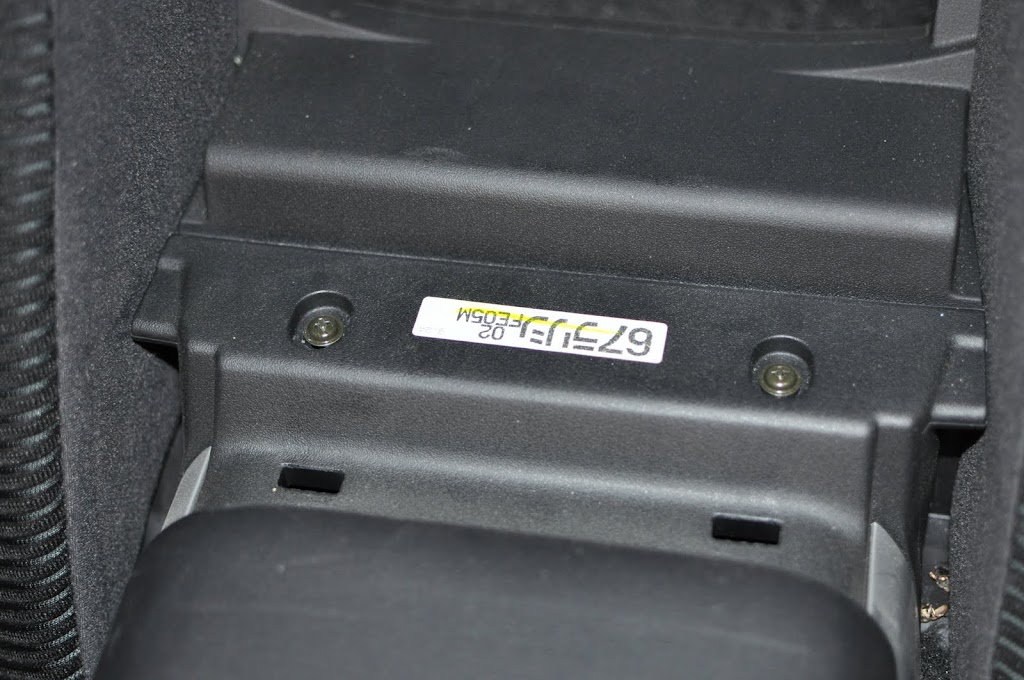
Now there are two move in the rear cargo pocket, and two more under the truck/rear seat divider.
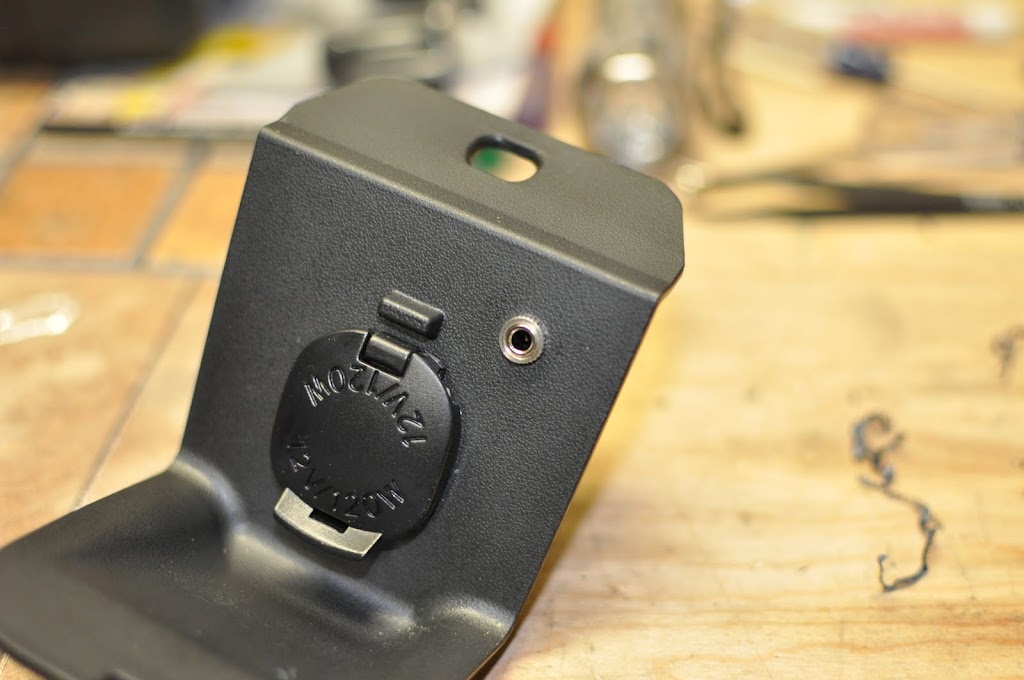
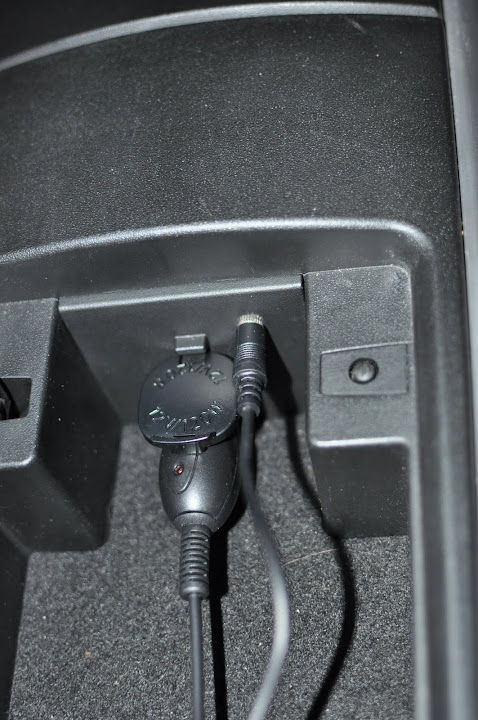
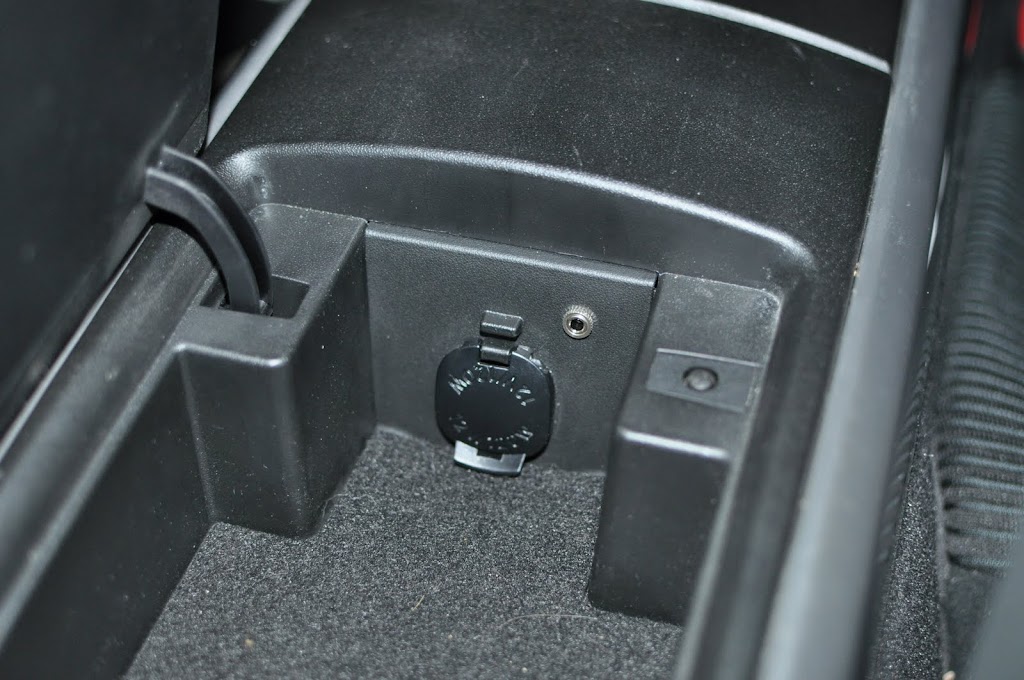
Now pop the 12volt power plug from the console (disconnect the cable obviously)

Drill the Hole and place the connector.
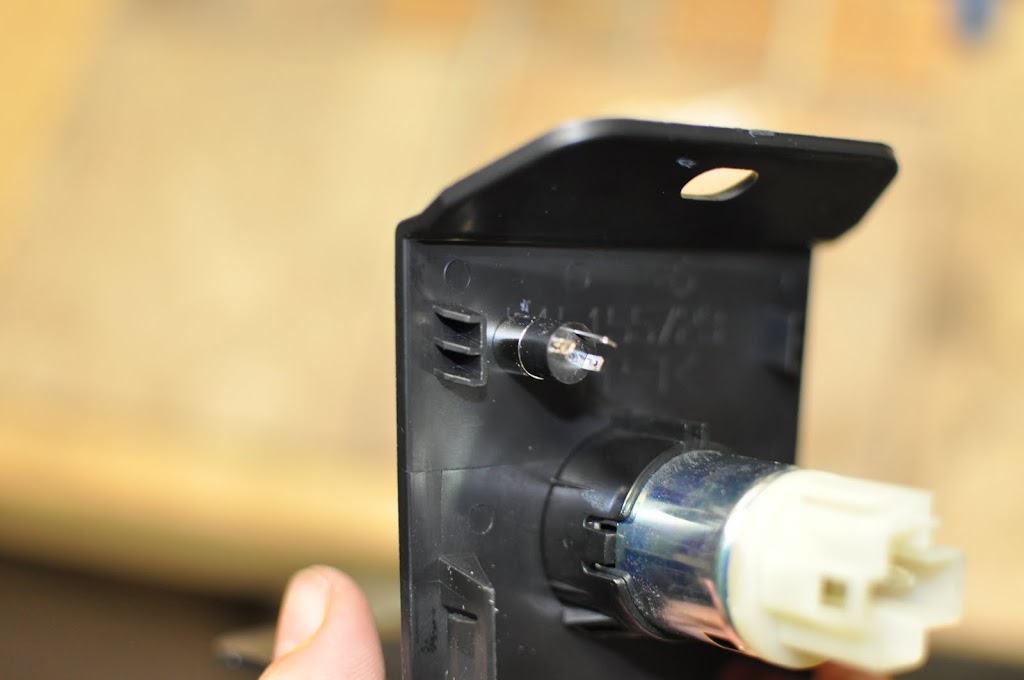
There are three prongs. Two silver and one gold. One of the silver prongs is longer then the rest (the one in the middle) That is the ground. I combined the grounds from both the right and the left audio to make one ground. then the other silver is the left audio, in my case the black wire. The gold was the right audio and in my case a red wire.
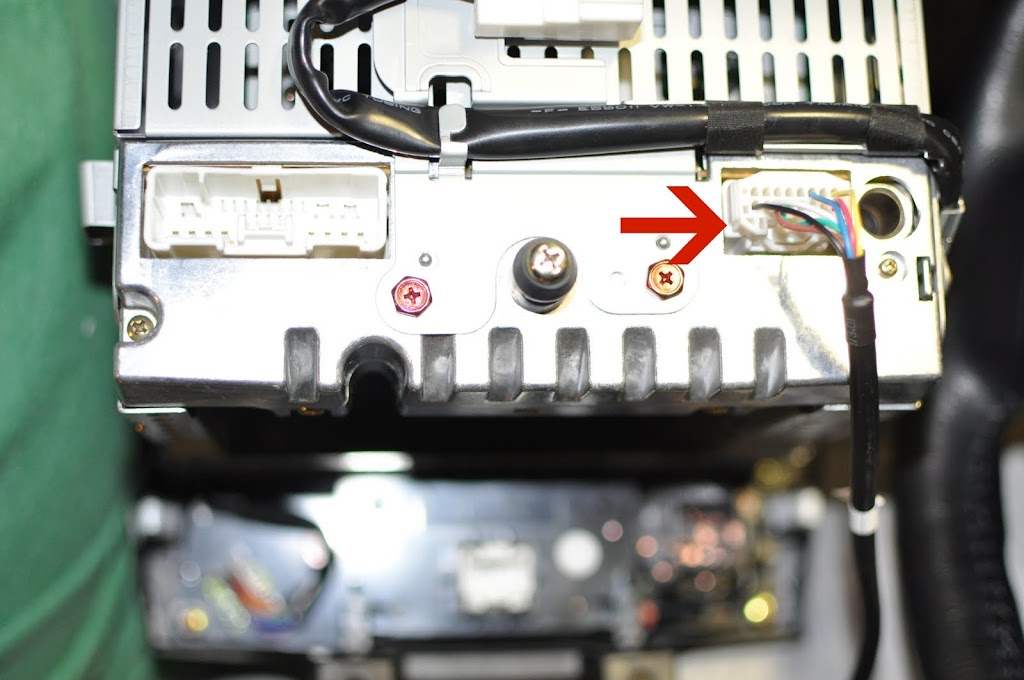
Then i put the GROM box (1) behind the A/C controls and put the cd changer wire/connector up into the radio compartment (2) and feed the 3.5mm wire up from the center arm rest. (3)
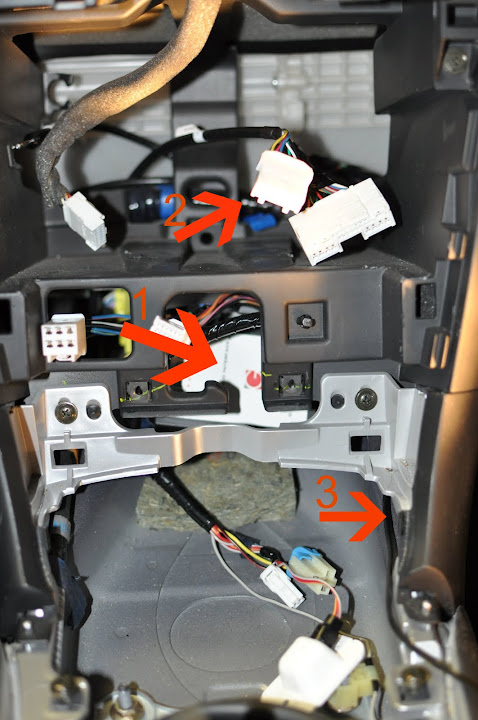
I then started reassembly with the GROM unit plunged into the head unit.
All Done
Code:
[IMG]link[/IMG]
Items needed:
- http://www.gromaudio.com/store/aux_a...nterface_.html
- A Panel mount 3.5mm jack from Parts Express
- Anything that has at least a 3.5mm on one end will work. i used about 5 feet to get the connector to the place where I wanted it. Here a 6 foot cable at Radio Shack.
- Drill
- Phillips Screwdriver
- Flat head to pry up parts.
- 10mm socket with long extension and ratchet.
First off you need to get behind the radio. there are tons of guides out there for that and i don't want to have to rehash that so for now here is a link. Follow it thru step 6 and that is all you need.
http://www.whatsmyip.org/ipodrx8/
Then also you will need to remove the entire center console. Start with this first screw in front of the cup holders.
Then remove the felt in the cellphone area and remove the one screw there.
Now there are two move in the rear cargo pocket, and two more under the truck/rear seat divider.
Now pop the 12volt power plug from the console (disconnect the cable obviously)
Drill the Hole and place the connector.
There are three prongs. Two silver and one gold. One of the silver prongs is longer then the rest (the one in the middle) That is the ground. I combined the grounds from both the right and the left audio to make one ground. then the other silver is the left audio, in my case the black wire. The gold was the right audio and in my case a red wire.
Then i put the GROM box (1) behind the A/C controls and put the cd changer wire/connector up into the radio compartment (2) and feed the 3.5mm wire up from the center arm rest. (3)
I then started reassembly with the GROM unit plunged into the head unit.
All Done
Last edited by rainierez; 01-18-2011 at 06:34 AM. Reason: Updated the wiring for the panel mount.
 01-15-2011, 12:27 PM
#2
Registered User

Join Date: Jun 2009
Location: Miami, FL
Posts: 9
Likes: 0
Received 0 Likes
on
0 Posts
What year is your 8? I have an 05 gt.. do you think my head unit will take this?.. single CD and Bose speakers..
My cd player stopped working a while ago, and both of my power outlets in the car also lol. any ideas on those?
My cd player stopped working a while ago, and both of my power outlets in the car also lol. any ideas on those?


 01-17-2011, 07:28 AM
#8
Registered User
Thread Starter
iTrader: (1)
Join Date: Jan 2011
Location: Indianapolis
Posts: 16
Likes: 0
Received 0 Likes
on
0 Posts
01-17-2011, 01:34 PM
#10
Sunlight Silver Bias

Join Date: May 2010
Location: Kirkland, WA
Posts: 1,259
Likes: 0
Received 0 Likes
on
0 Posts
Also, I noticed that there are three prongs on the back of the input module, which wire grounds to what on the back of that from the 3.5mm cable; did you by chance get a picture of the for the noobs in the room?
01-18-2011, 06:33 AM
#11
Registered User
Thread Starter
iTrader: (1)
Join Date: Jan 2011
Location: Indianapolis
Posts: 16
Likes: 0
Received 0 Likes
on
0 Posts
Like you noticed there are three prongs. Two silver and one gold. One of the silve prongs is longer then the rest (the one in the middle) That is the ground. I combined the grounds from both the right and the left audio to make one ground. then the other silver is the left audio, in my case the black wire. The gold was the right audio and in my case a red wire.
 01-22-2012, 06:00 AM
#16
Registered User
Thread Starter
iTrader: (1)
Join Date: Jan 2011
Location: Indianapolis
Posts: 16
Likes: 0
Received 0 Likes
on
0 Posts
Good luck
03-04-2012, 06:45 AM
#17
Registered

Join Date: Nov 2011
Posts: 12
Likes: 0
Received 0 Likes
on
0 Posts
Thanks for the write up, it's great, but I'm a little confused. Did you plug the RadioShack aux cable into the grom box, cut the other end and connect it to the 3.5mm jack? Is that a simple process? I noticed you said you combined the grounds, isn't there only one ground on the audio jack, what else are you referring to? I've never spliced cables together, or soldered anything, but I'm sure I could figure it out.
Thanks!
Thanks!
 03-07-2012, 09:44 AM
#19
Registered User
Thread Starter
iTrader: (1)
Join Date: Jan 2011
Location: Indianapolis
Posts: 16
Likes: 0
Received 0 Likes
on
0 Posts
Thanks for the write up, it's great, but I'm a little confused. Did you plug the RadioShack aux cable into the grom box, cut the other end and connect it to the 3.5mm jack? Is that a simple process? I noticed you said you combined the grounds, isn't there only one ground on the audio jack, what else are you referring to? I've never spliced cables together, or soldered anything, but I'm sure I could figure it out.
Thanks!
Thanks!
Soldering is fun, and there are tons of videos. I'm spoiled having done a lot of it I own a nice iron with a fine tip, this maybe hard with cheaper irons as they heat the wire up ALOT and can melt the cover off of the 24+ gauge wires. Just be careful and buy heat shrink to cover your solders. Make it nice
 03-08-2012, 04:33 PM
#20
Registered
Join Date: Nov 2011
Posts: 12
Likes: 0
Received 0 Likes
on
0 Posts
Sorry it took me a while to get back with you. Yes, You just cut off one end of the cable at the right length you need and strip the wires back. When I mentioned combining the grounds it is a reference to the Shielded part of the cable AND the ground wire in the bundle. They should both be grounded to avoid interference. You could however leave the shield out if you like but I wouldn't.
Soldering is fun, and there are tons of videos. I'm spoiled having done a lot of it I own a nice iron with a fine tip, this maybe hard with cheaper irons as they heat the wire up ALOT and can melt the cover off of the 24+ gauge wires. Just be careful and buy heat shrink to cover your solders. Make it nice
Soldering is fun, and there are tons of videos. I'm spoiled having done a lot of it I own a nice iron with a fine tip, this maybe hard with cheaper irons as they heat the wire up ALOT and can melt the cover off of the 24+ gauge wires. Just be careful and buy heat shrink to cover your solders. Make it nice

Thread
Thread Starter
Forum
Replies
Last Post
JimmyBlack
Series I Major Horsepower Upgrades
273
02-10-2020 10:23 PM