Scale Furai - Scale 20B Nitro Engine
#77
After it ran I decided to tear it down an see how the internals looked. Then I reassembled it and managed to over tighten a nut on the e-shaft and when I cranked the engine over it twisted a needle bearing. I have been busy over the last month and have not been able to play around with it.
Sometime I will get around to ordering one and get it fired up again.
Sometime I will get around to ordering one and get it fired up again.
#78
Since I have decided to go back to my original idea of a scale furai, I have started to work on some of the solid modeling.
I am hoping to have a surface model of the furai within the next month from a 3D scan of the 1:43 Spark Mazda Furai model. I hope to use this to begin work on a foam/bondo mold of the car. Then using the foam mold I will make a fiberglass mold to finally make carbon fiber body panels from. Plus, using this method I will easily be able to reproduce parts.
I also have a lot of work to do on the Courage carbon monocoque used in the Furai so I can also begin modeling that and then build a mold for that.
Not sure what I will do about the rear frame, because welding tubes/rods that small will probably just melt and not be weldable (word?). If anyone has any suggestions on this topic would you mind posting your ideas?
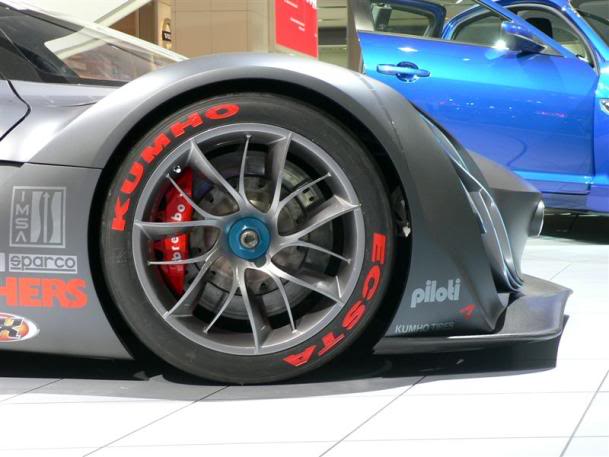
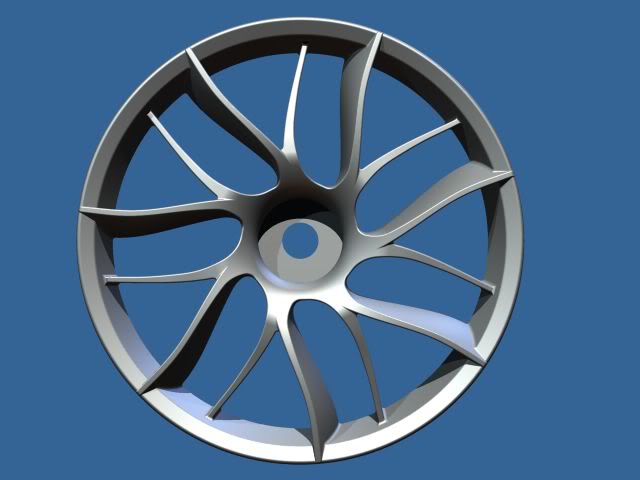
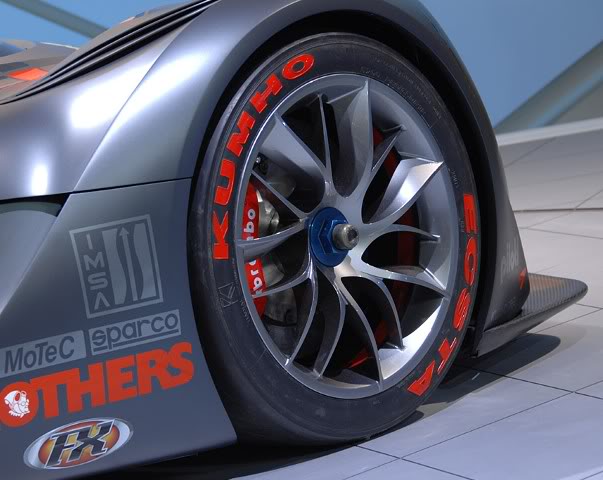
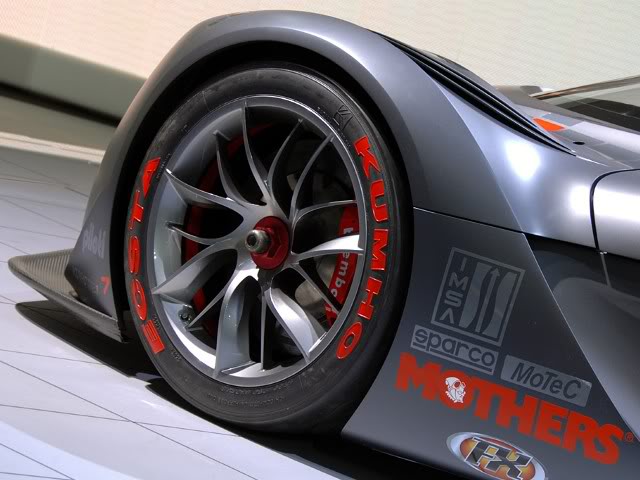
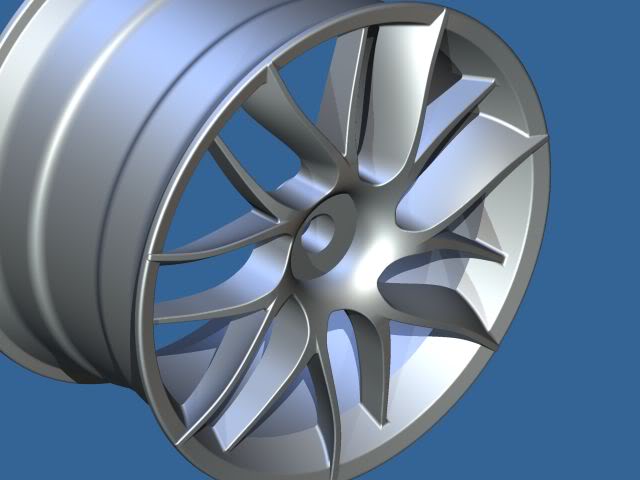
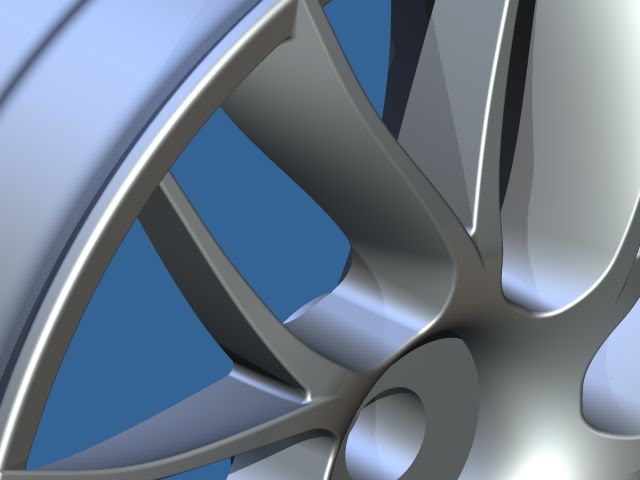
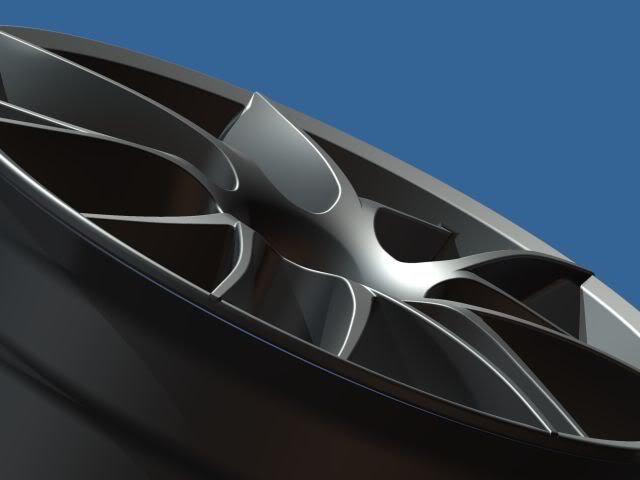
Here is my first completed part of the car, a solid model of the front wheels. I have a few tweaks yet, but am waiting until I have more of the car done for adjustments. Wheels are hard to find at this scale and if you do find them, they are not the right style. I modeled this off pictures available online. They appear to be a very good match. I am hoping to find a shop that will rapid prototype the wheel for a reasonable price. I doubt machining the wheel at this scale would be possible or it can be done at extremely high price.
Since the success of the scale rotary engine, I have also started work on a completely custom 20B...this engine will not use any existing engine parts and will include water jacket, oil system, side seals, etc. The machining will be much more precise and will require CNC machines to hold exact tolerances. I will soon post pictures of my work up to this point.


Last edited by EdwardsB; 09-27-2009 at 04:07 PM.
#79
whines all the way home
iTrader: (2)
Joined: Oct 2004
Posts: 7,402
Likes: 2
From: Towson/Baltimore, MD
Looking good Brent,,,
If you complete the tire diameter and tread pattern, let me know and send me an STL.
Ill take care of the rest,,, I assume like you said before that one wheel would suffice so you can make a mold for replication,, but what if you went totally custom and one up Mazda by making the wheel side specific.
In the real Furai(our drivers side) the drivers side wheel is the way I would go and then make a mirrored part for the passenger side, so that the wheels have more of a flow,,,
#82
You might want to look into resin casting for certain parts. I use Alumalite for many things. You can find it at any arts and crafts store or check their website.
For the frame parts, try looking into using brass. It's easy to find online and can be soldered with silver solder for a very strong joint. It's also easy to work with.
For the frame parts, try looking into using brass. It's easy to find online and can be soldered with silver solder for a very strong joint. It's also easy to work with.
#83
Thanks RG, ill look into both of those suggestions. As of right now I'm looking into having the wheels prototyped in acrylic. I have actually never heard of Alumalite, Ill have to take a trip to the crafts store this week. I'm not at the frame material yet, but brass will definitely be a consideration. Thanks again for the advice, I appreciate it!
#85
#88
If you try it, my one suggestion to you is to not heat up your mold before you pour the casting resin into it. Also keep the casting resin in the refrigerator. You actually want it as cold as possible when you pour it as when warm it's only got a working time of about 2-3 minutes. Keeping everything cold can give you a working time of about 5-6 or so. It sets up pretty fast which makes it pretty hard to do some larger things. Fortunately they sell different kinds of resins. They even have clear resin if you want to make your own lights. It's fun stuff. I use it on my model railroad all the time.
#92
[QUOTE=neit_jnf;3254131]are you using counter weights?QUOTE]
^No I did not have any, only the flywheel. I really did not pick up much vibration running this setup either, but for the next version of the engine I will include counterweights.
I would but I have moved since I finished the engine, and do not have anywhere in my apartment for my lathe. In the next few months I hope to have a garage, and then I will have my machining stuff here. I'll let you know when that happens.
I have the CAD work for the coupling between those two engines in the tractor. He used a different setup and joined the two engines e-shafts and rotor housings with an adapter.
#93
[QUOTE=EdwardsB;3254413]
Odd, both of mine have counterweights front (integrated to the flywheel) and rear, maybe you can somehow integrate them or make new ones. Once you get it better balanced you can rev it up more and it should last longer.
If you want to increase compression polish the sides of the rotors to mirror finish as well as the side plates and very carefully polish the rotor housing width, so the clearance between the sides of the apex seals and side plates is tighter, not too tight or it'll lock (don't ask how I know lol)
Last edited by neit_jnf; 10-01-2009 at 08:22 AM.
#94
^Yeah my original two engines had counterweights, but my combine "13B" did not have any. The single rotors needs the weight to offset the imbalance of only one rotor. On the engine I made there was very little vibration felt while running, and the engine was isolated from the stand by rubber washers.
Yeah I had my ceter and side plate to am almost perfect mirror finish after some work.
Yeah I had my ceter and side plate to am almost perfect mirror finish after some work.
#95
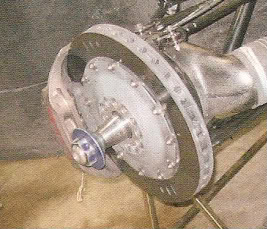
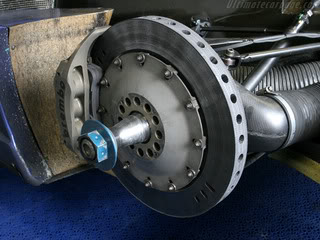
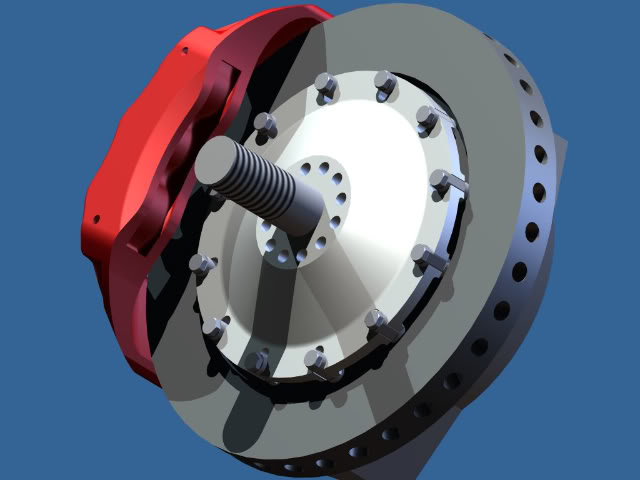
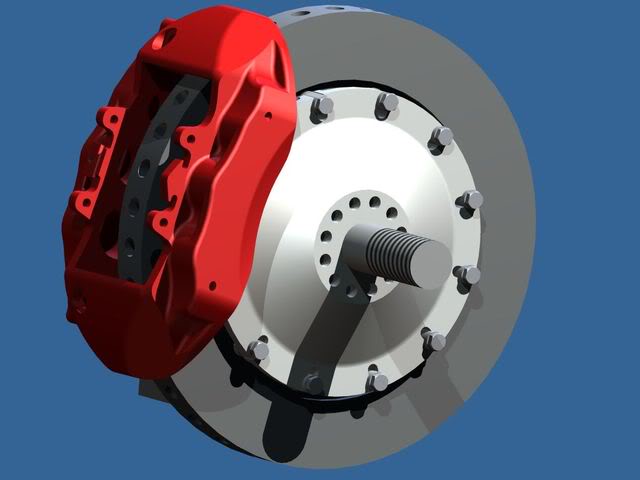
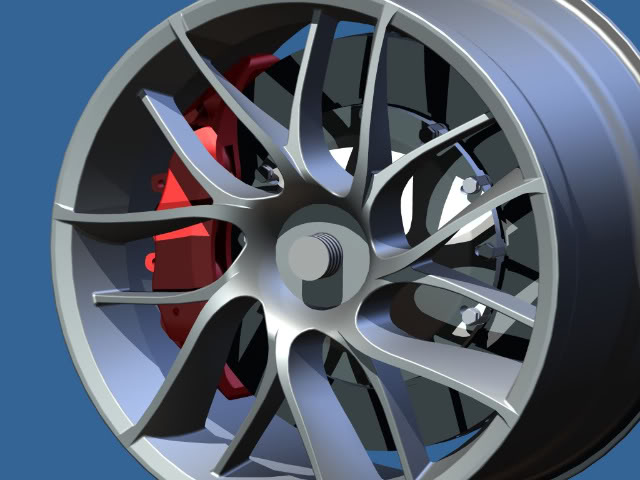
A little bit of my progress. I know it does not look like much but to get the caliper right took 3 different drawings and all the little fixing parts for the rotor were a pain to draw/source. I got tech drawings of the rotor/rotor parts and the caliper off brembo's website, which was an easy way to make the scale brakes. I still need the pads, but am not sure how they attach to the calipers yet so I have to search for more pictures. I am also not finished with the spindle, I need to add the correct tapers and lengths. At the same time I am drawing these I am also source the parts, tools and materials necessary to build the car, it eats up time now but will save me headaches down the road.
Request!
I was also wondering if anyone can help me out with pictures of the Courage C65's carbon monocoque. These have been very hard to come by, and I need them to create and accurate scale model to build the body of the Furai on top of. I have found some of the B-K Motorsports car on mulsannes corner, but I still need a few more angles.
So if anyone has any pit or shop pictures of the courage C65's monocoque and would not mind sending them my way I would really appreciate it. Or if you know someone who may have pictures would you mind pointing me in their direction. I will not give out any names or pictures you can share with me, and you can pm me for my email address. I would really appreciate any help I could get! Here is what I have so far:
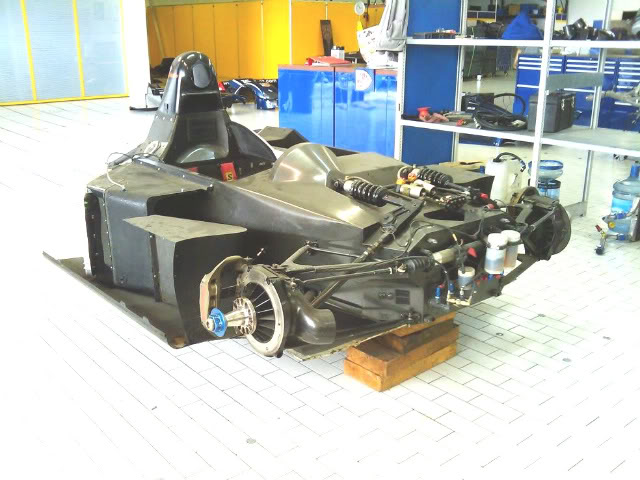
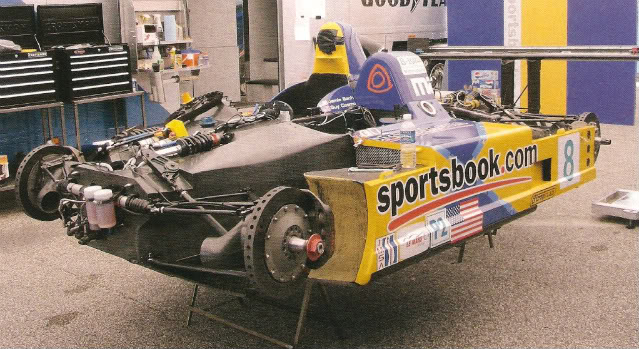
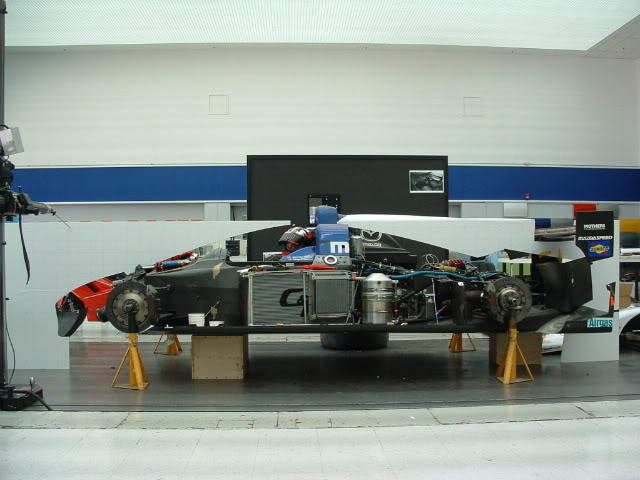
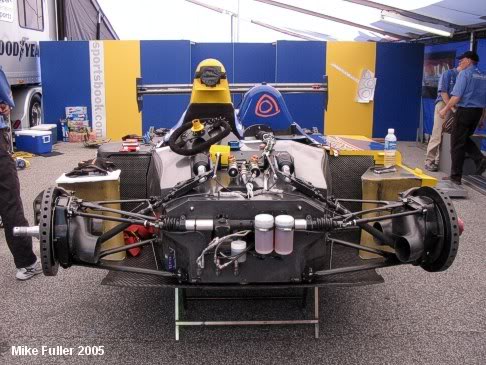
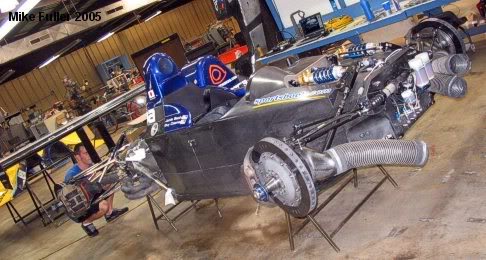
Race Fans?
Are there special regulations on dimensions of the monocoque in le mans that I could use to helps scale my drawings. Or do you know where I might be able to find book/index of regulations that may contain regulations on the carbon tub size?
Thanks again everyone!


Request!
I was also wondering if anyone can help me out with pictures of the Courage C65's carbon monocoque. These have been very hard to come by, and I need them to create and accurate scale model to build the body of the Furai on top of. I have found some of the B-K Motorsports car on mulsannes corner, but I still need a few more angles.
So if anyone has any pit or shop pictures of the courage C65's monocoque and would not mind sending them my way I would really appreciate it. Or if you know someone who may have pictures would you mind pointing me in their direction. I will not give out any names or pictures you can share with me, and you can pm me for my email address. I would really appreciate any help I could get! Here is what I have so far:


Race Fans?
Are there special regulations on dimensions of the monocoque in le mans that I could use to helps scale my drawings. Or do you know where I might be able to find book/index of regulations that may contain regulations on the carbon tub size?
Thanks again everyone!
Last edited by EdwardsB; 11-02-2009 at 09:03 PM.
#97
^yeah a little bit. I am still getting used to my job and I have been on and off with the designs. I also had to start over on the rotor housing because I forget to account for shrinkage in the casting process...many hours of work lost  .
.
I needed a break from the monocoque due to frustration because info and pics are so hard to come by. I even found a courage C65 for sale in Switzerland and tried to act like an interested customer, requesting more pictures and info before I visit the car...but I don't think they bought it for a minute.
Anyway I switched over to the engine because I had info and parts for scaling available. Here are some preview shots, I'm waiting to get more of the engine done before I show larger pics. I have to order some more blown/rejected engine parts (center housing, e-shaft, etc) to use for scaling purposes...anyone got any parts they would be interested in selling/donating?
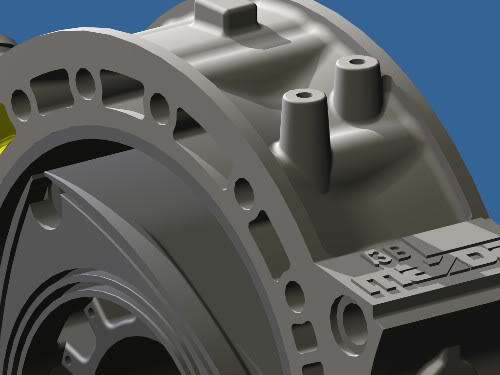
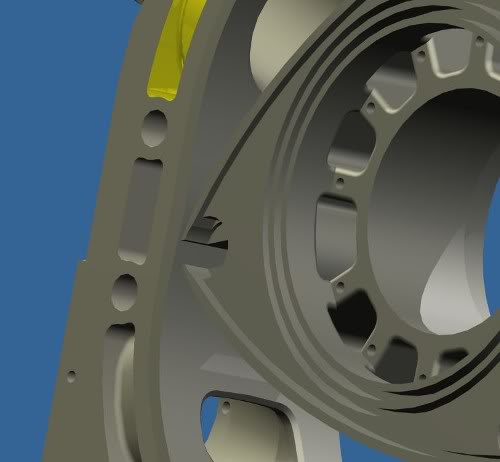
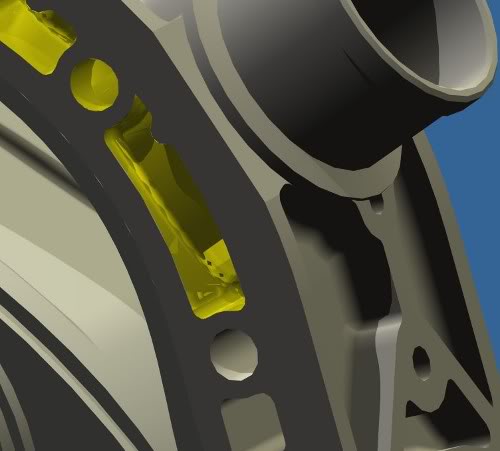
 .
. I needed a break from the monocoque due to frustration because info and pics are so hard to come by. I even found a courage C65 for sale in Switzerland and tried to act like an interested customer, requesting more pictures and info before I visit the car...but I don't think they bought it for a minute.
Anyway I switched over to the engine because I had info and parts for scaling available. Here are some preview shots, I'm waiting to get more of the engine done before I show larger pics. I have to order some more blown/rejected engine parts (center housing, e-shaft, etc) to use for scaling purposes...anyone got any parts they would be interested in selling/donating?


