NE NJ local meets on Tuesday nights

 02-05-2010, 04:17 PM
#9302

stop by my crib on the way there ... I am right off of 78, pretty much ON THE WAY ... I may even roll out to KDR with you since I have never been there.... we'll get lunch
Guys, I am having a strange fill-up issue .... the gas pump will shut off when my tank is only half full .... and I am scared to force it since the manual says not to do so ... has anyone else experienced this?
oh and do you think Dave can do PA state inspection?
Guys, I am having a strange fill-up issue .... the gas pump will shut off when my tank is only half full .... and I am scared to force it since the manual says not to do so ... has anyone else experienced this?
oh and do you think Dave can do PA state inspection?
02-05-2010, 04:29 PM
#9303
F yo couch!

Join Date: Feb 2009
Location: Belleville, NJ
Posts: 1,806
Likes: 0
Received 0 Likes
on
0 Posts
its actually caused by something in either the neck or the tank system, i believe pressures in the tank cant escape by...something, which causes the filler to prematurely "pop"
when i get a chance ill look it up, i know one of fords cars had this problem before
when i get a chance ill look it up, i know one of fords cars had this problem before
02-05-2010, 04:31 PM
#9304
F yo couch!
Join Date: Feb 2009
Location: Belleville, NJ
Posts: 1,806
Likes: 0
Received 0 Likes
on
0 Posts
and Dennis, tell me this doesnt sound menacing
[EMBED]<object width="425" height="344"><param name="movie" value="http://www.youtube.com/v/OaxuMlVXxKo&hl=en_US&fs=1&"></param><param name="allowFullScreen" value="true"></param><param name="allowscriptaccess" value="always"></param><embed src="http://www.youtube.com/v/OaxuMlVXxKo&hl=en_US&fs=1&" type="application/x-shockwave-flash" allowscriptaccess="always" allowfullscreen="true" width="425" height="344"></embed></object>[/EMBED]
[EMBED]<object width="425" height="344"><param name="movie" value="http://www.youtube.com/v/OaxuMlVXxKo&hl=en_US&fs=1&"></param><param name="allowFullScreen" value="true"></param><param name="allowscriptaccess" value="always"></param><embed src="http://www.youtube.com/v/OaxuMlVXxKo&hl=en_US&fs=1&" type="application/x-shockwave-flash" allowscriptaccess="always" allowfullscreen="true" width="425" height="344"></embed></object>[/EMBED]
02-05-2010, 04:41 PM
#9305
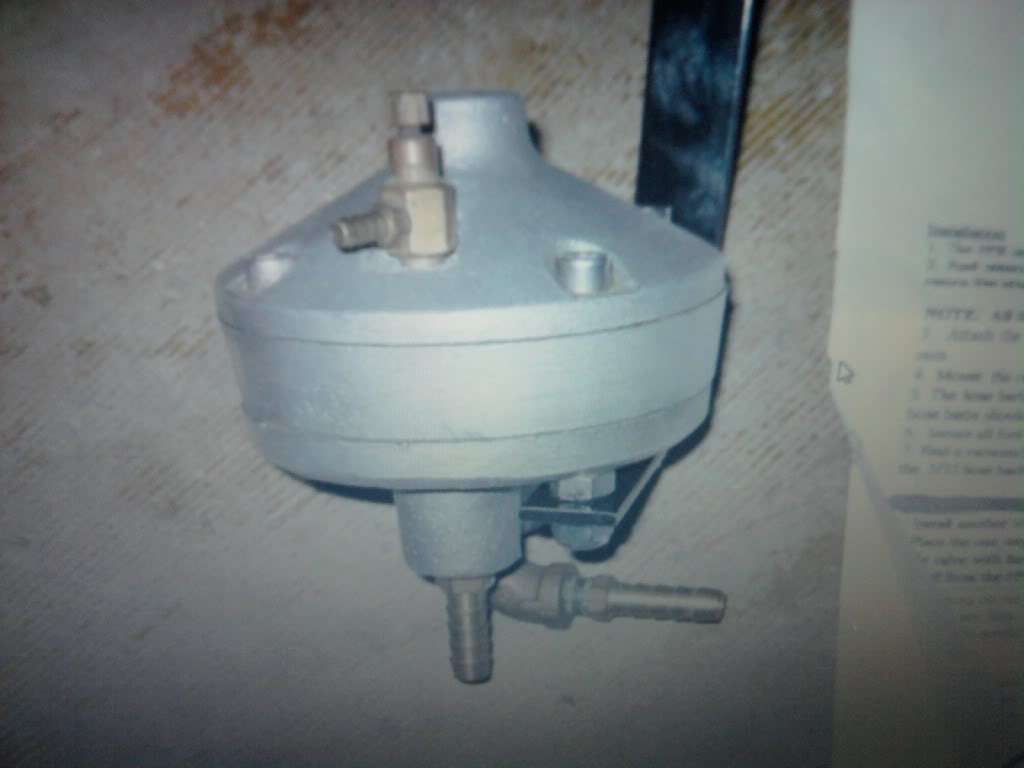
on the filler pipe of the gas pump there is a small pipe that is set up in such a way that when the handle is in the "pump" position air can freely circulate, however when gas gets high enough to submerge the pipe, air can't be taken in anymore and the handle snaps down.. next time look at a gas filler neck and you'll notice a small hole on the very tip of the gas nozzle, that is it.
which is why I ask if it has happened on more then 1 pump, because it could just be a faulty pump... but if it isn't a faulty pump and knowing how the gas pump operates you can only surmise that something is blocking free flow of air when the pump is inside the filler neck. maybe pump gas with the gas nozzle at angle?
which is why I ask if it has happened on more then 1 pump, because it could just be a faulty pump... but if it isn't a faulty pump and knowing how the gas pump operates you can only surmise that something is blocking free flow of air when the pump is inside the filler neck. maybe pump gas with the gas nozzle at angle?
Last edited by alz0rz; 02-05-2010 at 04:43 PM.
02-05-2010, 04:53 PM
#9306
I feel like I may be sticking it too far into the gas hole ... ill try to see if it helps holding it a little out ... it has happened on 2 of 3 fills so far ... 1st one had no issues ... all different pumps ... will investigate further
Thanks for the help!
Thanks for the help!
Last edited by stinksause; 02-05-2010 at 04:55 PM.
02-05-2010, 05:10 PM
#9307
F yo couch!
Join Date: Feb 2009
Location: Belleville, NJ
Posts: 1,806
Likes: 0
Received 0 Likes
on
0 Posts
ok mr. know it all, thanks for the explanation obviously ive never been around a car before so i would never know what thats actually for, i wont even waste my time looking up the info since im sure u got it figured out already
02-05-2010, 05:11 PM
#9308

oh and i wasn't necessarily addressing that to you, it was to stinksauce, hence I asked him about it being the same pump and suggestions on how to pump it to see if it remedies the problem.
02-05-2010, 06:15 PM
#9310
.. i don't get it? i tested my compression and it turns out the tester itself is faulty... not sure what you're getting at..
02-05-2010, 06:26 PM
#9311
F yo couch!
Join Date: Feb 2009
Location: Belleville, NJ
Posts: 1,806
Likes: 0
Received 0 Likes
on
0 Posts
not the same but its something to look into:
Printable View (92 KB)
TSB
07-11-15 SLOW FUEL FILL/PREMATURE SHUT OFF
Publication Date: May 25, 2007
FORD: 2005-2007 Five Hundred, Freestyle
MERCURY: 2005-2007 Montego
ISSUE:
Some 2005-2007 Five Hundred, Montego and Freestyle vehicles may experience premature automatic shut off of the fuel fill nozzle. Several variables, including variations in fuel pump nozzles, fuel flow rates, and fuel flow pressure may result in the premature automatic shut off of the fuel fill nozzle making it more difficult to fill the fuel tank.
ACTION:
Follow the Service Procedure steps to correct the condition.
NOTE: THIS CONDITION MAY STILL OCCUR EVEN AFTER THE REPAIR BELOW IS COMPLETE. SOME FILLING STATION PUMPS MAY DELIVER FUEL AT A RATE GREATER THAN THE DEPARTMENT OF TRANSPORTATION (DOT) SPECIFICATION, OR MAY USE NOZZLE DESIGNS THAT ARE OVERLY SENSITIVE AND TEND TO SHUT OFF PREMATURELY. THIS IS NORMAL.
SERVICE PROCEDURE
It is not necessary to complete all steps listed. Repair is complete when concern is found.
Drain fuel tank to 1/2.
Install IDS and check for diagnostic trouble code (DTC) P1450. Is DTC present?
Yes - Go to Step 4 to repair Evaporative Emissions (EVAP) restriction.
No - Go to Step 3.
Monitor the fuel tank pressure PID (FTP) on IDS and start refueling, stopping at 7/8 tank or less (add less than 2.5 gallons). Did voltage go over 3.8?
Yes - Go to Step 4 to repair EVAP restriction.
No - Go to Step 5 to inspect fill pipe/tank for blockage.
Remove fresh air line at fuel vapor separator (line goes from fuel filler housing to fuel vapor separator near carbon canister). Blow shop air through the lower end of the line and capture contaminants in a clear plastic bag in the top end. Was a blockage or appreciable amount of debris (spider nest/web) present?
Yes - Follow procedure I to install new filler housing kit that contains new spider trap to prevent spiders from building a nest/web in fresh air line. Repair complete.
No - Go to Step 6.
Inspect the fill hose for any evidence of a kink. Remove the clamp at the tank spout and pull off the hose. Check the spout for any evidence that it may have been crushed under the clamp. Push check valve in tank with finger, the plunger in the tank should move freely down with light pressure and return to the top with a light spring force. If the spout is crushed or the valve does not move freely - remove and replace the fuel tank. Was concern found?
Yes - Repair/replace line or tank as necessary. Repair complete.
No - Go to Step 7.
Remove EVAP canister and check for liquid fuel when the quick connect is removed or the canister is tipped down. Was excess amount of fuel seen? Excess would leave a 10" (25 cm) diameter circle on a flat surface.
Yes - Remove the sending unit access cover on the vehicle right side and remove the sending unit. Inspect the large vapor line quick connect connection to the bottom side of the sender flange, and if not fully seated, fully seat the connector, reinstall sender using new gasket. If the connector was properly installed remove and replace the fuel tank and the carbon canister. Repair complete.
No - Go to Step 9.
Inspect the fill pipe for any blockage. Note an object like a nut that will fit through the 13/16" (21 mm) hole at the top of the pipe should fall freely through the remainder of the pipe. Was blockage found?
Yes - Remove the blockage or replace the fill pipe. Drain the fuel to less than 1/2 tank prior to reinstalling the pipe. Repair complete.
No - Go to Step 8.
Remove secondary sending unit on left side of vehicle and inspect tank valve body. Valve body is about 3 1/2" (9 cm) in diameter (about size of a baseball) and is located rearward of opening for Five Hundred/Montego and forward of opening for Freestyle. With one finger, push plunger located in center of bottom plate up 1/2" (13 mm). Plunger should move freely and fall when let go. Does plunder move freely?
Yes - Go to Step 10.
No - Remove and replace the fuel tank. Repair complete.
Replace the canister with a new lower restriction canister. Repair complete.
Reassemble vehicle.
Refuel to three automatic click offs and confirm vehicle fills okay and voltage remains below 3.6 volts. Observe the fuel gauge reading after refueling. Does fuel gauge show above full, correctly indicating fuel level?
Yes - System is okay.
No - Go to Step 12.
Check the FLI reading in the cluster. Does reading on the secondary side read XXX or higher? Enter Instrument Cluster Self-Diagnosis Mode following instructions in Workshop Manual (WSM), Section 413-01. Check F1 XXX or FDM fuel level XXX RADS and F2 XXX or JPM FUEL LVL XXX RADS. Are both numbers 210 or higher?
Yes - Reading correct and the system is operating properly.
NOTE: THE CLUSTER MAY BE IN SLOW IN UPDATING FROM 7/8 TO FULL.
No - Refer to TSB 06-17-2 Fuel Gauge Erratic/Inaccurate and install sender service kit.
Procedure I - Fuel Filler Housing Removal And Installation
WARNING: DO NOT CARRY LIGHTED TOBACCO OR OPEN FLAME OF ANY TYPE WHEN WORKING ON OR NEAR ANY FUEL-RELATED COMPONENTS. HIGHLY FLAMMABLE VAPORS ARE ALWAYS PRESENT AND CAN IGNITE. FAILURE TO FOLLOW THESE INSTRUCTIONS CAN RESULT IN PERSONAL INJURY.
WARNING: DO NOT CARRY PERSONAL ELECTRONIC DEVICES SUCH AS CELL PHONES, PAGERS OR AUDIO EQUIPMENT OF ANY TYPE WHEN WORKING ON OR NEAR ANY FUEL-RELATED COMPONENTS. HIGHLY FLAMMABLE MIXTURES ARE ALWAYS PRESENT AND MAY BE IGNITED. FAILURE TO FOLLOW THESE INSTRUCTIONS CAN RESULT IN PERSONAL INJURY.
WARNING: THIS PROCEDURE INVOLVES FUEL HANDLING. BE PREPARED FOR SPILLAGE AT ALL TIMES AND ALWAYS OBSERVE FUEL HANDLING PRECAUTIONS. FAILURE TO FOLLOW THESE INSTRUCTIONS CAN RESULT IN PERSONAL INJURY.
Release the fuel tank filler cap and position aside.
Remove the two (2) bolts from the top of the fill pipe through the fill door.
Remove the two (2) fuel tank filler pipe upper retaining screws. To install, tighten to 27 lb-in (3 N-m).
Remove the fuel tank filler pipe lower retaining bolt. To install, tighten to 80 lb-in (9 N-m).
Remove the right hand rear inner fender splash shield.
Remove lower end of carbon canister fresh air line (rubber connector) from carbon canister rectangular dust box from connection behind right rear tire.
Being careful not to let dirt get into the end of the uncapped fill pipe, pull the top of the fill pipe through the hole in the filling housing and cover with plastic bag. Stow pipe out of the way for housing removal.
Remove two (2) screws from behind the fill door located inside rubber door stoppers, then remove the housing and fresh air line out through the wheel well.
On some vehicles, the cap is attached to one of the bolts which holds the fill pipe to the filler housing. Attach this cap using the push pin supplied in the kit and to the hole in the fuel housing. On some vehicles, the cap is attached to filler housing with a push pin. This push pin should be removed from the housing and from the cap. Reattach the new push pin supplied in the kit to the cap and to the new housing. Lastly, for later models, the cap is attached to the back of the fill door. If this is the case, leave the cap as is and push the supplied push pin into the empty hole in the housing as a plug.
To install, reverse the removal procedure.
To help seal the housing better to the quarter panel, a nut is included in the kit. (Figure 1)
PART NUMBER PART NAME
5F9Z-9T328-B Fuel Filler Kit - Wagon
5G1Z-9T328-B Fuel Filler Kit - Sedan
7G1Z-9D653-D Canister - Sedan
7F9Z-9D653-D Canister - Wagon
OTHER APPLICABLE ARTICLES:
06-17-02
WARRANTY STATUS:
Eligible Under Provisions Of New Vehicle Limited Warranty Coverage And Emissions Warranty Coverage
IMPORTANT: Warranty coverage limits/policies are not altered by a TSB. Warranty coverage limits are determined by the identified causal part.
OPERATION DESCRIPTION TIME
MT071115 Use SLTS Operations If Available; Claim Additional Diagnosis Or Labor Performed As Actual Time Actual Time
DEALER CODING
BASIC PART NO. CONDITION CODE
9D653 55


 02-05-2010, 07:23 PM
#9315
if your not 1st your last

word rodey calm down
I was teaching you so well grasshopper , doesnt matter who is right or wrong as long as we are here to help.
dont waist your money unless its needed.
my rx8 would always shutoff on me at the pump was really embarrasing
had to say its a builtin effect LOL
mazda que mas da
I was teaching you so well grasshopper
, doesnt matter who is right or wrong as long as we are here to help.dont waist your money unless its needed.
my rx8 would always shutoff on me at the pump was really embarrasing
had to say its a builtin effect LOL
mazda que mas da
02-05-2010, 07:55 PM
#9316
TNC

Join Date: Oct 2008
Location: New York
Posts: 2,054
Likes: 0
Received 0 Likes
on
0 Posts
yeah man that thing sounds SICK!!!!! that might be me next!!!!!
Yeah im Not gonna go 2 morrow..... Dave said he's not going to be at the shop cause of the weather.... Thanks for both of your guys help  I appreciate it
And steve I just got home ill call u ina bit....
I actually took some today in the City..... nothin crazy... the sky is shitty, so theres really no nice Background.... Ive been carrying it on me to and from work.... getting the hang of all the features....
Ill post some pics soon... Yo O i remember you said somethin about Flicker being better for pics????
I appreciate itAnd steve I just got home ill call u ina bit....
I actually took some today in the City..... nothin crazy... the sky is shitty, so theres really no nice Background.... Ive been carrying it on me to and from work.... getting the hang of all the features....
Ill post some pics soon... Yo O i remember you said somethin about Flicker being better for pics????
 02-05-2010, 11:32 PM
#9320
Bubblicious? DEF.
Join Date: Mar 2004
Posts: 4,062
Likes: 0
Received 0 Likes
on
0 Posts
 02-06-2010, 02:51 AM
#9322
not the same but its something to look into:
Printable View (92 KB)
TSB
07-11-15 SLOW FUEL FILL/PREMATURE SHUT OFF
Publication Date: May 25, 2007
FORD: 2005-2007 Five Hundred, Freestyle
MERCURY: 2005-2007 Montego
ISSUE:
Some 2005-2007 Five Hundred, Montego and Freestyle vehicles may experience premature automatic shut off of the fuel fill nozzle. Several variables, including variations in fuel pump nozzles, fuel flow rates, and fuel flow pressure may result in the premature automatic shut off of the fuel fill nozzle making it more difficult to fill the fuel tank.
ACTION:
Follow the Service Procedure steps to correct the condition.
NOTE: THIS CONDITION MAY STILL OCCUR EVEN AFTER THE REPAIR BELOW IS COMPLETE. SOME FILLING STATION PUMPS MAY DELIVER FUEL AT A RATE GREATER THAN THE DEPARTMENT OF TRANSPORTATION (DOT) SPECIFICATION, OR MAY USE NOZZLE DESIGNS THAT ARE OVERLY SENSITIVE AND TEND TO SHUT OFF PREMATURELY. THIS IS NORMAL.
SERVICE PROCEDURE
.......
DEALER CODING
BASIC PART NO. CONDITION CODE
9D653 55
WOW dude ... thanks so much ... today I went to the pump again and put the nozzle in only 3/4s of the way and it filled up to the brim ... I think it will be ok ... but dude .... that is seriously impressive

sinned, let me know when you are planning to head down there
Last edited by stinksause; 02-06-2010 at 02:55 AM.