Holiday Pricing!!
#9
Installation is cake...
Remove OEM ****. You can do it like I did (by hand –make sure your hands are dry) or use a pliers (place a protective layer of some form over the stock **** as you don’t want to leave any marks –pet peeve).
1.Pull **** outward to remove. Try not to wiggle or push side wards.
2.Once **** is removed. Locate the D-ring that keeps it in place.
3.Place D – ring on new ****.
4.Once D ring is in place. Align D ring for installment. Press firmly (again no wiggling ) until **** is in place.
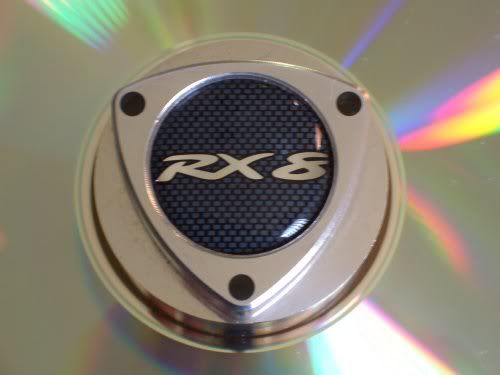
5.Place sticker on new ****. (You have 2 choices, Pettit or Rx8 logo.)
Mission accomplished.
-------------------------------------
I've had mine for 4+ months and I love it!
#10
Originally Posted by Rx8honey
Installation is cake...
Remove OEM ****. You can do it like I did (by hand –make sure your hands are dry) or use a pliers (place a protective layer of some form over the stock **** as you don’t want to leave any marks –pet peeve).
1.Pull **** outward to remove. Try not to wiggle or push side wards.
2.Once **** is removed. Locate the D-ring that keeps it in place.
3.Place D – ring on new ****.
4.Once D ring is in place. Align D ring for installment. Press firmly (again no wiggling ) until **** is in place.
5.Place sticker on new ****. (You have 2 choices, Pettit or Rx8 logo.)
Mission accomplished.
-------------------------------------
I've had mine for 4+ months and I love it!
Remove OEM ****. You can do it like I did (by hand –make sure your hands are dry) or use a pliers (place a protective layer of some form over the stock **** as you don’t want to leave any marks –pet peeve).
1.Pull **** outward to remove. Try not to wiggle or push side wards.
2.Once **** is removed. Locate the D-ring that keeps it in place.
3.Place D – ring on new ****.
4.Once D ring is in place. Align D ring for installment. Press firmly (again no wiggling ) until **** is in place.
5.Place sticker on new ****. (You have 2 choices, Pettit or Rx8 logo.)
Mission accomplished.
-------------------------------------
I've had mine for 4+ months and I love it!
Also, it looks like it lights up? You don't have to wire anything to power?
#12
Phantom Menace: Yes it does light up. It lights up when your headlights are on. No wiring required. The illumination from the lights that light up your CD player etc. luminates in 3 points on the ****.
PS: thanks for the compliment
PS: thanks for the compliment

#13
Originally Posted by Rx8honey
Phantom Menace: Yes it does light up. It lights up when your headlights are on. No wiring required. The illumination from the lights that light up your CD player etc. luminates in 3 points on the ****.
PS: thanks for the compliment
PS: thanks for the compliment

No, no....Thank you!

#25
just got mine and its great...only problem is i put the sticker on a little cockeyed and went to pull it off to reposition and ripped the pettit one in half...so now im using the rx-8 one...wanted to have the pettit one on there.


