Minc REW Build
#26
Registered
Thread Starter
I have been thinking through what to do about cooling for the car.
------------------
A/C: Maintaining stock Rx8 A/C system, ideally try to not touch the condenser or lines.
OIL: For the time being, I will maintain the stock oil coolers. However I need to do the inlet and outlet lines from the engine. Additionally I may need to do a remote oil filter. So preparing for the future, I will likely do an Improved racing filter and thermostat unit. Then I will just make my own adapter to the engine which could have oil temp and pressure sensors.
Heater Core: Since I plan on keeping the Heater Core I will have to keep these in mind when buying A/N fittings and lines for the Engine Cooling.
Throttle Body: I do not plan on keeping the coolant lines that run through the throttle body. Considering I will not be driving the car in the winter. Perhaps may keep this in mind if I make a manifold for the Heater Core connections.
--------------
Radiator and Intercooler setup: There are a few choices here to contemplate. Currently I am leaning towards option 3. I am already planning on going with a Davies Craig 150 unit. I am also waiting on an order from JDL manufacturing for his 13b EWP 16AN adapter/filler neck.
*For the below images the light blue is where I plan on placing the Air Intake Filter.
1. Traditional Air2Air where the bumper crash bar would be modified/removed to fit an intercooler up front. Downsides being potential poor engine cooling at higher boost, complex piping, lag.
2. V mount A2A, where I would tilt the radiator towards the rear of the car by 45deg. Then the intercooler would go from the top of the condenser to the top of the radiator. My main gripe with this setup is if one cooler is less restrictive and I see overtemps in the other system. Perhaps this could be mitigated by splitting up the airflow after the condenser or even before the condenser. Downsides being potential split airflow issues, engine bay clutter, under hood temps. EDIT: Note that the crossbar that holds the battery would likely have to be removed. In my images I mistakenly had drawn it too far back.
3. Rear Mount Radiator, A2A. Considering I am already doing an EWP system, relocating the rad to the trunk. The benefit to this would be to avoid airflow conflicts. The A2A intercooler could then be really any size and located to shorten/simplify the charge piping. Downsides of this are the weight balance change, cost of the longer lines, and ducting work.
4. Rear Mount W2A cooler. The condenser and engine radiator would remain in stock location, EWP in front somewhere. The W2A would sit either across the front of the engine or along the ECU box. Then the W2A cooler in the trunk would need its own EWP. Downsides being the high cost, weight addition, complexity, 2x EWP electric draw, ducting.
Here is a template if you want to doodle your own setup, I just used the snipping tool.
------------------
A/C: Maintaining stock Rx8 A/C system, ideally try to not touch the condenser or lines.
OIL: For the time being, I will maintain the stock oil coolers. However I need to do the inlet and outlet lines from the engine. Additionally I may need to do a remote oil filter. So preparing for the future, I will likely do an Improved racing filter and thermostat unit. Then I will just make my own adapter to the engine which could have oil temp and pressure sensors.
Heater Core: Since I plan on keeping the Heater Core I will have to keep these in mind when buying A/N fittings and lines for the Engine Cooling.
Throttle Body: I do not plan on keeping the coolant lines that run through the throttle body. Considering I will not be driving the car in the winter. Perhaps may keep this in mind if I make a manifold for the Heater Core connections.
--------------
Radiator and Intercooler setup: There are a few choices here to contemplate. Currently I am leaning towards option 3. I am already planning on going with a Davies Craig 150 unit. I am also waiting on an order from JDL manufacturing for his 13b EWP 16AN adapter/filler neck.
*For the below images the light blue is where I plan on placing the Air Intake Filter.
1. Traditional Air2Air where the bumper crash bar would be modified/removed to fit an intercooler up front. Downsides being potential poor engine cooling at higher boost, complex piping, lag.
Spoiler
Spoiler
Spoiler
Spoiler
Spoiler
Last edited by MincVinyl; 01-18-2023 at 03:57 PM.
#27
Registered
iTrader: (11)
I'm using the improved racing filter/thermostat combo and retained the stock oil coolers. I simply deleted the stock Rx8 oil temp thermostat in the oil coolers. I think it will work out well? No real time data.
I don't think you need coolant running through the thermostat. I just don't see that being an issue unless you live up north I guess.
As far as water cooling goes, I think A2A V mount is the way to go, at least that's what I've read. All of this discussion is so circumstantial. I considered A2A and its probably the best way but I'm a glutton for punishment and I want to see if I can get a stable well functioning A2W system. I plan on leaving the stock water pump in place. So that cuts down on the number of electronic water pumps. I'm going to have a large water reservoir in the trunk and I'm planning to place the W2A cooler in the front of the car, mounted to a custom crash bar and ducted from the front bumper. I have not decided where to place the pump but probably in the rear with large water reservoir.
I think I can keep the overall weight of the car down with other modifications that I've done. I hope to keep the weight about 3000lbs. I'm not building the car for any specific auto X or racing class however.
#28
Registered
Thread Starter
I'm using the improved racing filter/thermostat combo and retained the stock oil coolers. I simply deleted the stock Rx8 oil temp thermostat in the oil coolers. I think it will work out well? No real time data.
I don't think you need coolant running through the thermostat. I just don't see that being an issue unless you live up north I guess.
As far as water cooling goes, I think A2A V mount is the way to go, at least that's what I've read. All of this discussion is so circumstantial. I considered A2A and its probably the best way but I'm a glutton for punishment and I want to see if I can get a stable well functioning A2W system. I plan on leaving the stock water pump in place. So that cuts down on the number of electronic water pumps. I'm going to have a large water reservoir in the trunk and I'm planning to place the W2A cooler in the front of the car, mounted to a custom crash bar and ducted from the front bumper. I have not decided where to place the pump but probably in the rear with large water reservoir.
I think I can keep the overall weight of the car down with other modifications that I've done. I hope to keep the weight about 3000lbs. I'm not building the car for any specific auto X or racing class however.
I don't think you need coolant running through the thermostat. I just don't see that being an issue unless you live up north I guess.
As far as water cooling goes, I think A2A V mount is the way to go, at least that's what I've read. All of this discussion is so circumstantial. I considered A2A and its probably the best way but I'm a glutton for punishment and I want to see if I can get a stable well functioning A2W system. I plan on leaving the stock water pump in place. So that cuts down on the number of electronic water pumps. I'm going to have a large water reservoir in the trunk and I'm planning to place the W2A cooler in the front of the car, mounted to a custom crash bar and ducted from the front bumper. I have not decided where to place the pump but probably in the rear with large water reservoir.
I think I can keep the overall weight of the car down with other modifications that I've done. I hope to keep the weight about 3000lbs. I'm not building the car for any specific auto X or racing class however.
I do live up north and have had a throttlebody freeze up on me before, but this car wont see the cold much anyways.
This weekend I am either going to spend time re-powdercoating my brake calipers, or dropping the subframe to be cleaned up. If I have time I will play around with the radiator and see what I can get away with for a v-mount.
EDIT: Oh also I sent an email to Nicon Rotary and apparently he has a way to still take orders through his distributor in the US. I am hoping to get the oil pan as it is one of the last things I need for the engine to get in the car.
The following users liked this post:
RotaryMachineRx (01-13-2023)
#29
No respecter of malarkey
iTrader: (25)
probably because having the fins straightened and internals ultrasonically cleaned costs less. Mine came back looking like new. Plus those SS lines are really heavy, but clearly the OE lines are not the best against corrosion. My preference is Amarid/Kevlar braided hose.
there’s nothing wrong with the OE coolers once modified and setup as Warrior stated.
.
there’s nothing wrong with the OE coolers once modified and setup as Warrior stated.
.
Last edited by TeamRX8; 01-14-2023 at 01:45 PM.
#30
Instagram @slowpandemrx8
iTrader: (6)
I am also using the improved racing combo on my daily with mishimoto coolers. Honestly I am not sure why I have never seen more custom setups, considering how bad the fins are on most 50k+ mile coolers.
I do live up north and have had a throttlebody freeze up on me before, but this car wont see the cold much anyways.
This weekend I am either going to spend time re-powdercoating my brake calipers, or dropping the subframe to be cleaned up. If I have time I will play around with the radiator and see what I can get away with for a v-mount.
EDIT: Oh also I sent an email to Nicon Rotary and apparently he has a way to still take orders through his distributor in the US. I am hoping to get the oil pan as it is one of the last things I need for the engine to get in the car.
#31
Registered
Thread Starter
Yeah if you want to send me his details I will message him. I see one guy in florida that says he has them in stock, and he appears to be from the same part of Russia.
#32
Registered
Thread Starter
Well my packaged arrived from the motherland.
Other than the engine itself I will need a few seals and bolts to get it in the car
Here's a comparison of a few of the gaskets between atkins and my local mazda dealer
N3YA-10-427 Oil pan gasket Atkins $49.00(mazda $153.21)
9G4B-00-230 Engine Mount Bolts 6xAtkins $15 (Mazda $ 1.82)
N3A1-13-111C LIM engine Gasket Atkins $47.00(Mazda $ 57.62)
N3A1-13-112 UIM to LIM Gasket Atkins $17.25(Mazda $ 20.13)
N386-15-162 Water pump Gasket Atkins $5.50(Mazda $ 6.33)
N3A1-13-655 Throttle Body Gasket Atkins $24.75(Mazda $ 29.33)
N3A1-13-461 Exhaust Gaskets 2x Atkins $170(Mazda $220.20)
$520.8 +$10.92
+$20 shipping
I will say that there will be a considerable amount of weight added to the car. Even the crossbar and the oil pan feel beefy. I will try to remember to weigh whatever I can as I go.

Other than the engine itself I will need a few seals and bolts to get it in the car
Here's a comparison of a few of the gaskets between atkins and my local mazda dealer
N3YA-10-427 Oil pan gasket Atkins $49.00
9G4B-00-230 Engine Mount Bolts 6x
N3A1-13-111C LIM engine Gasket Atkins $47.00
N3A1-13-112 UIM to LIM Gasket Atkins $17.25
N386-15-162 Water pump Gasket Atkins $5.50
N3A1-13-655 Throttle Body Gasket Atkins $24.75
N3A1-13-461 Exhaust Gaskets 2x Atkins $170
$520.8 +$10.92
+$20 shipping
I will say that there will be a considerable amount of weight added to the car. Even the crossbar and the oil pan feel beefy. I will try to remember to weigh whatever I can as I go.

#35
Registered
Thread Starter
Another small update:
Shipment from JDL came in with:
-2x Walbro 450 intank surge tank >> so far kind of a pain to setup
-Rx8 S1 shifter Al bushing kit >> so far honestly no difference coming from a 130k mile transmission
-EWP adapter with filler neck >> still contemplating where to put the radiator.
-OMP blank off plate
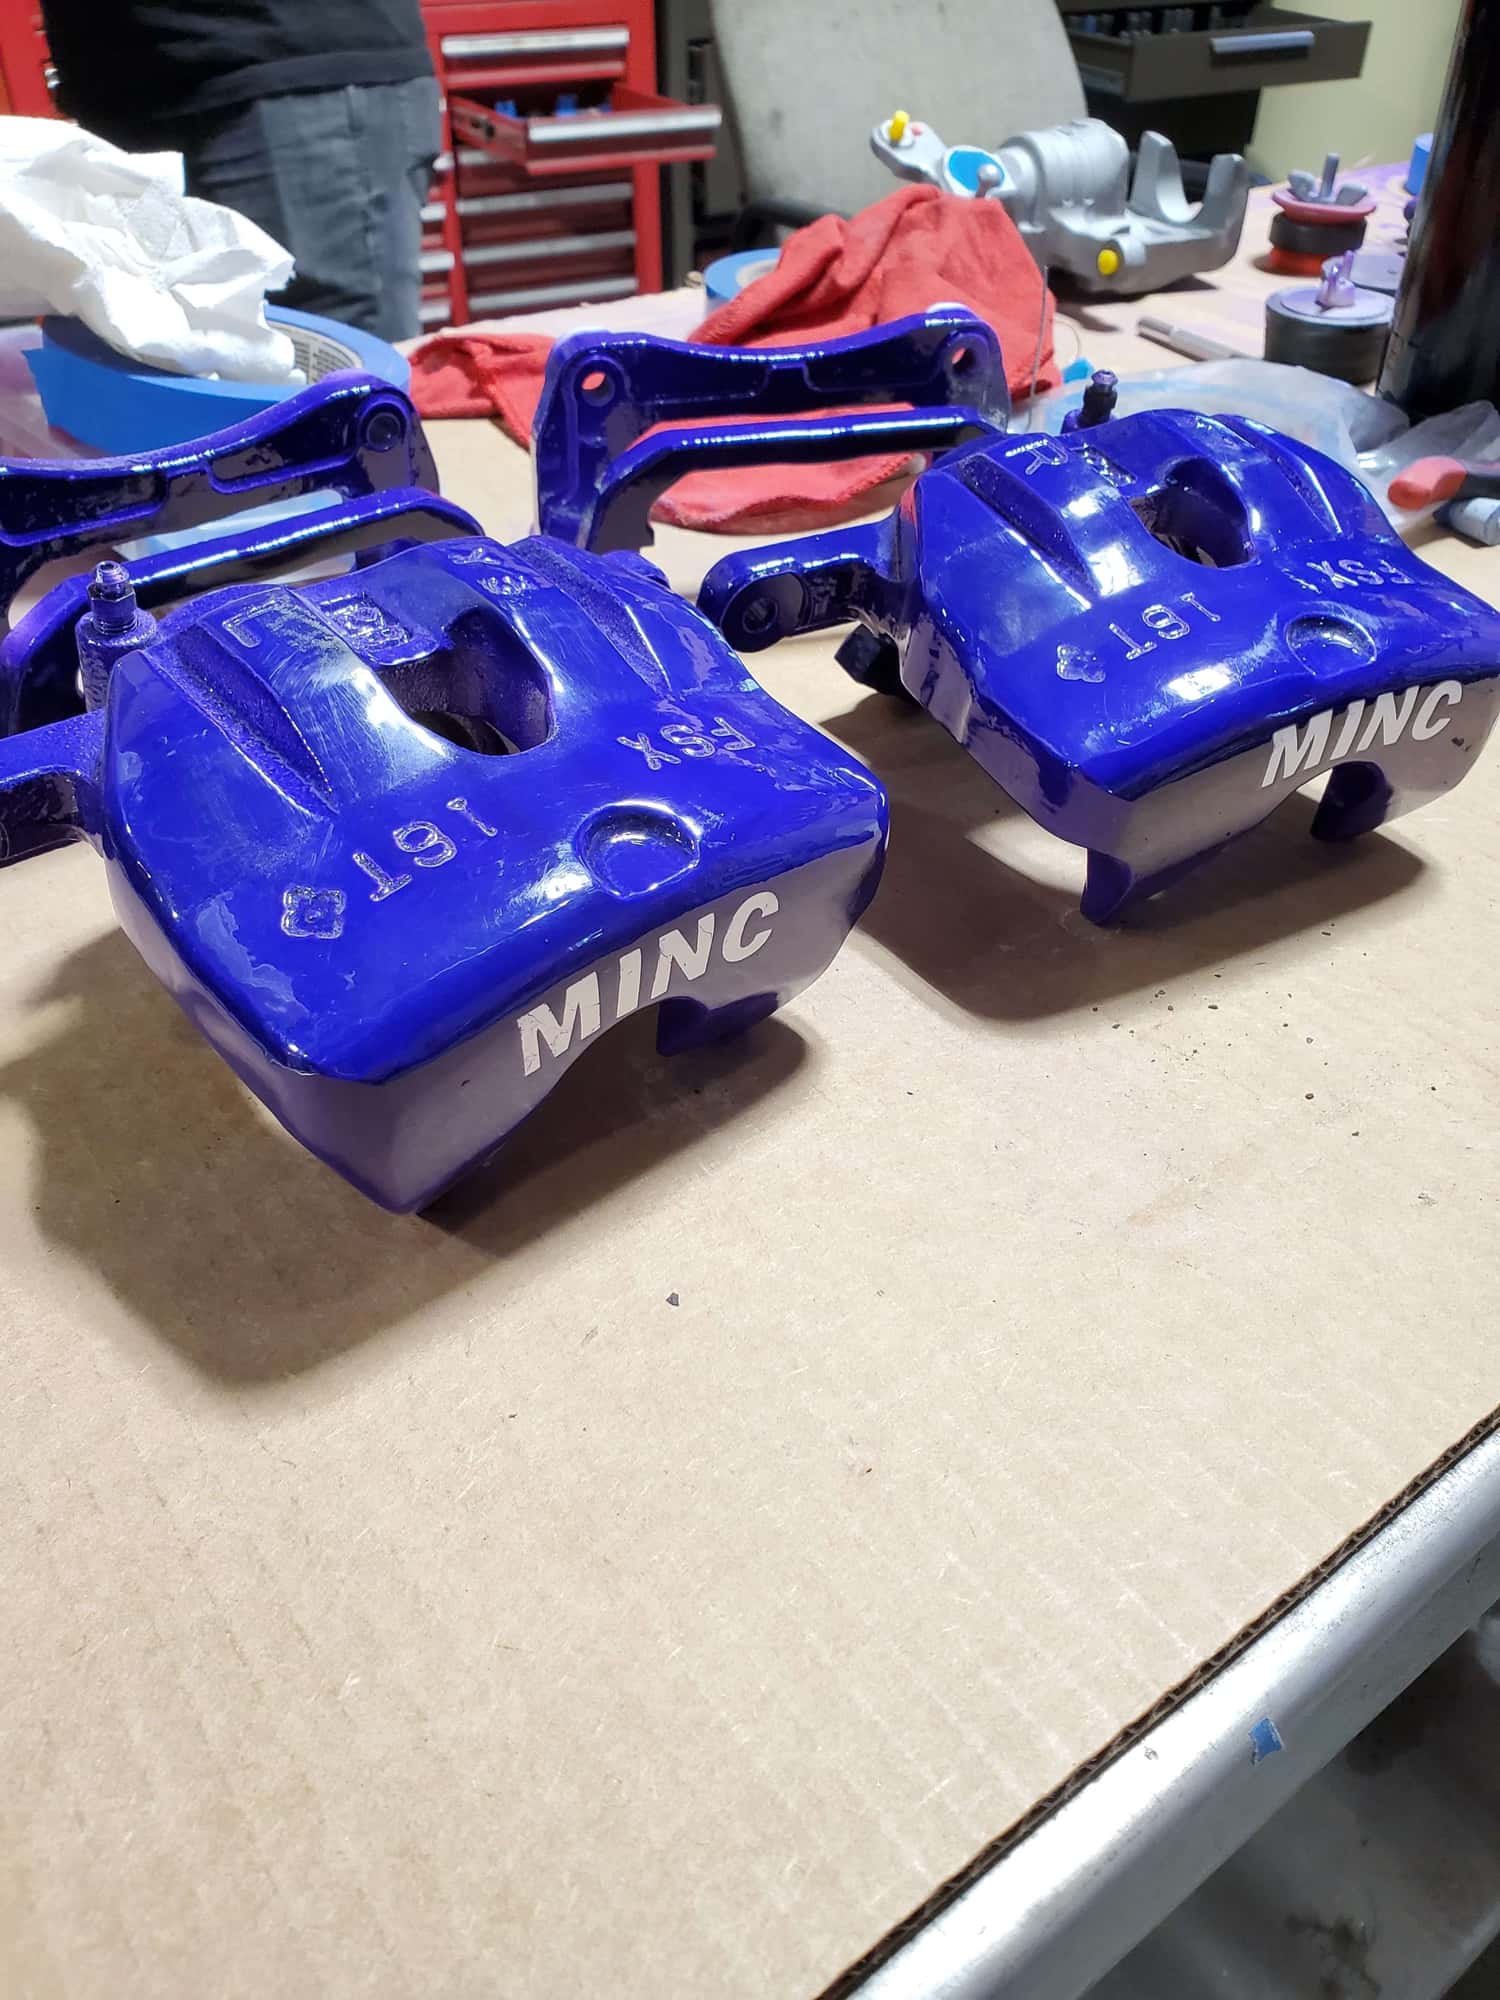
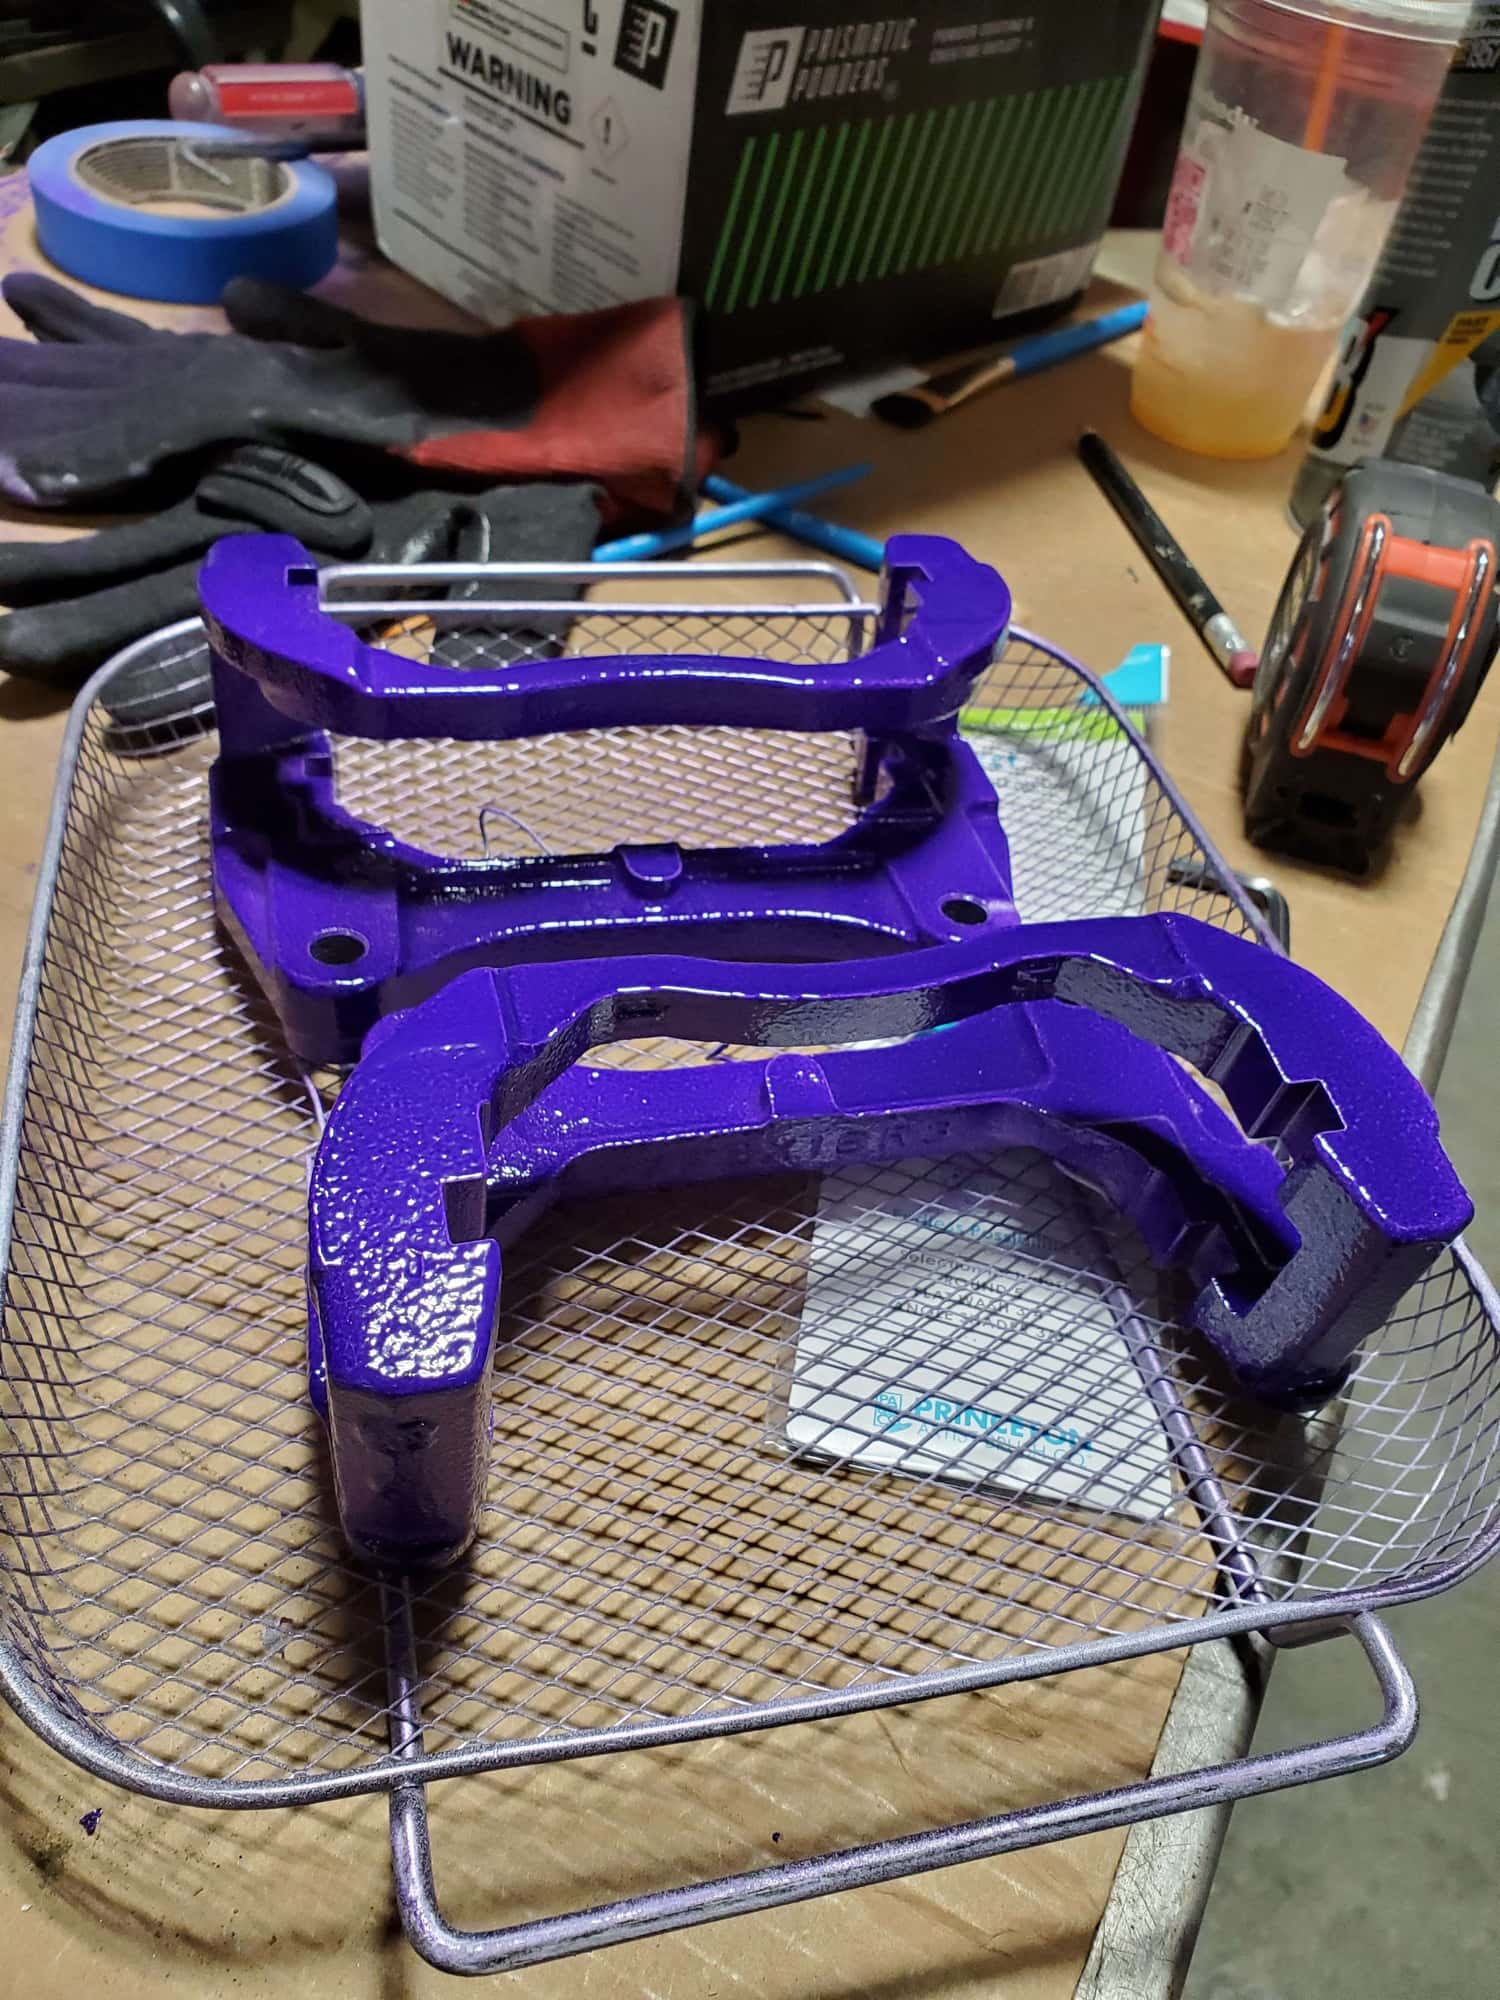
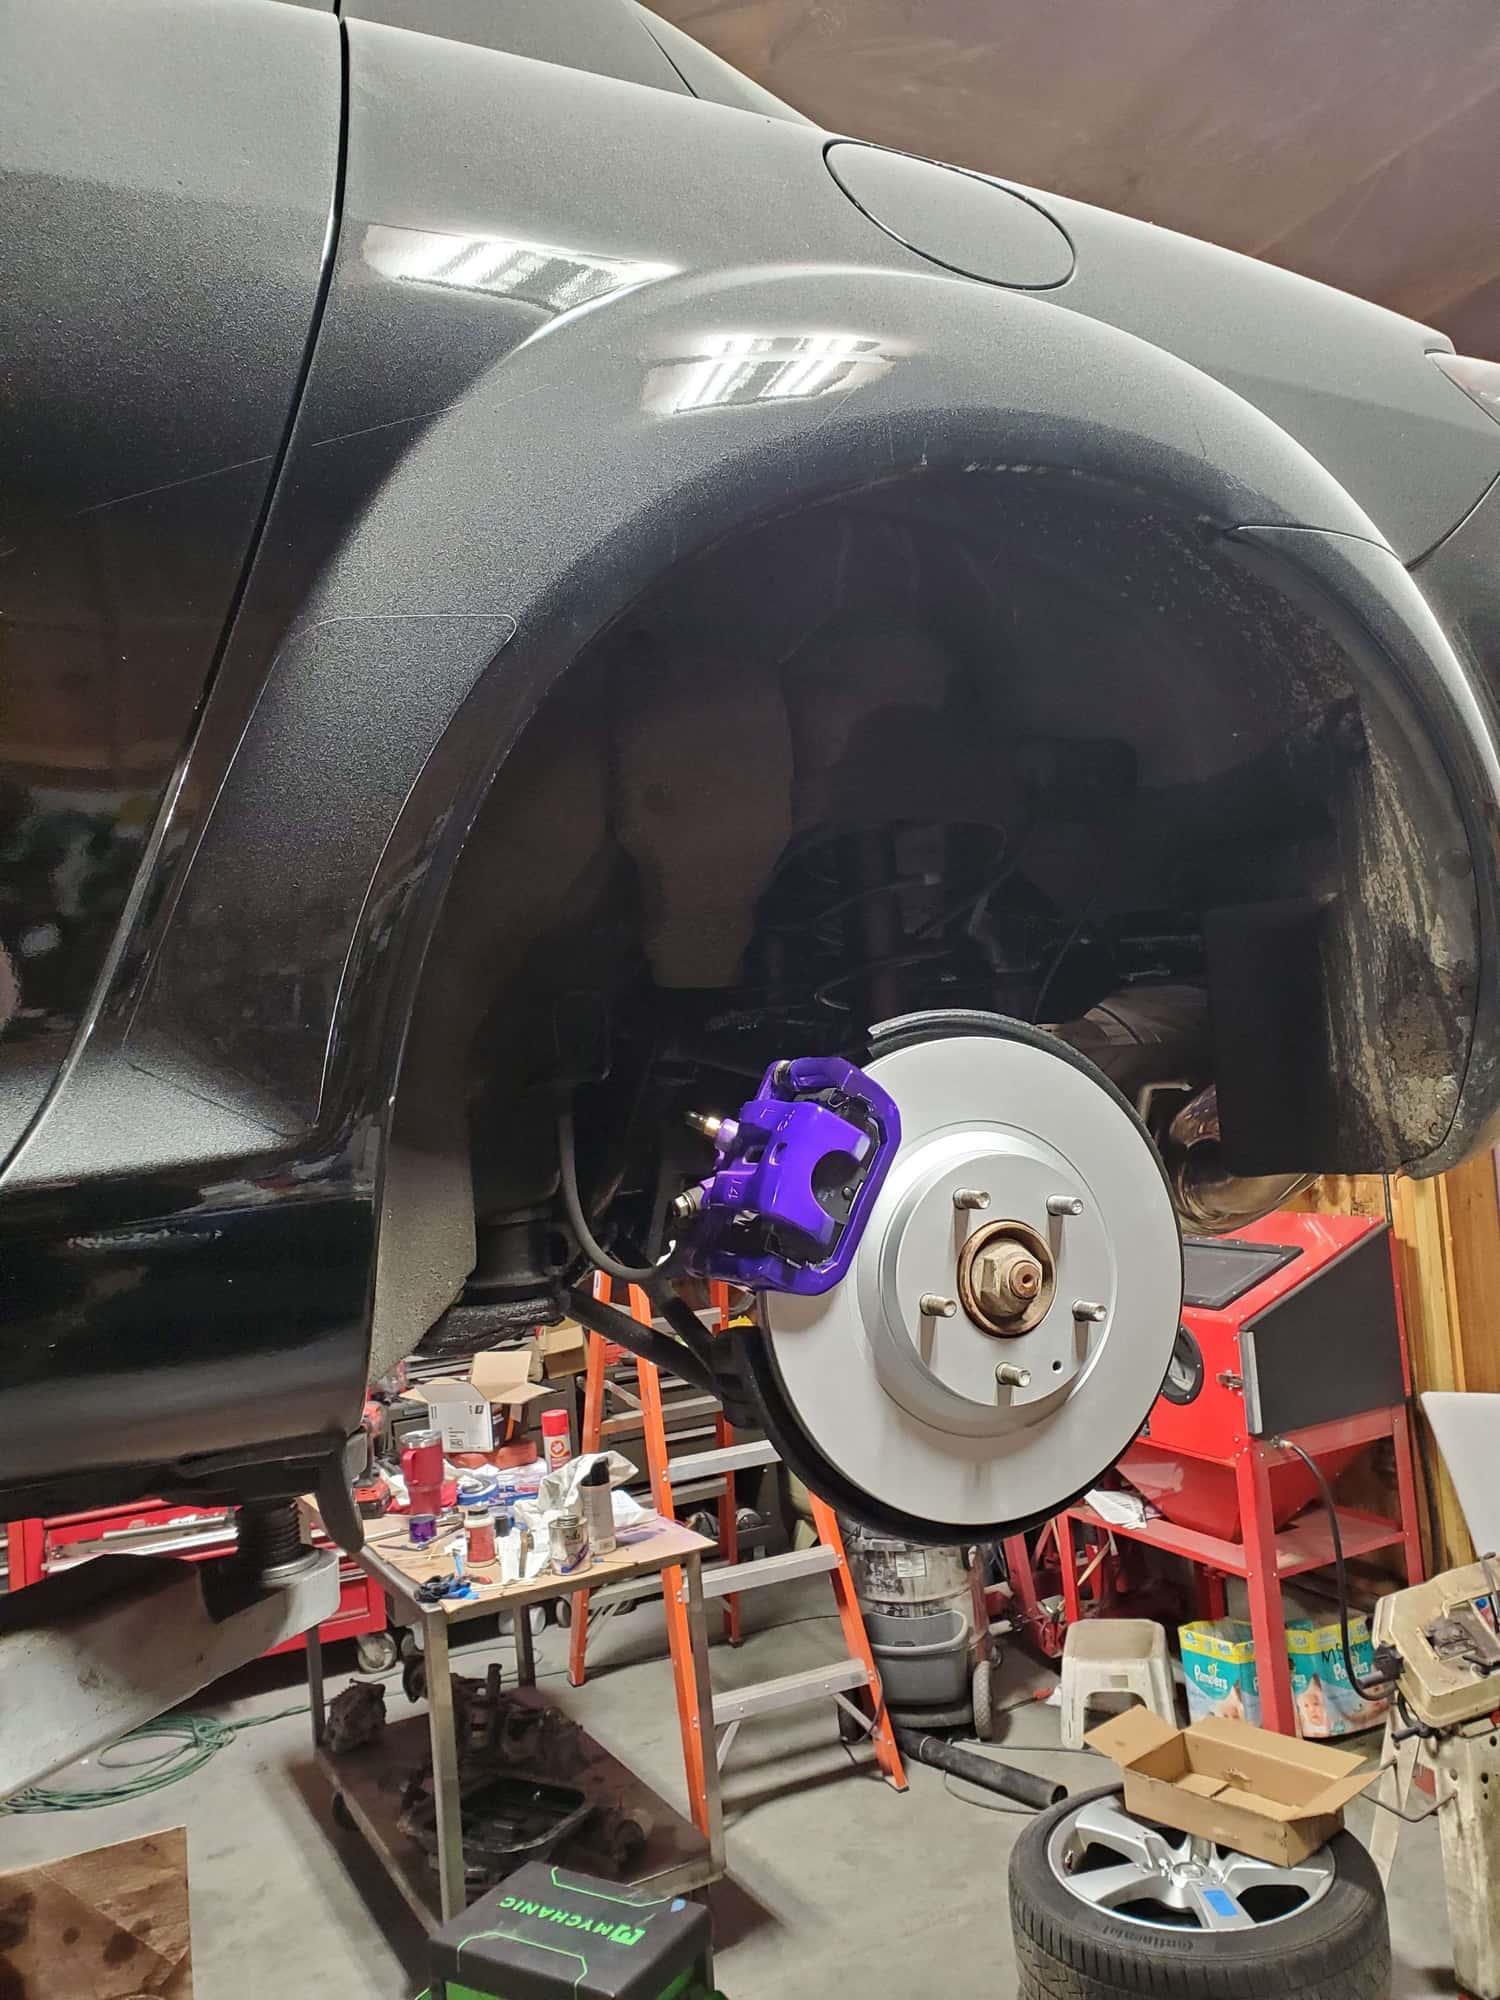
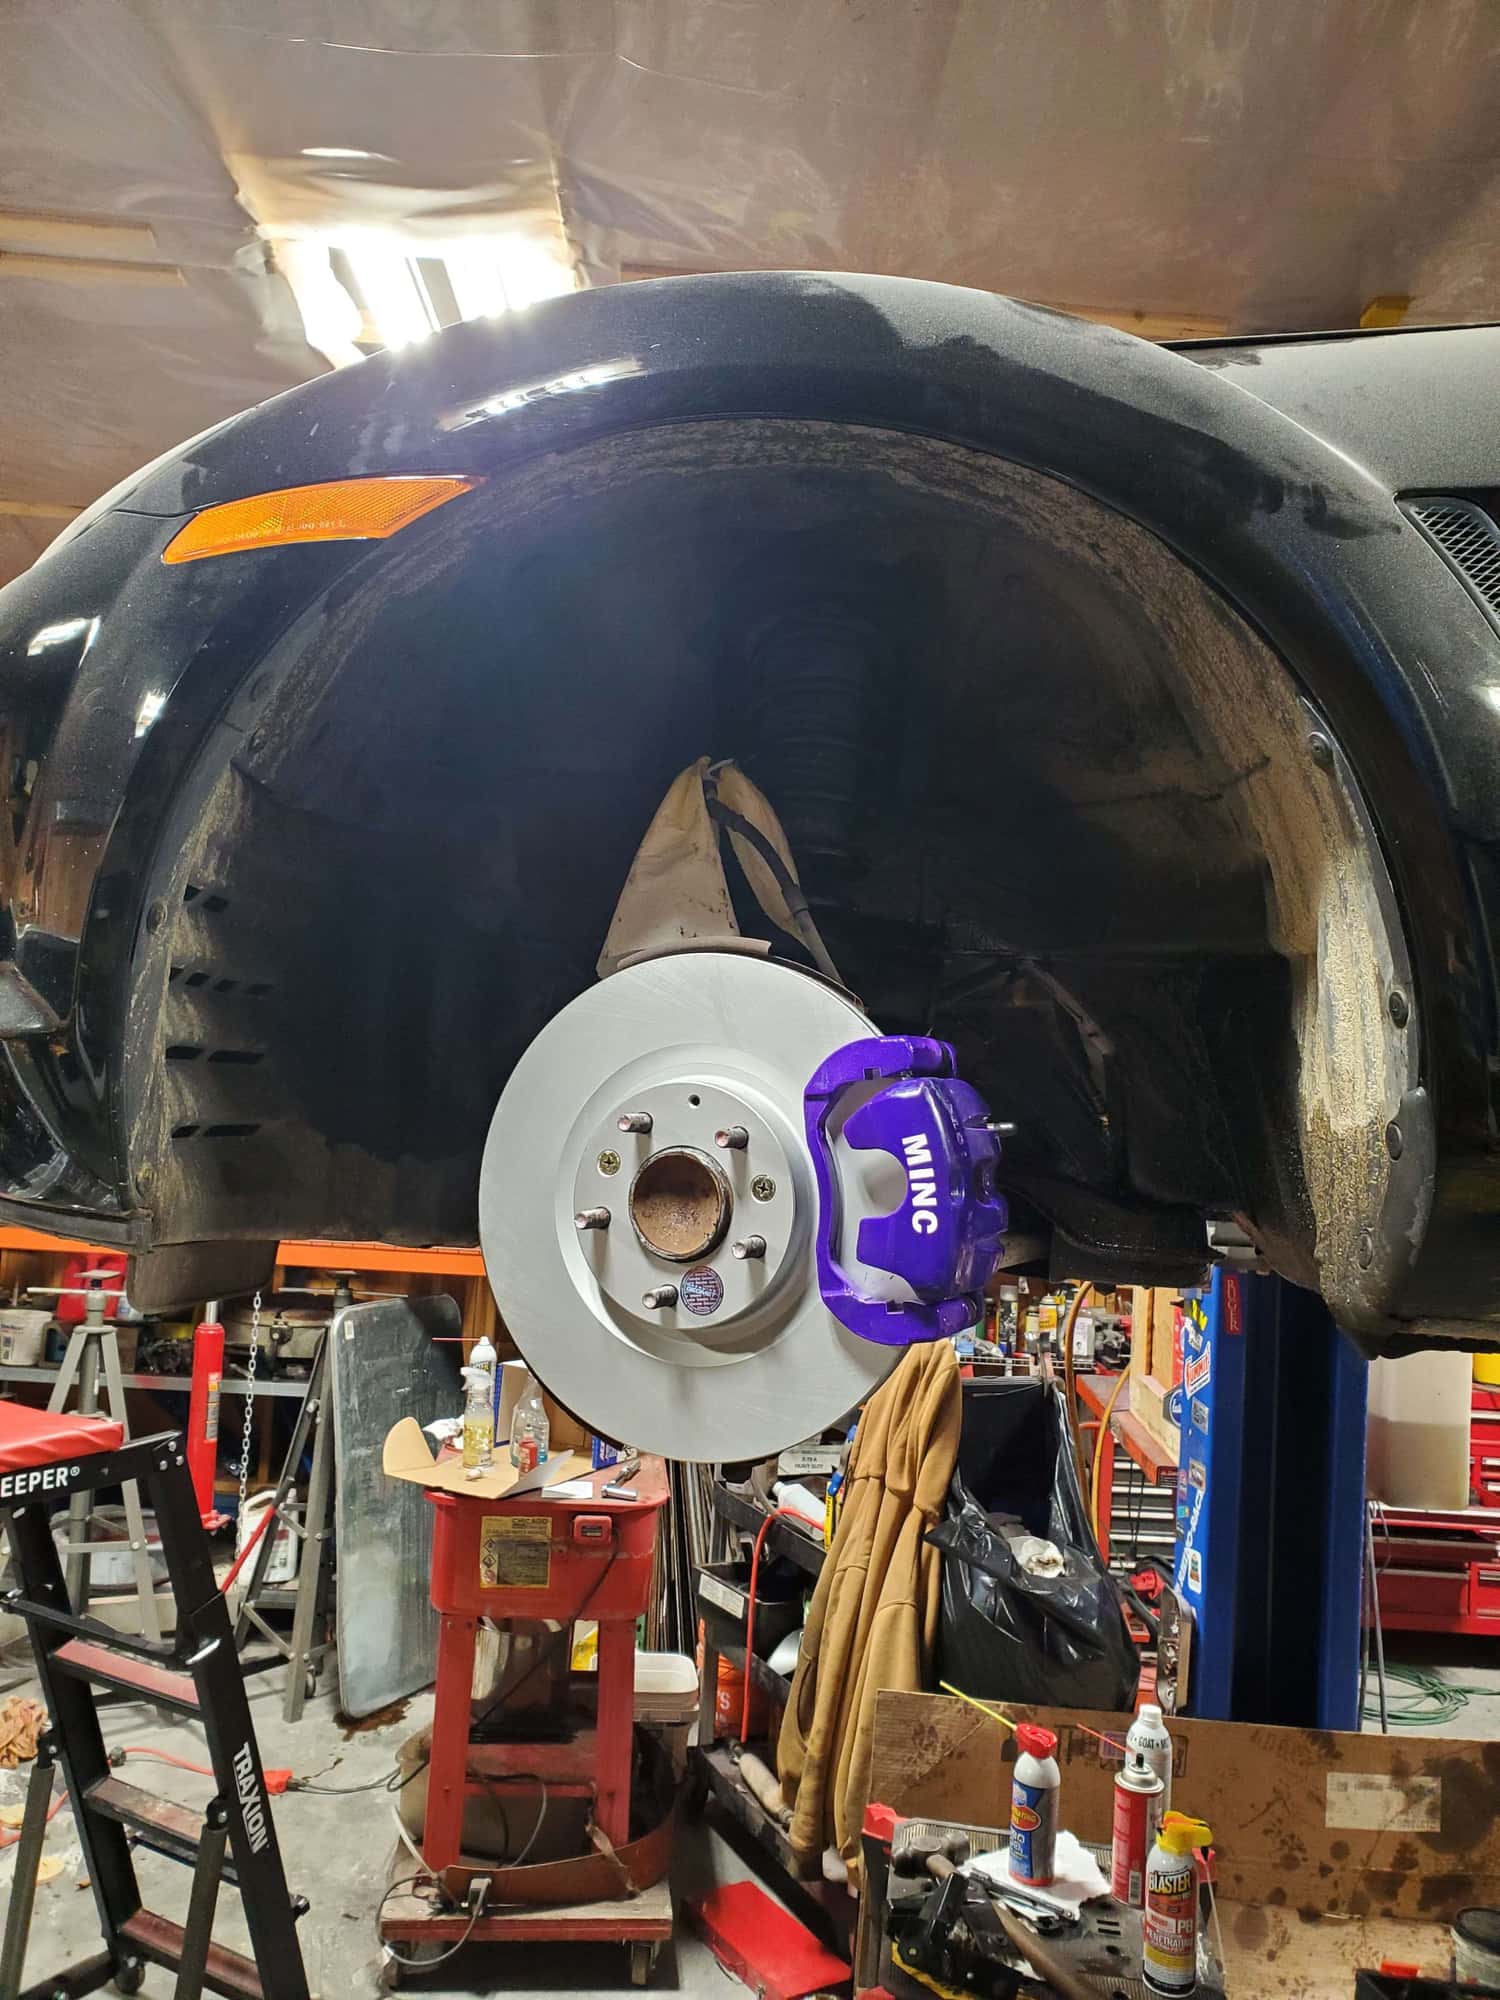
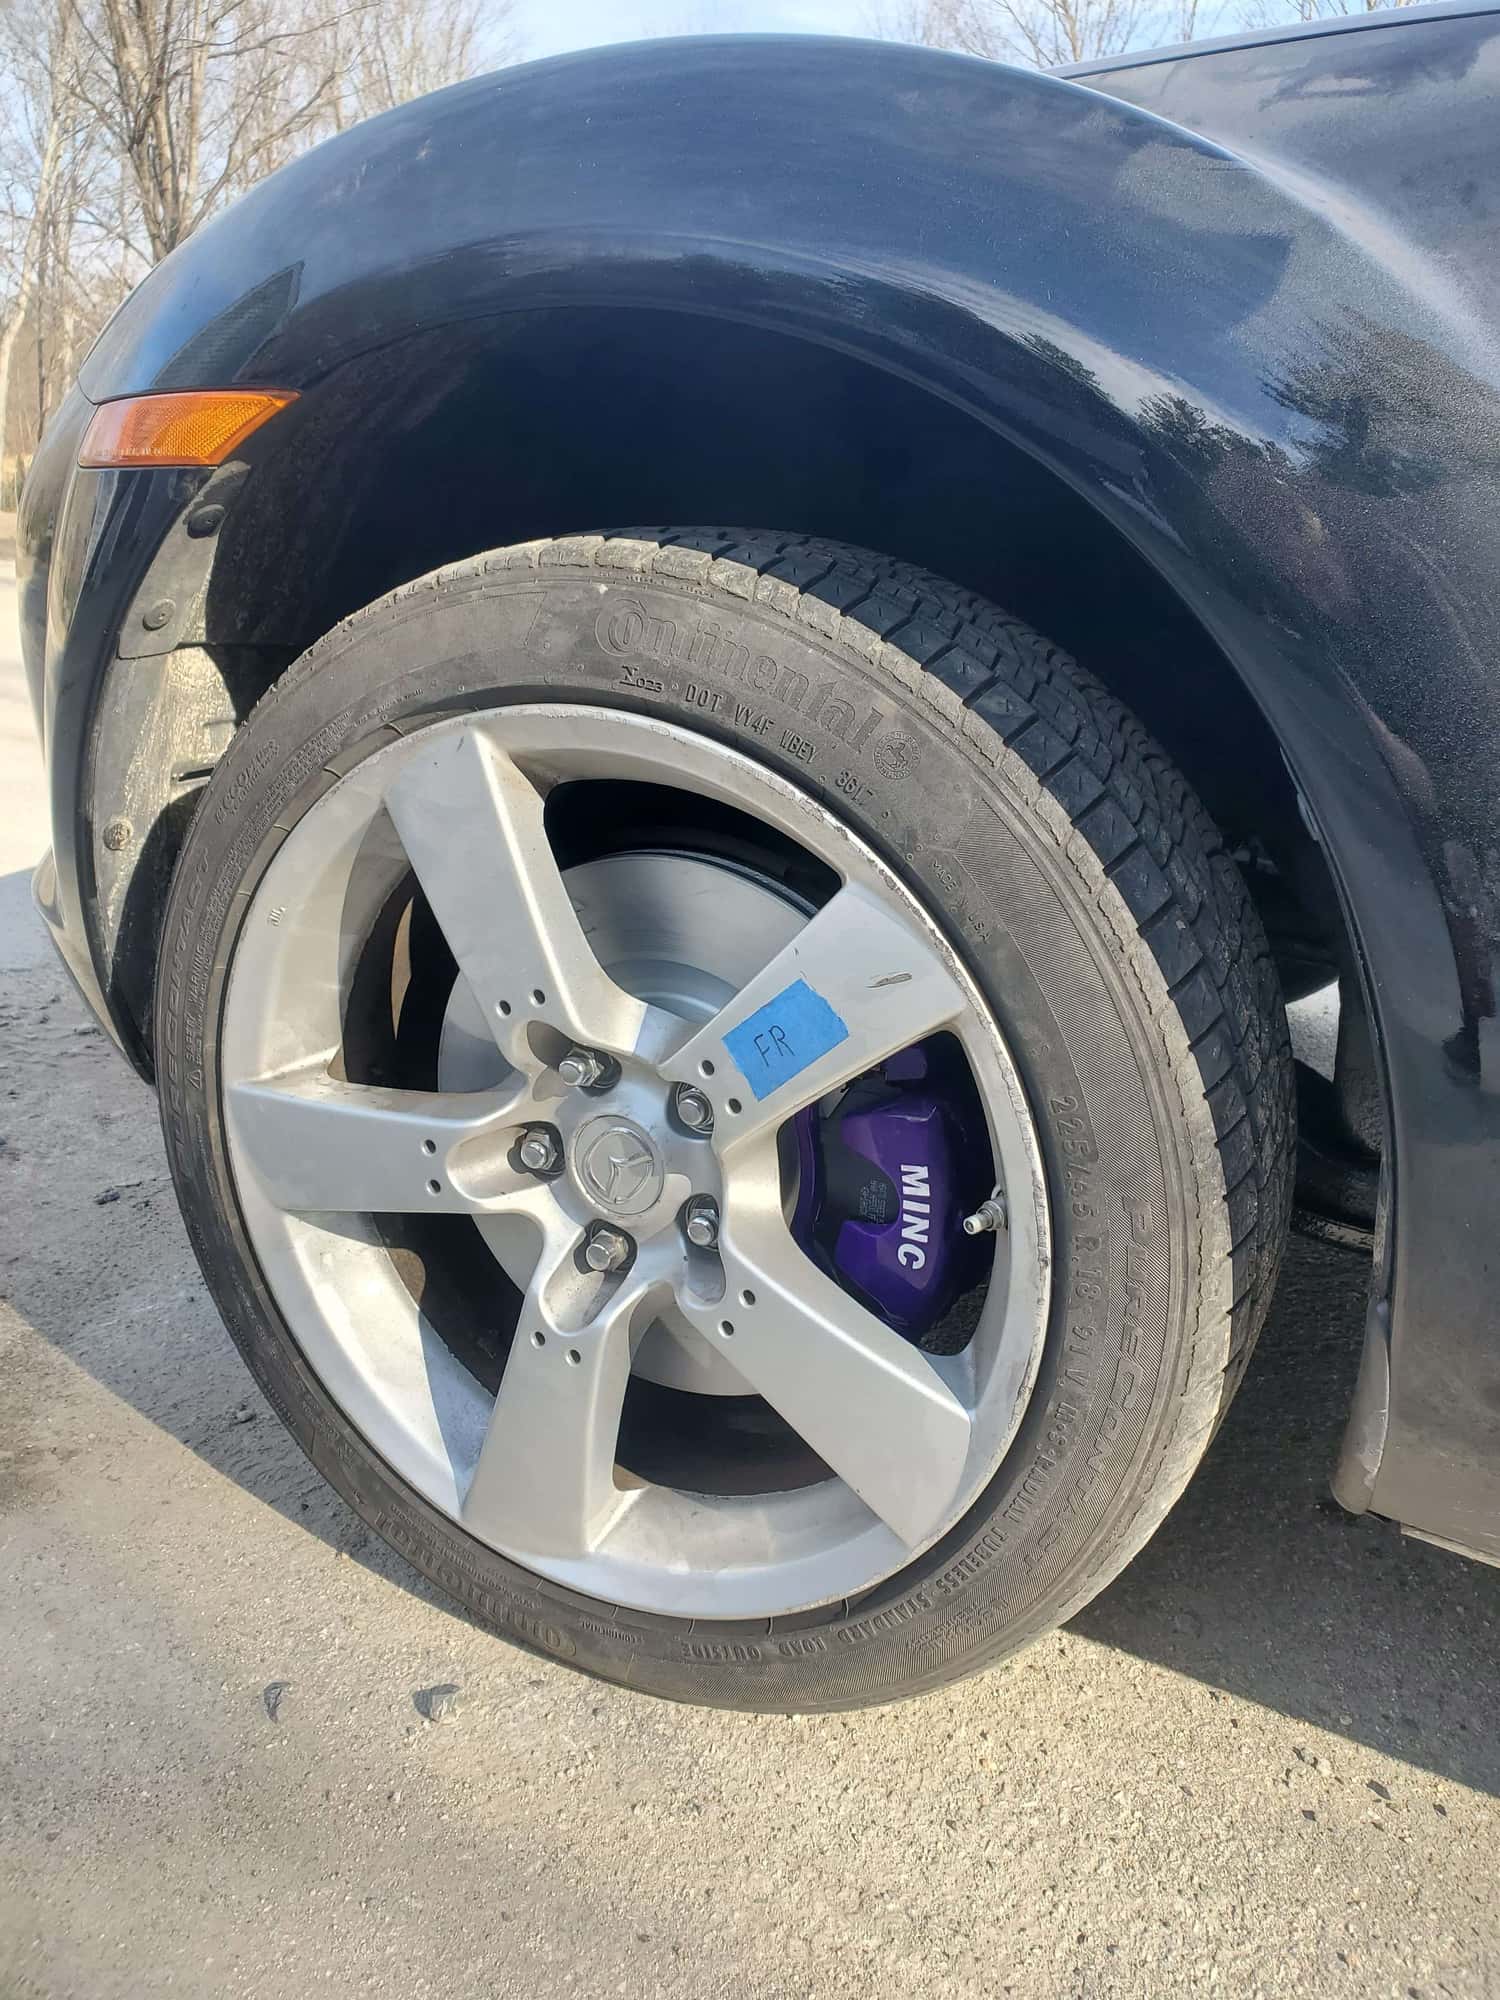
The brake system is back together, speed bleeders are a blessing. I had to cancel my order for stoptech rotors and brakelines due to never ending backorder and just got some powerstops. I will end up revisiting this at some point and probably go for wilwoods. For now brakes makes it easier to push the car around. See spoiler for my powdercoated calipers.
We spent quite a bit of time cleaning the barn.
-adding a 10x10 garage door to seal the heat in better
-added a tv so we can now throw youtube vids up from our phones.
-adding an old computer soon
-got our free oven up and running for powdercoating
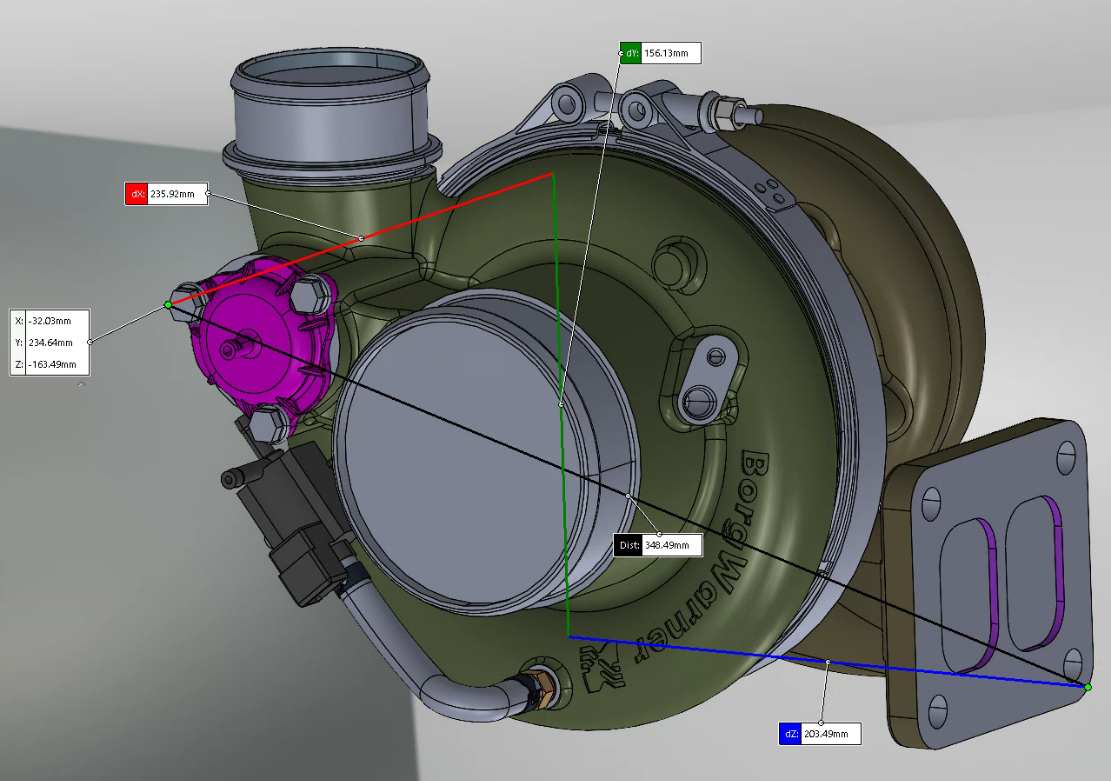
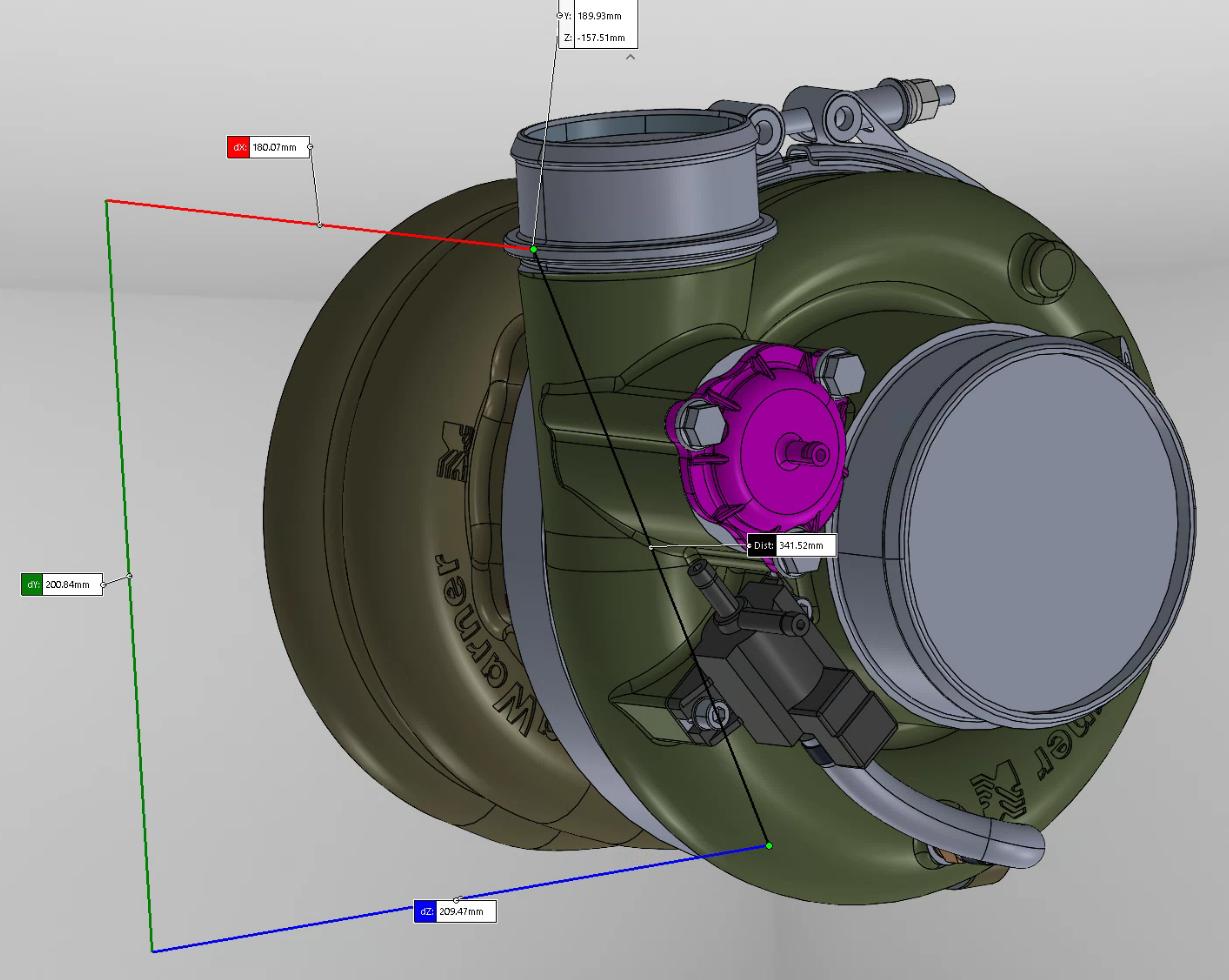
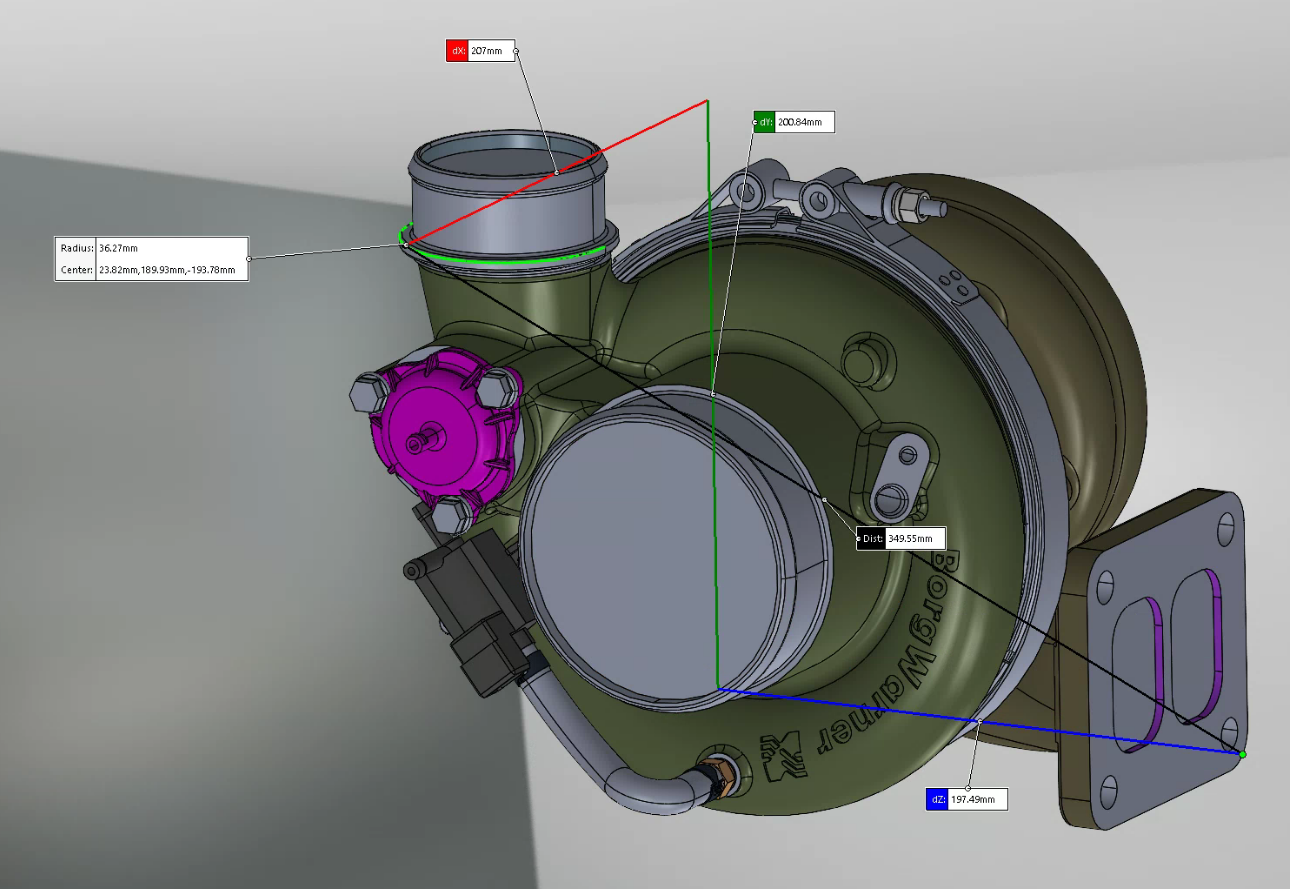
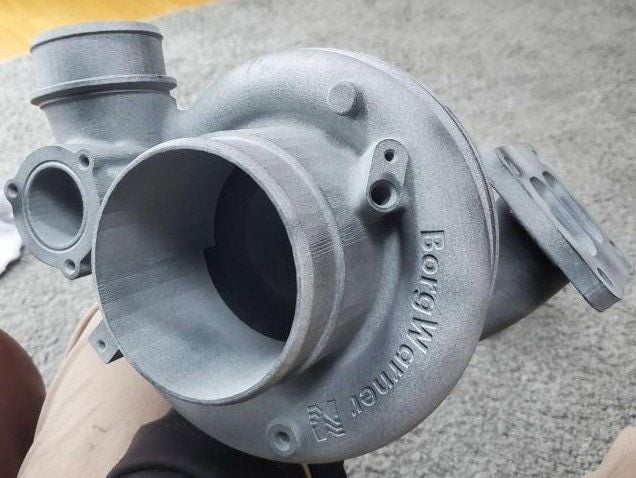
I talked with Full Race to get an update on my turbo situation. Apparently BorgWarner is giving them a vague timeline shooting for late June. However I had asked and got granted access to CAD files for the 8374-9280 turbo. I am allowed to share pictures, but not share the actual CAD. Since I wont have the turbo for a while I plan on printing the turbo in multiple pieces to use for fitment. Alternatively if I can scan my engine bay when the engine gets installed, I could just design my manifold then.

Shipment from JDL came in with:
-2x Walbro 450 intank surge tank >> so far kind of a pain to setup
-Rx8 S1 shifter Al bushing kit >> so far honestly no difference coming from a 130k mile transmission
-EWP adapter with filler neck >> still contemplating where to put the radiator.
-OMP blank off plate
The brake system is back together, speed bleeders are a blessing. I had to cancel my order for stoptech rotors and brakelines due to never ending backorder and just got some powerstops. I will end up revisiting this at some point and probably go for wilwoods. For now brakes makes it easier to push the car around. See spoiler for my powdercoated calipers.
Spoiler
We spent quite a bit of time cleaning the barn.
-adding a 10x10 garage door to seal the heat in better
-added a tv so we can now throw youtube vids up from our phones.
-adding an old computer soon
-got our free oven up and running for powdercoating
I talked with Full Race to get an update on my turbo situation. Apparently BorgWarner is giving them a vague timeline shooting for late June. However I had asked and got granted access to CAD files for the 8374-9280 turbo. I am allowed to share pictures, but not share the actual CAD. Since I wont have the turbo for a while I plan on printing the turbo in multiple pieces to use for fitment. Alternatively if I can scan my engine bay when the engine gets installed, I could just design my manifold then.

The following 3 users liked this post by MincVinyl:
#36
No respecter of malarkey
iTrader: (25)
can you confirm the dimension from the turbine flange to the furthest point directly opposite it across the shaft centerline (max width based on your 3D pic above, perpendicular to the mounting flange surface)? Probably the compressor housing, but might depend on which turbine. I never could find that anywhere.
thanks.
.
thanks.
.
The following users liked this post:
Warrior777 (02-28-2023)
#37
Instagram @slowpandemrx8
iTrader: (6)
Speed bleeders are an absolute must. I finally discovered them and will never go back lol.
Very cool stuff with the turbo cad! I didn't realize you had a 3D printer to print these parts. Hopefully it won't consume too much of your time.
Super pumped to receive my JDL Surge tank as well! Would love to see what is considered a "pain" for the install.
Very cool stuff with the turbo cad! I didn't realize you had a 3D printer to print these parts. Hopefully it won't consume too much of your time.
Super pumped to receive my JDL Surge tank as well! Would love to see what is considered a "pain" for the install.
The following users liked this post:
Warrior777 (02-28-2023)
#39
Instagram @slowpandemrx8
iTrader: (6)
Minc good stuff. Also just a small tip while working in Solidworks (you may know this already, but if not hopefully it helps) usually when I am looking for dimensions like this I would project a plane from the from the flange surface and make a coincident relation to the farthest point on the turbo (the compressor outlet flange as well as the BOV flange). Then measure that distance between planes.
The reason I say this is the dim from the compressor outlet flange is not at the furthest point between your last image and the previous image changed. Solidworks does wonky measurements like that while using the measuring tool if you're not careful, but the easiest controlled way I've experienced is using parallel planes and coincident relations.
Also Team, you will want to be looking at the dZ dim, the black is the compound dimension in 3D space, if you didn't figure that out already.
Cheers.
#40
Registered
Thread Starter
Thanks, I'll give that a go next time.
I should have noted that I chose a few different end points on the compressor incase he was looking for different measurements
I should have noted that I chose a few different end points on the compressor incase he was looking for different measurements
The following 2 users liked this post by MincVinyl:
Fickert (02-28-2023),
Warrior777 (02-28-2023)
The following users liked this post:
Warrior777 (02-28-2023)
#42
No respecter of malarkey
iTrader: (25)
the manufacturers wouldn’t agree maybe, not that they aren’t all being copied in complete entirety any way
my apology for not having thanked you for taking the time for those measurements, makes me realize how easy the Garrett G30 turbo will fit in comparison.
.
my apology for not having thanked you for taking the time for those measurements, makes me realize how easy the Garrett G30 turbo will fit in comparison.
.
#43
Registered
Thread Starter
Another update,
Soon to clean out the engine bay and get rid of the old radiator. My buddies Acty is up on the lift for the time being though.
Pics in spoiler below
- Apparently mazda is taking a while to fulfil orders for the irons, but Adam at REC is starting the build.
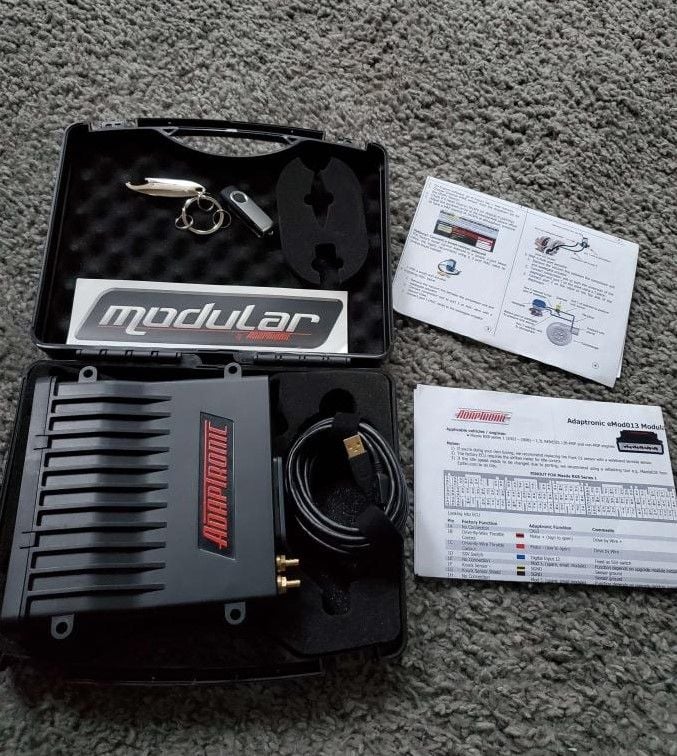
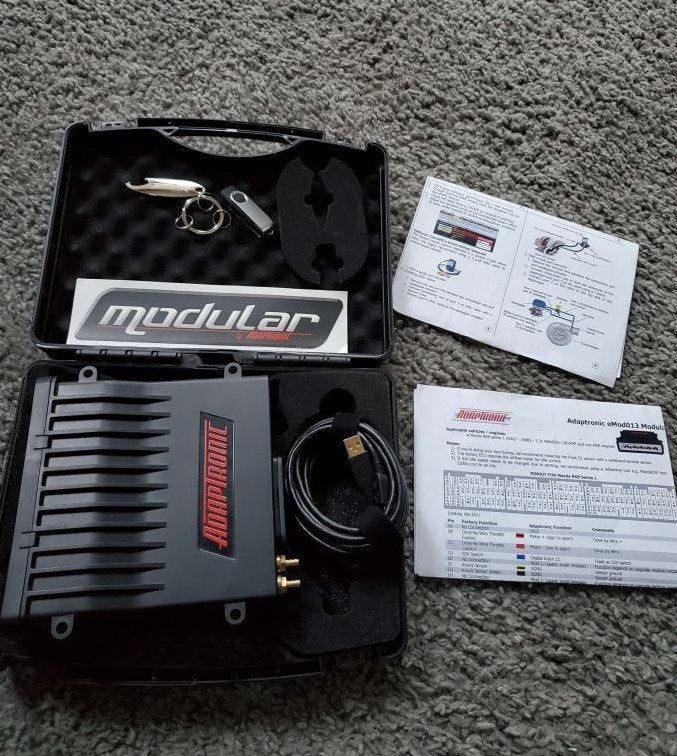
- I have obtained an adaptronic from Richie(LandspeedRx8). I am sure the Haltech route would have worked out, but for $800 the adaptronic is roughly half the cost of getting the haltech running.
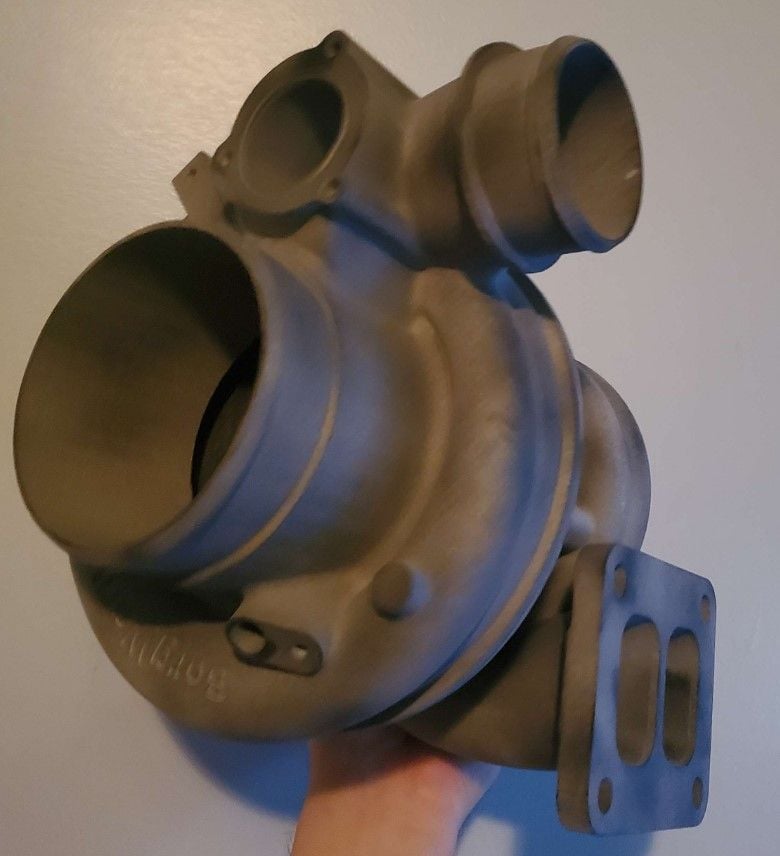
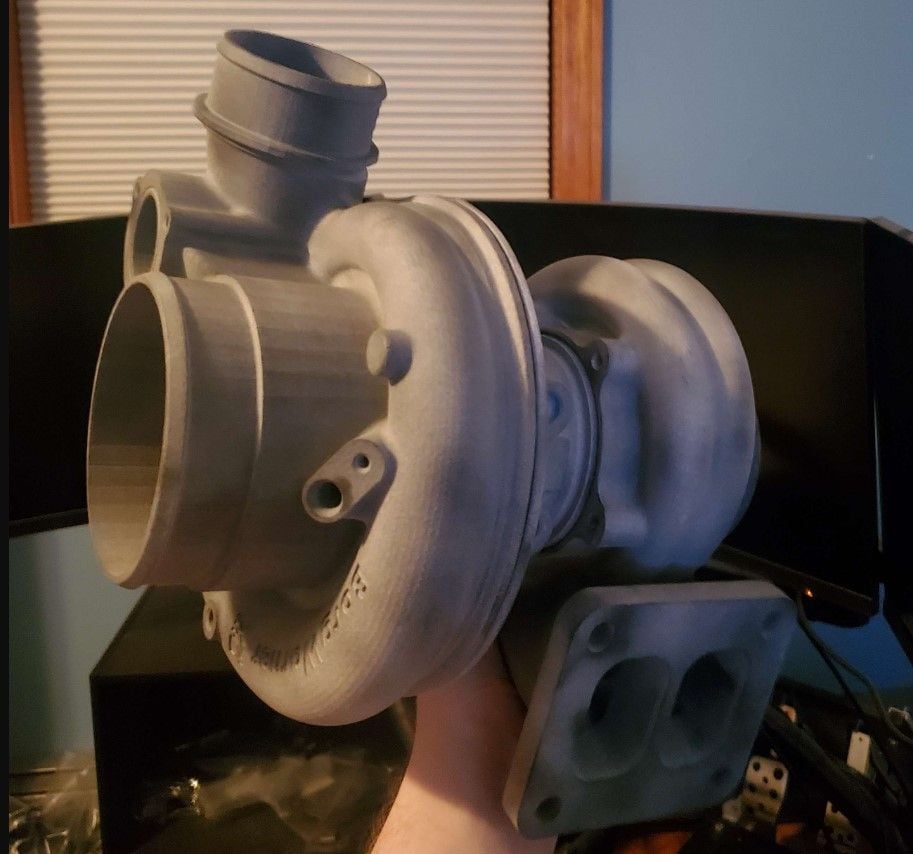
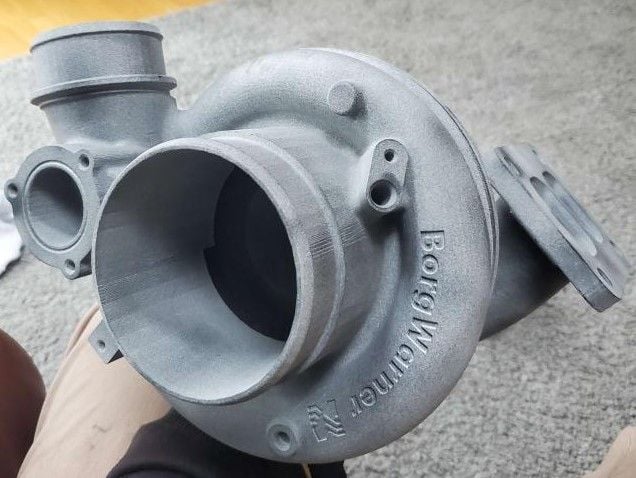
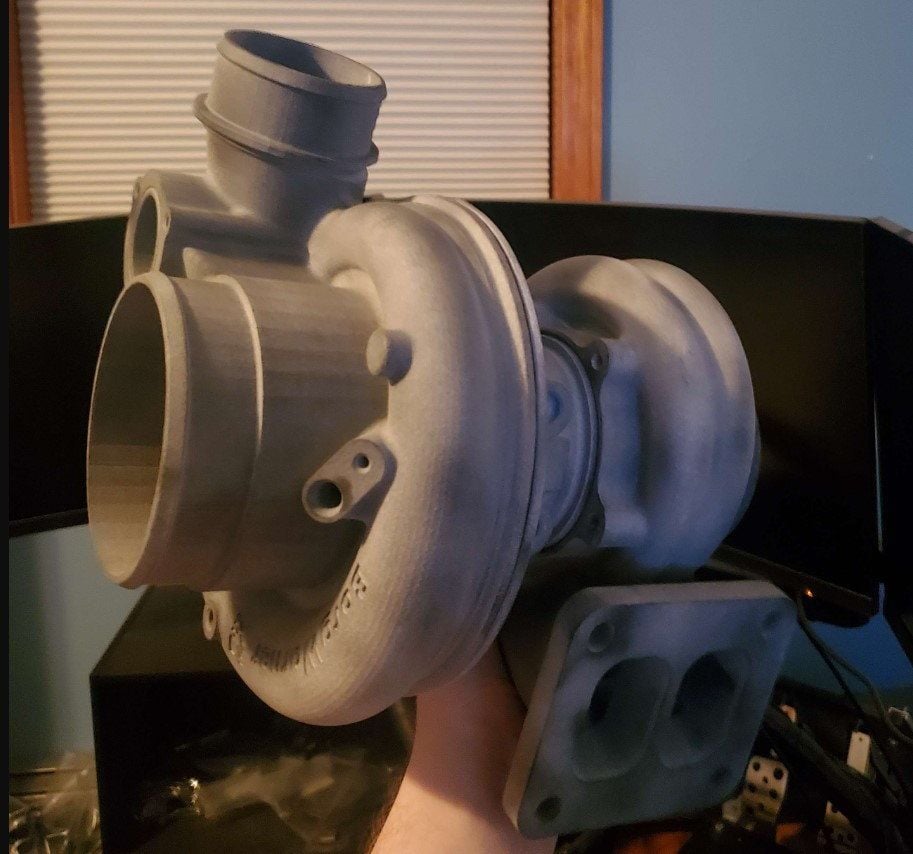
- The prototype fitment turbo print finished. I printed it in 4 parts from the files BorgWarner gave. For printing purposes I hollowed out as much as I could, solidworks had issues shelling which is why the internals are not correct. However the parts fit really well together and can fully rotate for positioning in the engine bay. This was printed on an HP multijet system in nylon.
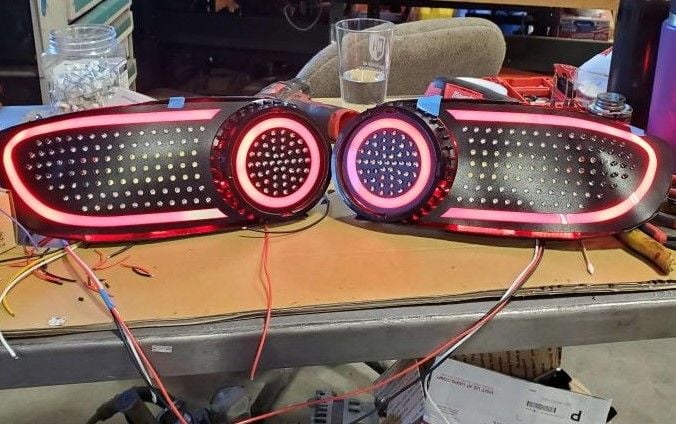
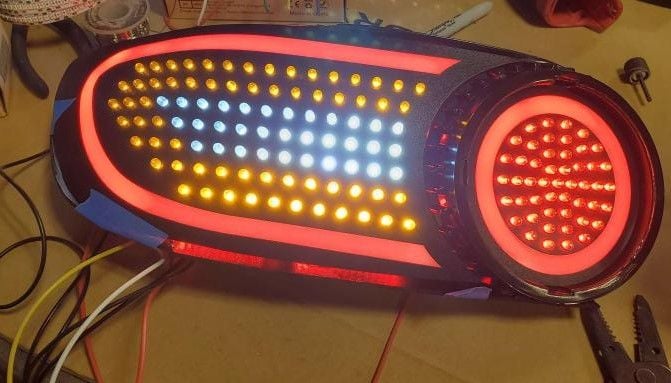
- My illumaesthetic LED tail light kit is coming together.
Soon to clean out the engine bay and get rid of the old radiator. My buddies Acty is up on the lift for the time being though.
Pics in spoiler below
Spoiler
The following users liked this post:
RotaryMachineRx (03-15-2023)
The following users liked this post:
Warrior777 (03-15-2023)
#45
SPOOLN8
iTrader: (1)
Join Date: Nov 2008
Location: Edmonton, Alberta, Canada
Posts: 2,229
Received 210 Likes
on
158 Posts
Looks good Minc, I'll be curious to see where you end up mounting that turbo and how your exhaust manifold shapes up. I'm assuming with water pump delete you will be top mounting it?
You'll appreciate what you get from Adam, he does good work and in a timely fashion. I just ordered all of my rebuild gaskets/seals from him yesterday and it was already dropped off at Canada Post last night and is in-transit to me today.
You'll appreciate what you get from Adam, he does good work and in a timely fashion. I just ordered all of my rebuild gaskets/seals from him yesterday and it was already dropped off at Canada Post last night and is in-transit to me today.
The following users liked this post:
Warrior777 (03-16-2023)
#47
Registered
Thread Starter
Team, do spoilers not work on the phone? My only reason for using them is to avoid pictures bloating the thread when people reply. If they do not work let me know.
I am going IWG, which sucks because they did not provide that file. I always go back to this build below which I believe was a 9180IWG. This manifold appears to have the flanges parallel, likely there will be a sweetspot where the actuator can be on the side of the subframe and the turbine will be above the subframe. Judging based on the flange and IWG arm, the actuator should be located between the two. Which it appears that there will be plenty of room. If anything the subframe can be modified.

I am going IWG, which sucks because they did not provide that file. I always go back to this build below which I believe was a 9180IWG. This manifold appears to have the flanges parallel, likely there will be a sweetspot where the actuator can be on the side of the subframe and the turbine will be above the subframe. Judging based on the flange and IWG arm, the actuator should be located between the two. Which it appears that there will be plenty of room. If anything the subframe can be modified.

The following users liked this post:
Warrior777 (03-16-2023)
#48
No respecter of malarkey
iTrader: (25)
it doesn’t work on my iPwn; I have to reply and look at it in the reply box to see the pictures.
A build thread is all about pics. Stop making a deal out of it and just post them up already. I get what you’re saying about people going full-tard on copy-replies though.
That’s why I asked. I’m working on the manifold to accomplish that now; perfectly centered and equal length. As currently configured; will be just under 3” wide from flange face to flange face. How much to rent the turbo mockup? I feel like it will go in there fine based on other things I’ve seen, but can’t be 100% sure until trying it. I have the IWG actuator, but not the mounting plate for a B2 frame turbine. Still should be able tell just be holding in the correct place by hand.
.
A build thread is all about pics. Stop making a deal out of it and just post them up already.
 I get what you’re saying about people going full-tard on copy-replies though.
That’s why I asked. I’m working on the manifold to accomplish that now; perfectly centered and equal length. As currently configured; will be just under 3” wide from flange face to flange face. How much to rent the turbo mockup?
 I feel like it will go in there fine based on other things I’ve seen, but can’t be 100% sure until trying it. I have the IWG actuator, but not the mounting plate for a B2 frame turbine. Still should be able tell just be holding in the correct place by hand.
.
Last edited by TeamRX8; 03-15-2023 at 08:20 PM.
#49
Registered
Thread Starter
Noted, I can avoid using spoilers unless there is extra filler projects.
I was only told to not share the cad, but they never said anything about sharing the test piece. I may also be able to print a second one once we get an opening at work if you'd be willing to send it on a round trip.
I was only told to not share the cad, but they never said anything about sharing the test piece. I may also be able to print a second one once we get an opening at work if you'd be willing to send it on a round trip.
Last edited by MincVinyl; 03-15-2023 at 09:32 PM.
#50
No respecter of malarkey
iTrader: (25)
that’d be helpful
I don’t have any problem sending it back if that’s what you’re intending by “round trip”. I’m even willing to pay a rental/service fee. The reason I asked is because it’s not for me; I’ll be using a smaller turbo and it should definitely fit. It’s for another forum member and he’s on the long backorder list waiting for an EFR8374 IWG. Otherwise we’d have the turbo itself and just use the real thing.
I saw a simple/crude mockup kit being sold that tries to generically do the same thing, but the sizes don’t match up well. I had considered buying one and then having the appropriate parts laser cut for a more accurate check
https://www.speedwaymotors.com/Mock-...ge,487371.html
obviously your’s is better in every regard though. I was surprised by how real it appears to be.
.


