When you click on links to various merchants on this site and make a purchase, this can result in this site earning a commission. Affiliate programs and affiliations include, but are not limited to, the eBay Partner Network.
Commend you on a very clean looking install so far, well done, can't wait to see it rip. I'm hoping to have my car back on the road in the next 2 weeks here but it's not the first time I've said that
Team no worries and thanks. yes I would like to find a hood vent that I like and vent it that way. Might buy a cheap used hood to put what ever vents in it and just for practice as well. Rotary machine rx thank you very much that had been one of my main goals is to make it look clean and properly installed. Me too so excited to drive it again. Haha yeah that�s how it usually goes.
My plan is to box in the IC discharge path up through to the hood opening with some escalating-height louver-fins at the top to assist drawing air through it. Here he just bent the FD hood down left it open for the entire engine bay to vent out.
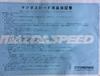
Hello everyone just a quick question and update. Officially v mounted got the radiator in took a lot of custom fab and test fitting unfortunately I only have pictures of the new cross member that I made will get picks of the rad soon. Almost all coolant lines ran as well. Was a bit of a pita to get return line for the coolant on the turbo but it�s on. So question I have I�m going remote oil filter and running factory rx8 oil coolers so the question is how do you run the lines from the oil pedestal to filter to coolers (in series) then back to front cover or vis versa pedestal to oil coolers to filter to front cover or does it not matter. I was thinking coolers first then filter just so it�s filtered right before going into the engine. Thanks for the input much appreciated. Also if anyone knows the thread size of the oil return bung in the front cover let me know that would be great 👍 thanks again last picture is referring to the oil return
If I understood correctly, the engine oil flow path from Mazda is pressurized oil discharges from from the lower front driver/LH corner of the engine, to the driver/LH side cooler, discharging from that cooler over to the inlet on the passenger/RH cooler inlet, and then discharging from the far cooler back to the upper top driver/LH corner of the rear iron to feed the engine. Mazda puts the filter after the coolers, but I've seen it done before the coolers plenty, including on the remote t-stat/filter assy I purchased in the link below. The argument for mounting it before is preventing any debris from an engine failure from getting to the coolers.
I would personally recommend removing the factory t-stats from the OE coolers, blocking the t-stat port, and using a combination remote t-stat/filter assembly similar to the one linked below.
The inlet & outlet connections for both the oil coolers and remote filter are critical to get correct. You can't just plumb it any way you want and need to be sure to get those right.
The way Team is laying this out is correct. Believe me I've done lots of reading into this because that's how my first engine failed (shop plumbed a remote oil filter in backwards). I mounted a remote filter just in front of my spark plugs on the bottom of the block; this gives you easy access to remove the filter from under the car while you are draining the oil pan. So my oil path is identical to stock, From LH engine outlet, to oil coolers as mentioned by Team above, back to filter mounted on LH side of engine, then up to the factory oil pedestal where I have an adapter with a -10AN fitting on it. Don't mind the Fram oil filter, it was temporary haha.
forgot to mention that all of the banjo bolt oil cooler line connections are M18x1.5 thread, most people adapt that to 10AN fittings and same size hoses.
here is the OE oil cooler line & system as was previously described
Thanks guys I appreciate it so I think I just had It backwards but makes sense since the front cover would be the output from the oil pump. Got it now thanks again. Yeah I did a little reading and figured out the front cover was 18x1.5 so just ordered the fitting for that otherwise already have all the -10 fittings for everything else. Just working on getting the bracket for the oil filter mounted right now then running oil lines have everything for the line just have to make them. Mounting the filter down by the spark plugs as well off the subframe. Also got the oil filler in pics of that. Got some pics of the radiator now that's it's back in sorry lots of pics.
Haha yeah I actually got the idea for the elbow to Bhr adapter from your build max. I really loved how clean it looks and was honestly just a great idea puts the throttle body in almost the factory position. So thanks for the inspiration hope your not mad that I copied it
If you're copying Max then you're likely safe and not going down the wrong path at all; MaD666MaX is another member here that imo hasn't received the credit due for what he's accomplished and shared with us in his thread.
.
Oil filter mounted. 50% of oil lines ran the ones from cooler 1 to cooler 2 and from cooler 2 to the input of oil filter. Need front cover to cooler 1 waiting on fitting and from filter to oil pedestal. Also got my gauges wired back up oil pressure oil temp and water temp plan on adding more gauges for boost afr and fuel pressure but already had the first three from the reny engine so was easy enough to get those pre wired up.
Unfortunately no. Been on the back burner for the past few months. Between work and the other two vehicles I have been very busy. The nice thing is it is now winter in Wisconsin so plan on just finishing it this winter hopefully ready for next summer and fall. Just turn the heater on and work in the garage while it�s nice and cold out. Early December I should start purchasing parts again and get back to work on it. Not a whole lot left to do main things ic piping rad fans ecu and all electrical one more oil line and breather for oil system and of course can�t forget to add all the fluids should be able to start and run after that and a tune of course. There are other things I would like to do but I just need to get it running first haha.
I've seen three or four builds now using the CX-racing turbo manifold but no results yet. For the price its almost dumb not to buy and use for a budget build (likely the route I'll be going).
Hello everyone I�m finally back haha. It�s been a while since I�m been able to work on the 8 had some minor set backs over the winter with life and my other cars (damn Subarus). But as of this week started doing all the electrical so far so good. Using the adaptronic modular ecu so using the factory rx8 harness just modifiing it. Question is I should be able to remove everything that isn�t being used so obviously keep fuel injectors ignition coils oil and knock sensors. But all the stuff for solinoids for the shutter valves and other things I�m not using can be removed correct or will this cause issues. I have no omp on the rew what need to be done with the electrical to make that work with rx8 chassis. For starter and alternator basically using that factory harness to power fuse box just running battery cable from trunk to starter using that as power stud and make a ground stud as battery is now in trunk. Thanks guys so excited to finally be working on the 8 again. Will hopefully upload pics for electrical progress tonight or tomorrow. Thanks again
You may want to think the whole thing through accounting for sensors and such. Because Adaptronic repurposes some of the OE wiring for sensors and functions that the factory system didn’t have. Otherwise you’d just need to run dedicated wiring for them instead. Probably the best place to start is with the Modular pinout to get a lay of the land, so to speak.
Okay yeah makes sense guess I didn�t realize that it reused some of the other wires for extras but haven�t really looked into that hard. So thanks team that is a great place to start.
referring to page 2, the baro sensor wire has been repurposed for EMAP and the mass air flow wire repurposed for IMAP, but then you have to pin each sensor into those wires for the Modular ecu to receive the signal properly.
when I bought Stokers REW RX8 with the Adaptronic Select piggyback ecu, it took me a bit to figure out why the external IMAP wasn’t outputting the correct signals and calibrating properly. He repurposed the baro wiring for the external MAP sensor but jumpered the wire to the internal ecu input terminal for an external MAP; which was correct, but then also still had the MAF installed and wired in fully.
So the Select ecu was receiving a signal from both sensors at the same time on the same IMAP input; oops. In his defense, there wasn’t anything in the Select literature that really explained any of that. When the MAF signal wire was depinned, the issue was resolved and the external IMAP calibrated and functioned as it should. But now the baro wiring has to be restored if I want to use EMAP on the future Modular ecu swap.
Awesome dude. Wonder if I should of wrapped the header but Lucky 7 didn’t think it necessary. Also having some issues even with the Modular Adaptronic ecu but the bugs are almost all worked out. Namely trying to get a CAN BUS gauge to read out all the pertinent stuff (oil pressure, coolant temp, etc).
Time will tell. With some creative ideas, they Instead they used some heat shielding to protect the brake lines and LIM from the hot side of the turbo. I’m just hoping the manifold is just far enough down and back to get cooled enough by airflow. Basically no room down in there. This is with a tdx57 turbo from turblown.
Biggest sad thing is a turboblanket wont fit in this space, so having to do some creative engineering.
Glad you’re back to it and thanks for your endeavor of DIY. Something I couldn’t of found the time to do, and correcty. Still need a piece near the LIM to stop from cooking rotor 1 and help IAT stay low. Front passenger side.You can see the brake line for the front right side and the hot side to turbo.
Turbo blanket's are not a solution and have the potential for catching fire. I believe Turblown still offers custom incol shielding and I'd say that was your best bet.
It's little insurance for an otherwise large investment. I see no reason to skimp on a few premium parts at this point of your build, especially when they will ultimately serve you better in the long run. A complete no brainer if reliability, longevity, performance are your goals imo.
yeah glad to be back at it too and so close yet so far to being finished or at least being able to start. I did not wrap my manifold i was going to but really just kind of said screw it did wrap the down pipe though. i also had could not fit my turbo blanket on my turbo no room on low mount might try something else down the road just focusing on getting it started at the moment. but thanks i have actually really enjoyed making the forum (not as bad as it seems can be very time consuming some times on top of trying to work on the car).


 07-14-2021, 09:18 AM


 In his defense, there wasn’t anything in the Select literature that really explained any of that. When the MAF signal wire was depinned, the issue was resolved and the external IMAP calibrated and functioned as it should. But now the baro wiring has to be restored if I want to use EMAP on the future Modular ecu swap.