When you click on links to various merchants on this site and make a purchase, this can result in this site earning a commission. Affiliate programs and affiliations include, but are not limited to, the eBay Partner Network.
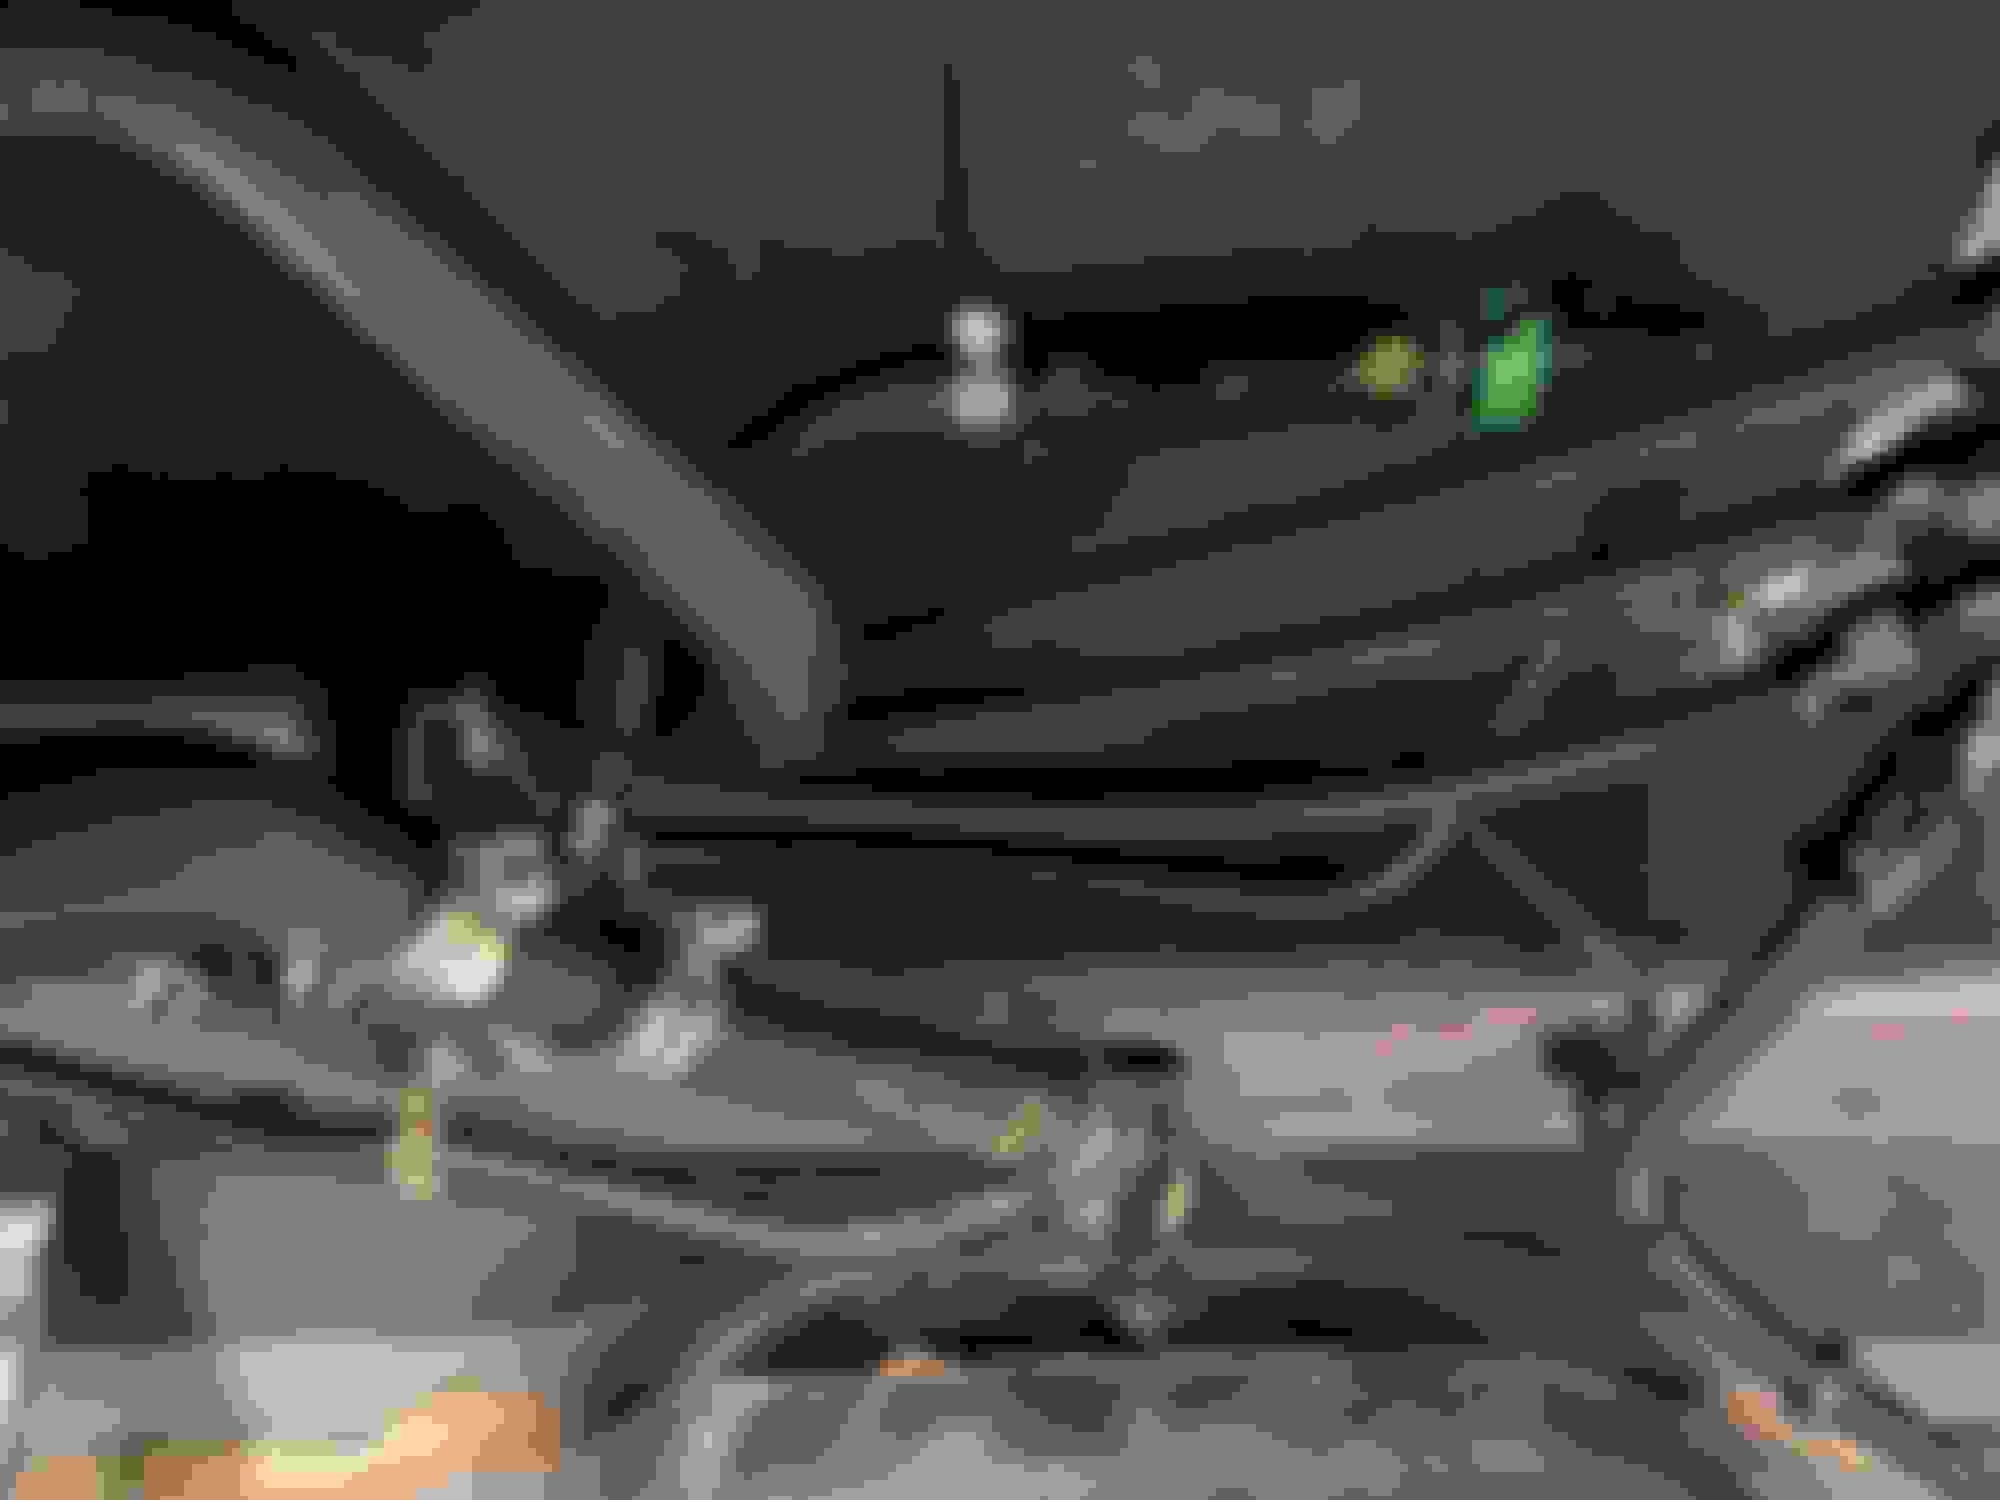
Heyooo, so I hated the brake feel immediately and decided to play with some cheap OEM components as a fill in for some more fluid needed for the increased piston area. Low and behold, the 1in G35 MC bolts right on up to the booster, uses a dual channel output, and only required pretty minor mods to get it working.
I grabbed one from ebay, as well as a spare RX8 booster for mock up while I got everything working. The goal was to have as little tearup from the stock system as possible so that if my brakes completely and utterly fail to be good, I can slap back on the stock stuff in an afternoon.
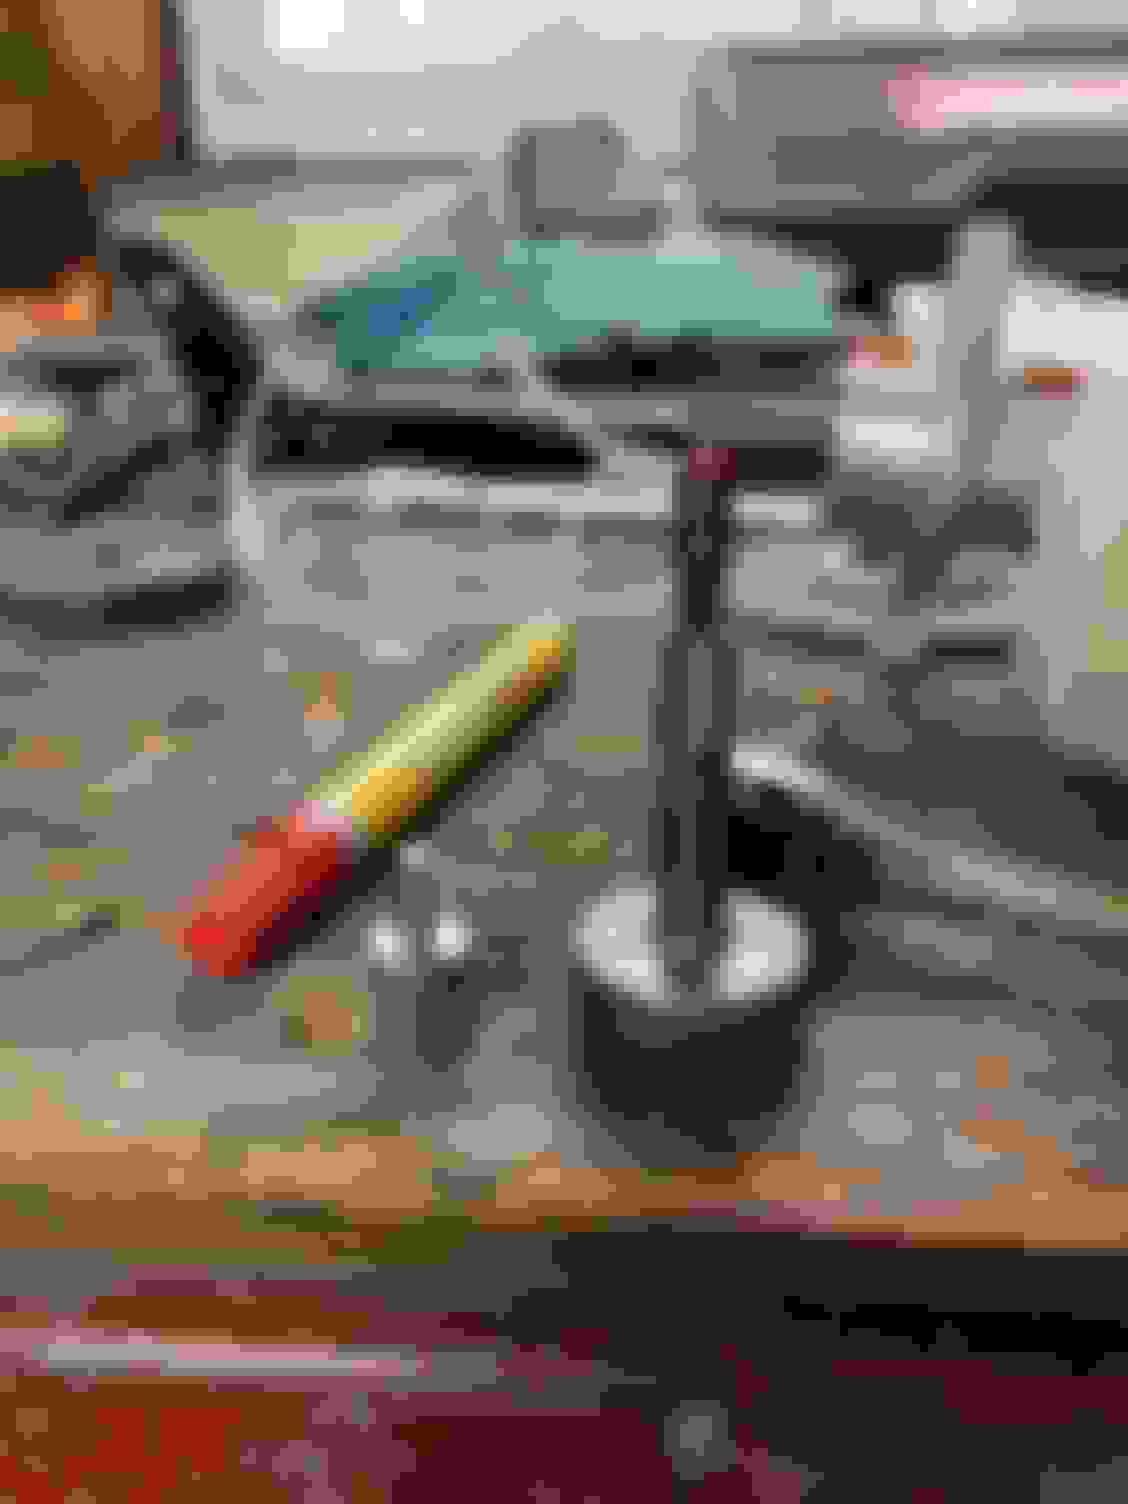
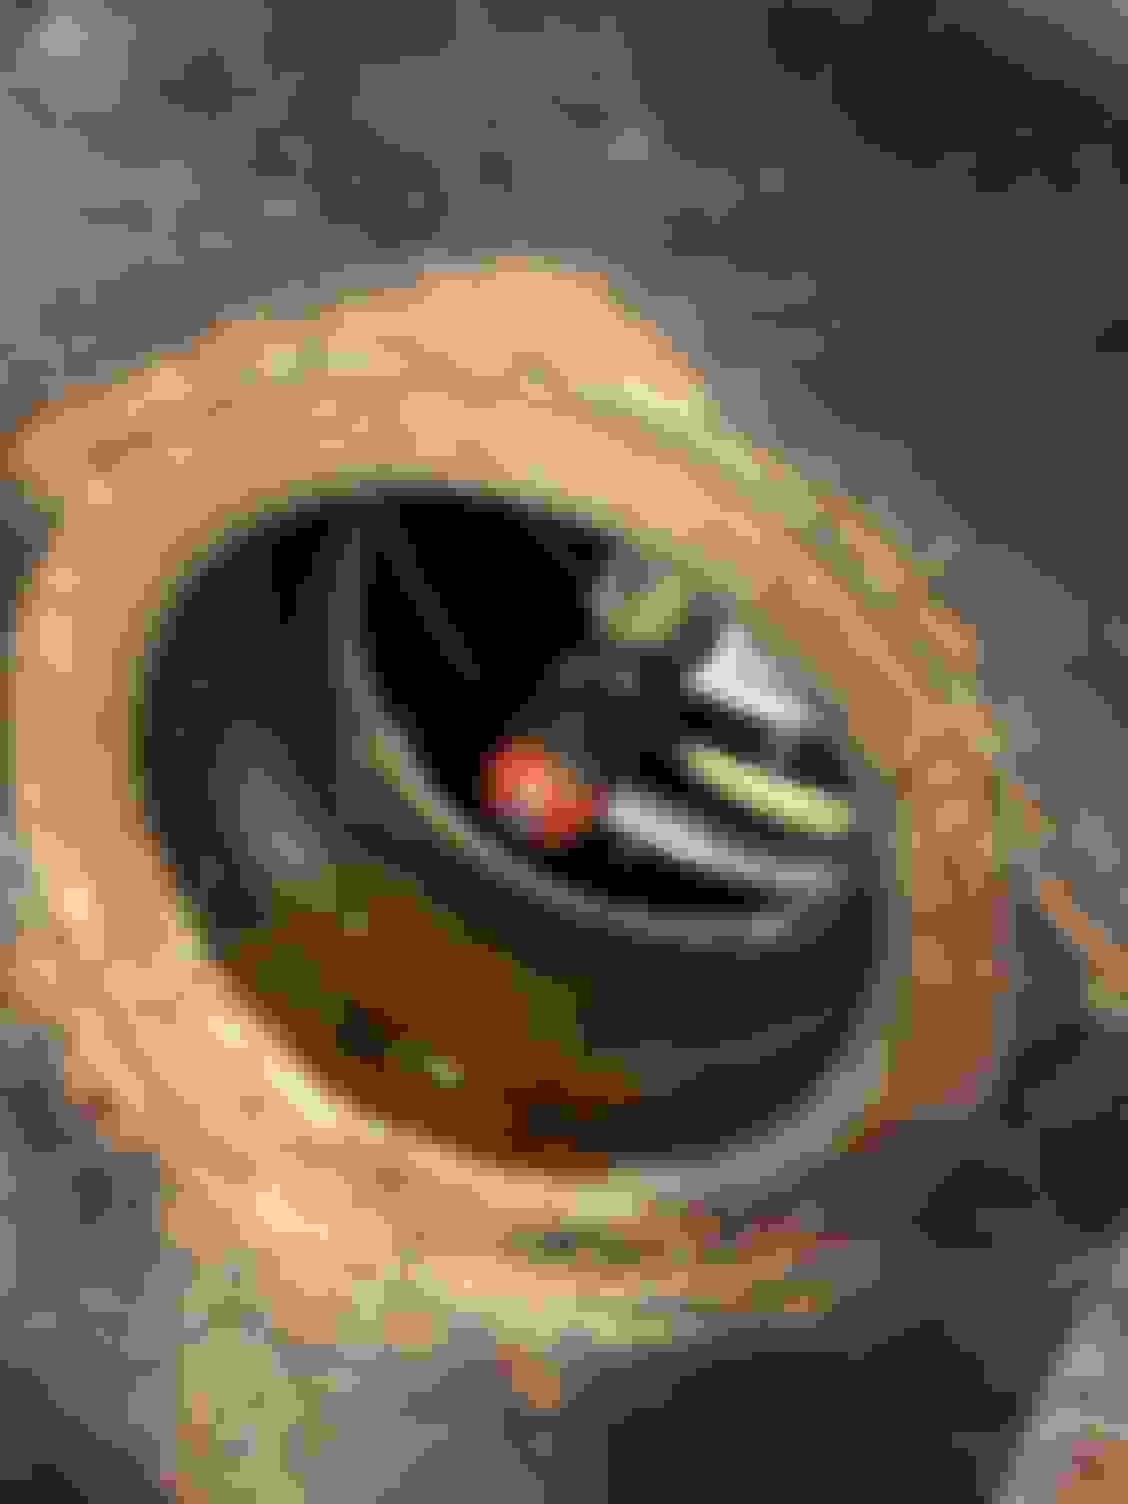
Started by measuring the plunger depth to pushrod and managed to find a standoff on McMaster that would fit perfectly height wise. I believe the part number was: 93655A254. M6x1.0 14mm 26mm total legnth. This would let me drive in the standoff and the stock pushrod all the way for a perfect clearance, and a nice hard material that would be the interface with the MC.
Once I had that on the bench working, I had to grind it down to clear the inner part of the G35 booster that you can see in the background as the 13mm hex portion needed to be < 10mm.
And as much as I love angle grinder mods... I decided to chuck another on the lathe at work to make sure it wasn't ugly.
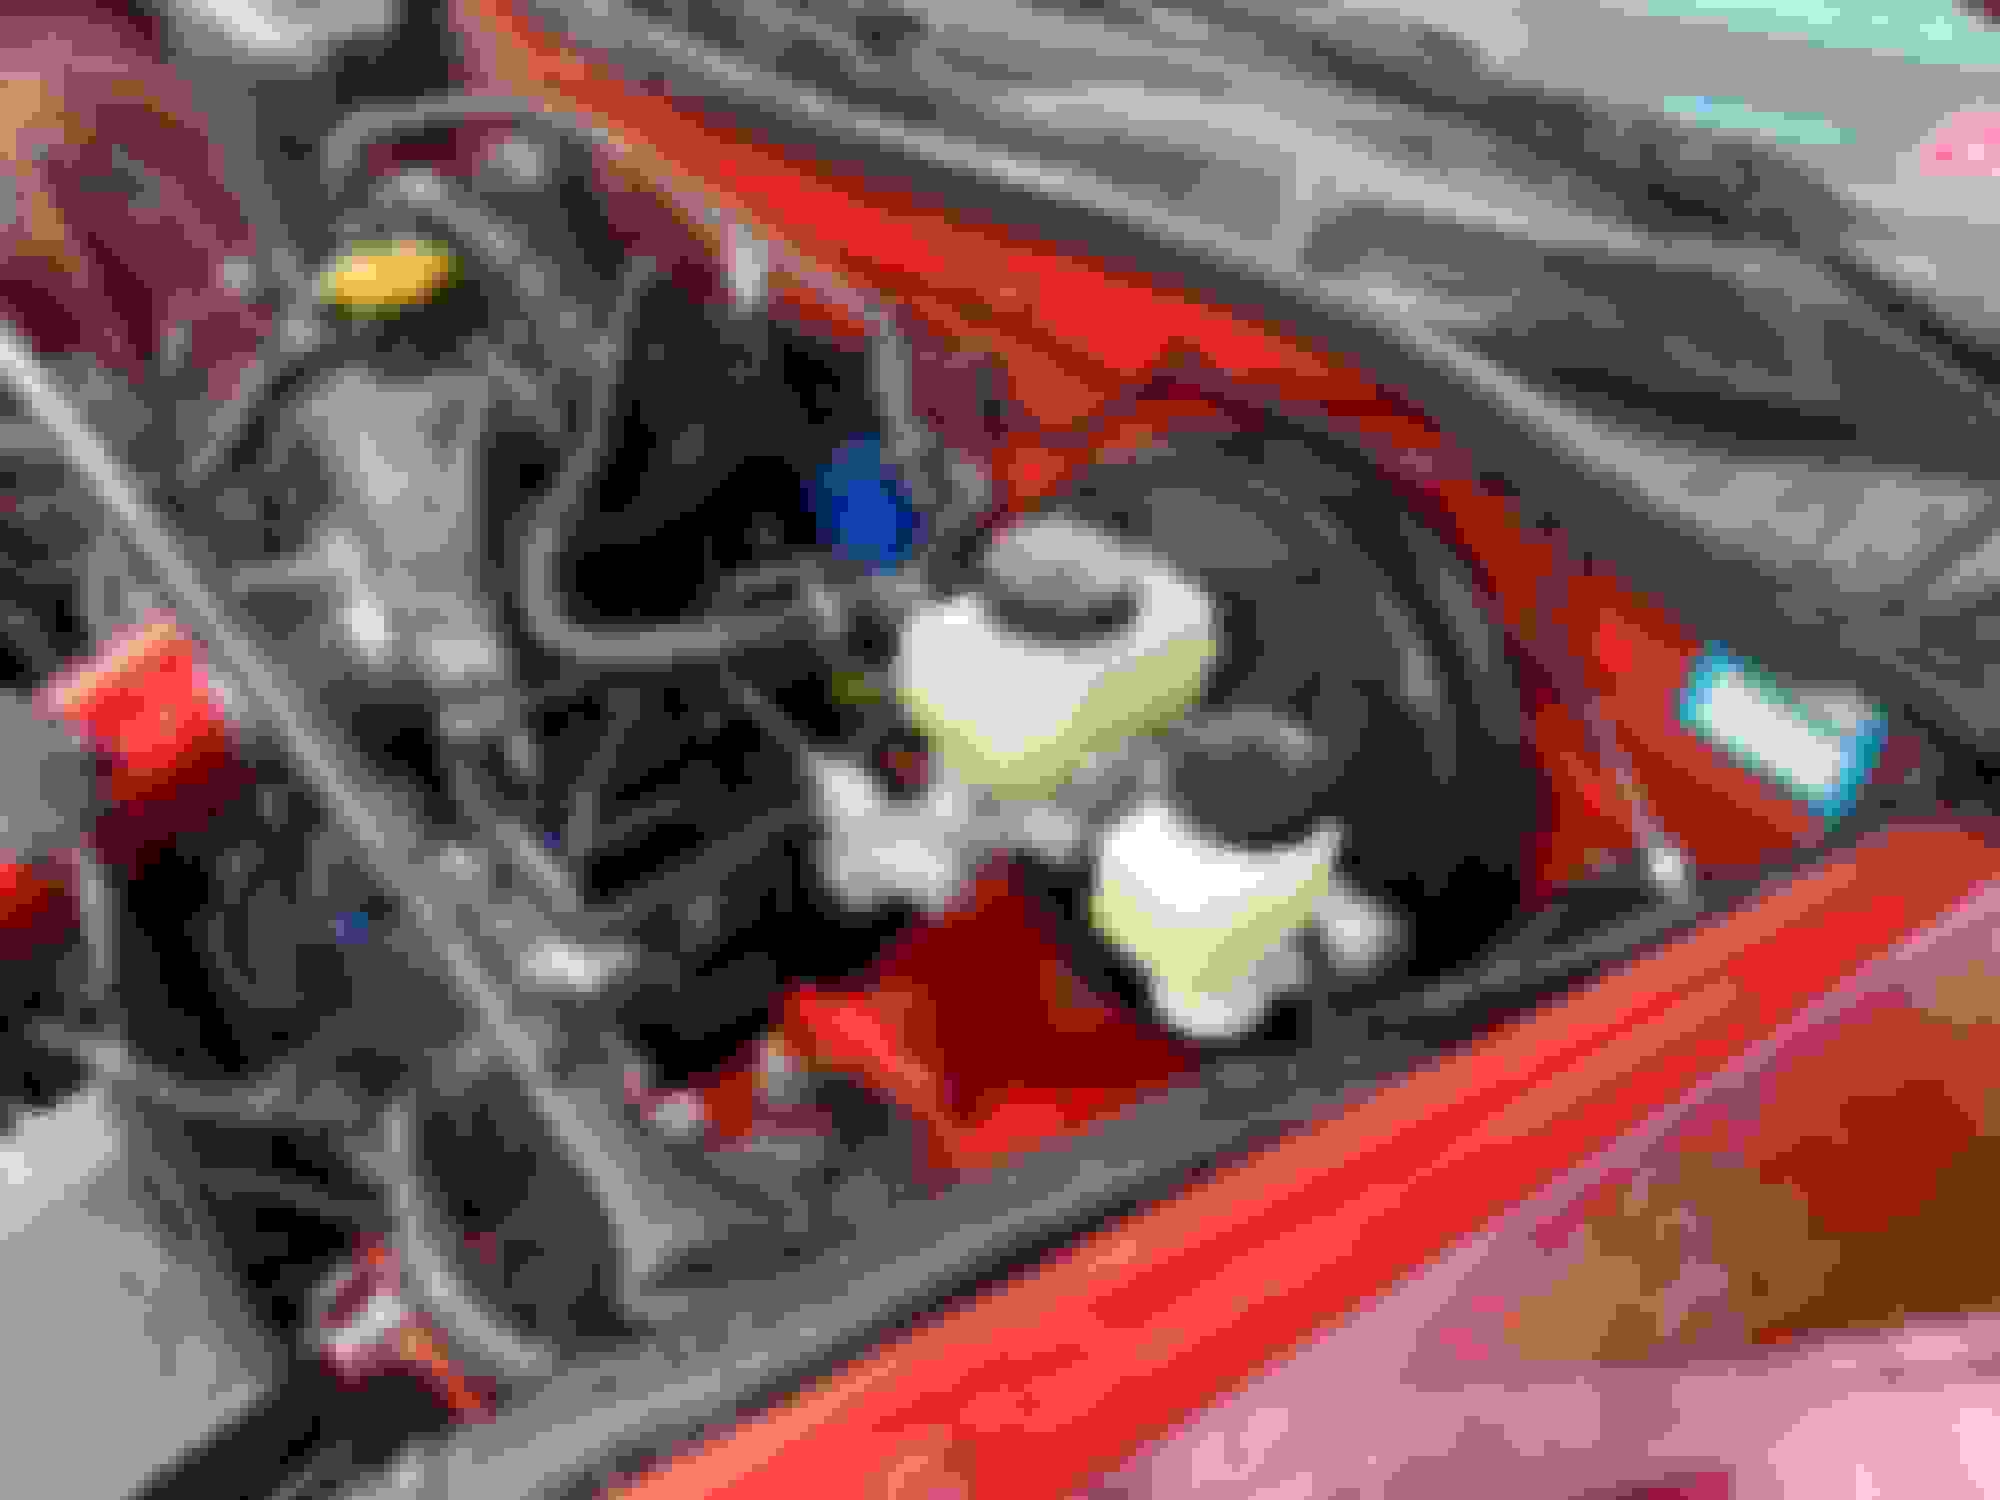
When I popped the MC in the vehicle I had the realization I needed a bracket for an external reservoir for the clutch system... and literally as I am typing this now, I realize I could have likely swapped over the RX8 reservoir instead of using the Nissan one... so... maybe more on that later hahaha!
Either way, I CADed up a design for a mount that would bolt on to the booster mounting and offset a Wilwood reservoir that was an overkill size. Still trying to finalize that one, but I have a rudimentary steel bent piece that works for now.
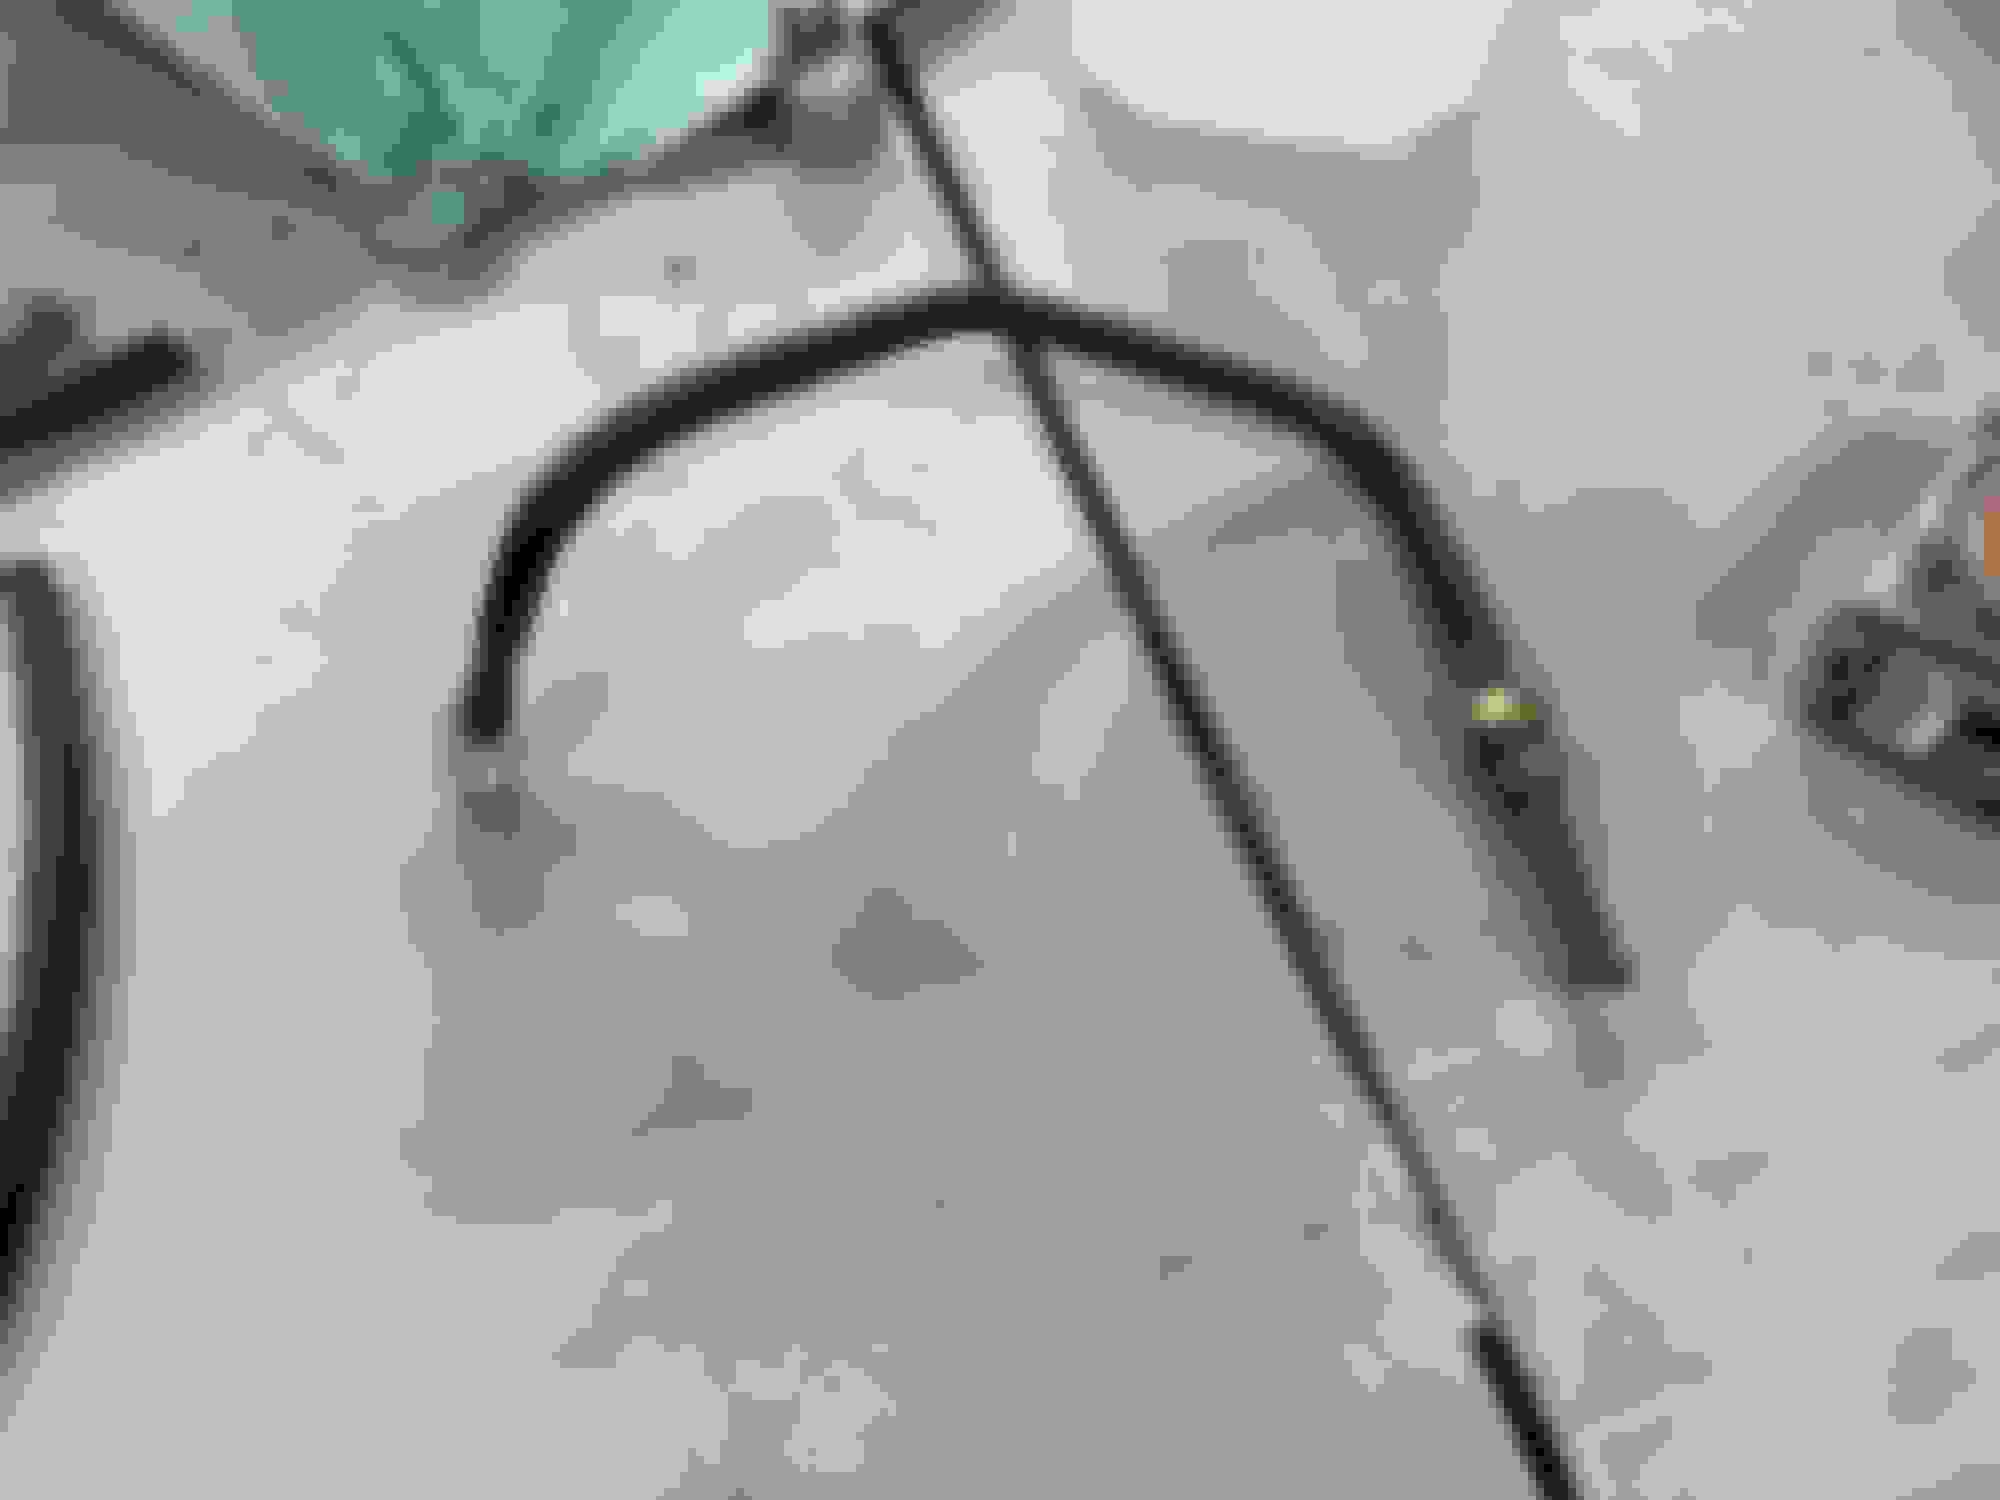
I bent up some lines, which took waaaay more time than anticipated, because using my Autozone flare tool made me want to jump off a bridge, so I splurged on the Eastwood bench mounted one. 10/10 tool, would recommend. What I had failed to do was give the lines enough length to fit in the jig to flare the tubes with the hardware on it, so I had to redesign my lines twice.
On the hardware note, it is a huge pain in the *** to find M12x1 1/4in inverted flare fittings. I could only find bubble flare fittings or fittings with a hole size of 6mm. 1/4in is 6.35mm, so they didn't fit around the line. I ended up using the fittings that came with the G35 master.
On the fittings note too: The Bosch ABS system uses bubble flares, and the G35 master uses inverted flares, so make sure if you end up doing this, you get the lines and fittings right. Either way, struggling on dumb things aside, I am really happy with the result.
When I went to bleed the system, I had one HELL of a trim trying to get it to bleed. I ordered myself a new motive adapter for the G35 res (which leaked like a damn sieve, by the way) to try to get some pressure in the system, but could only ever get the secondary channel to bleed. I took it out, spilled fluid all over, and tried to bench bleed it, but it just wasn't taking any fluid in.
Now, I've never actually taken apart a master cylinder before, but they are pretty simple and I figured that if I had a blown seal or the like on the primary, and I fucked up servicing it I'd be in the same boat of needing a new one, so I popped off the snap ring and tapped the plunger out along with the first stage.
Pretty damn schmooy.
Cleaned it up, popped it in, and it bled instantly. I figured that the reservoir feed port was clogged with some goop, so it was finally able to suck in fluid from the res. Easy once it works!
With everything bled decently, and completely flushed with VERY fresh brake fluid (thank you 2L of ATE type 200...), the brake feel was MASSIVELY improved, and based on my math it should be pretty perfect to work cohesively with the whole system.
Moved the car out and drove it up and down the driveway (more stuff is loose I need to wrap up before test drive), but the brakes work and feel phenomenal. Blasted the engine bay down to get the copious amounts of brake fluid out of every crevice, and now that it's off the lift I can finish up a bunch of little stuff.
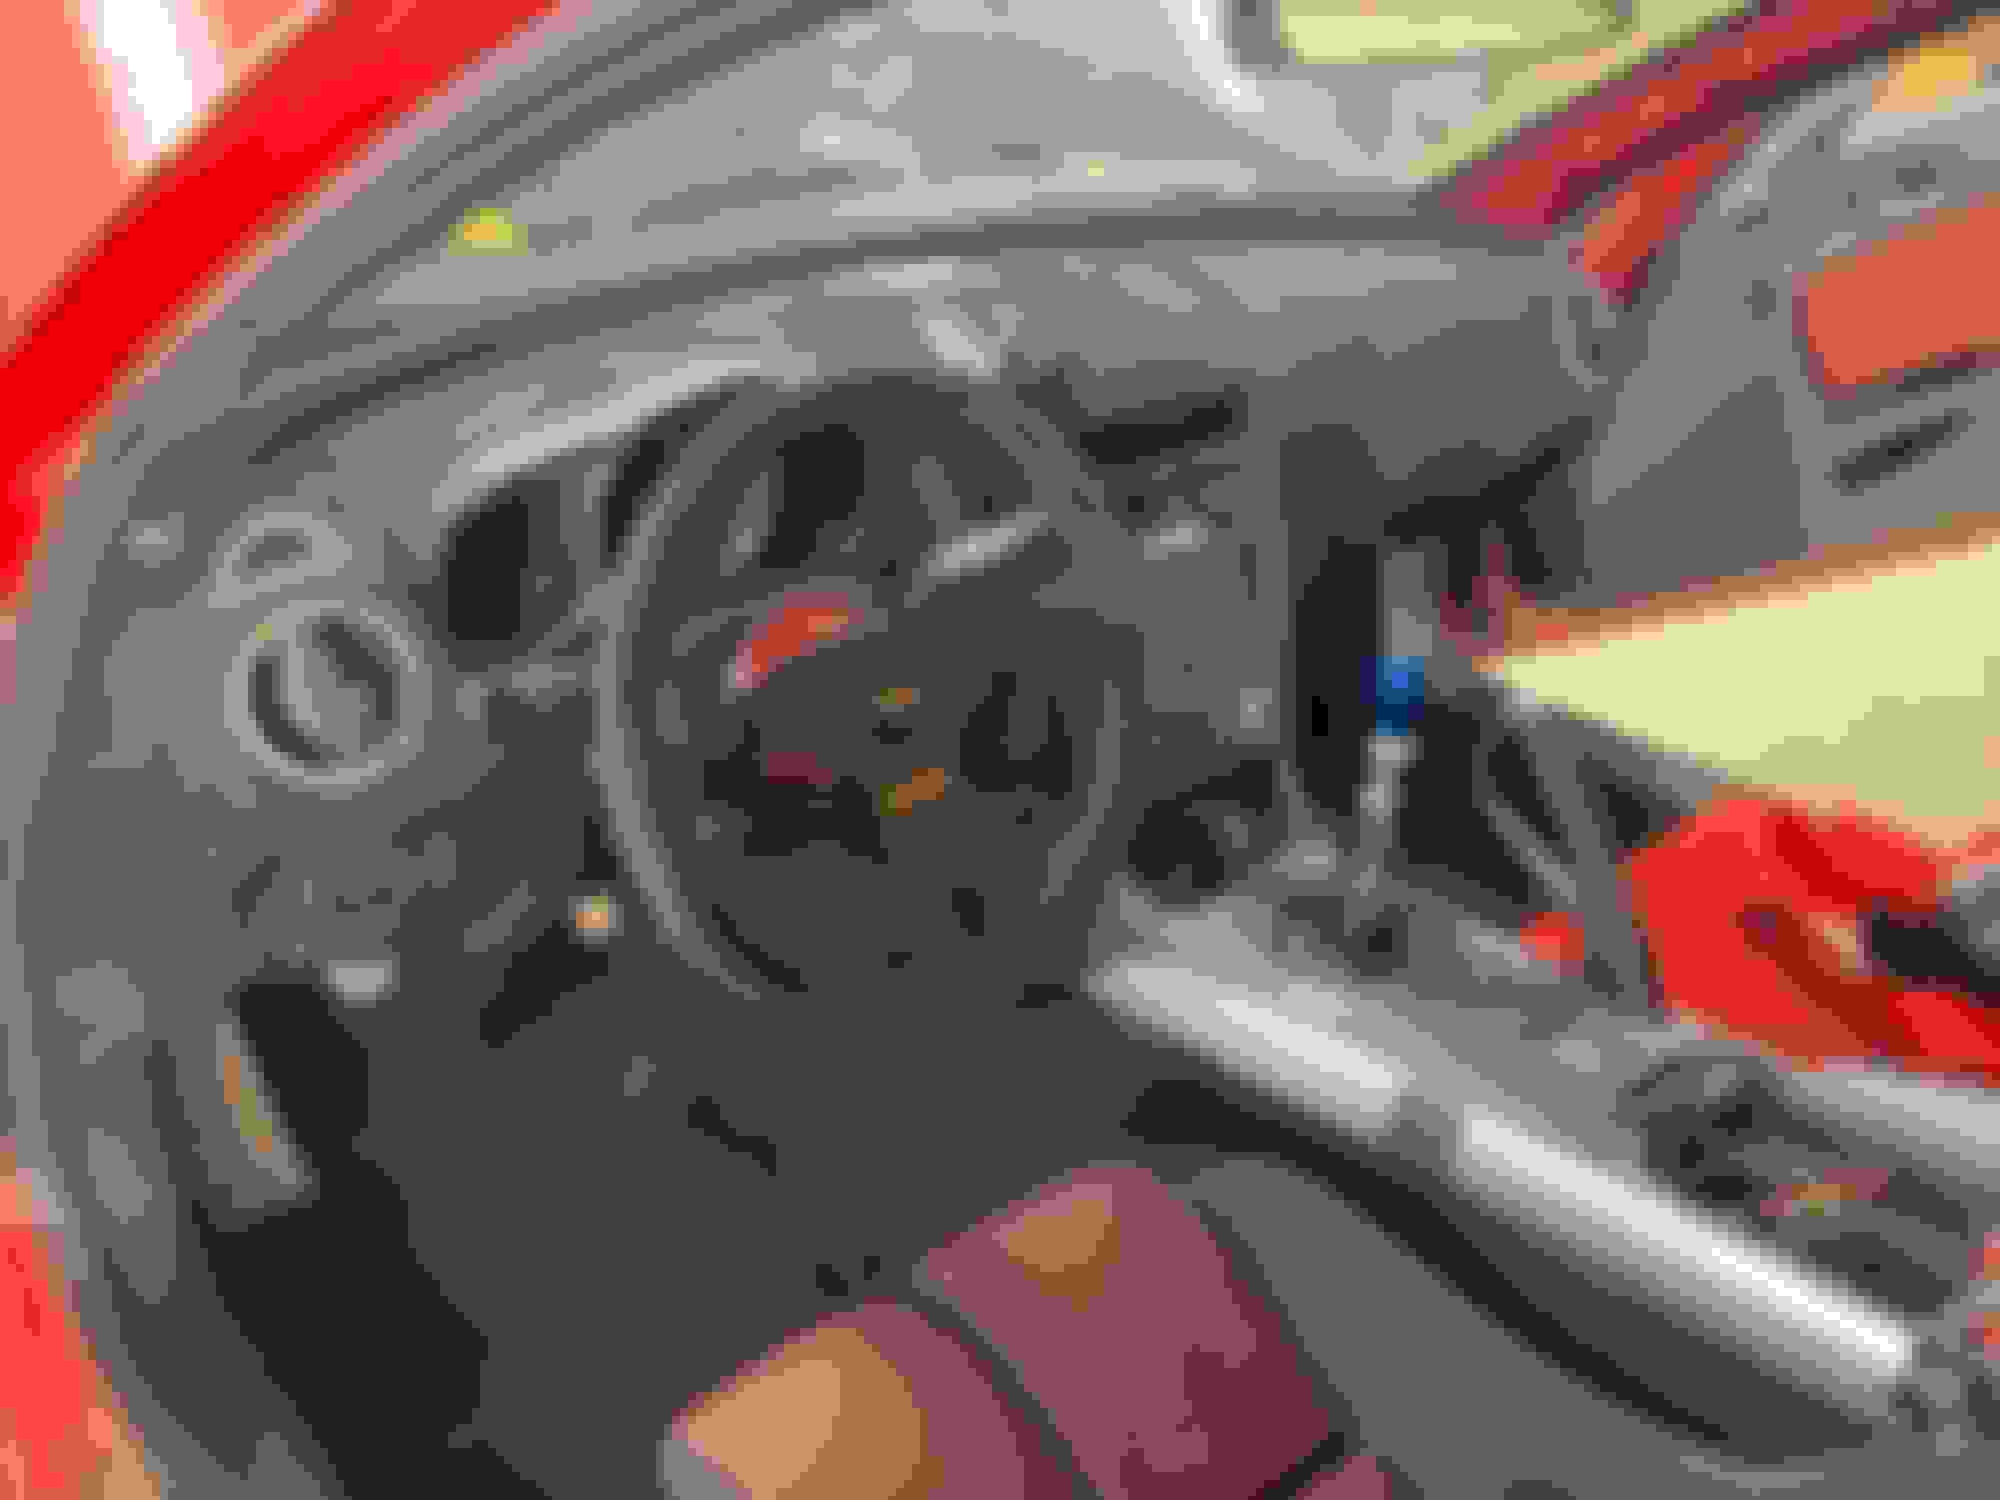
Had some issues late last season with glare, and I've always wanted an excuse to give this a try. Really, the excuse was just wanting to live out my WRC car interior dreams, so to say I did this because of glare is a pretty large, but not entirely unfounded stretch. I figured this car was the perfect candidate for a flocked dash, and I wanted to do it on a car I didn't care too much in order to learn how to do it nicely.
When I was researching, the right way to do this is with an electrostatic gun... which I considered fabbing up.. but in the end I just wanted a quick single day project. I used a kit from Flock It, which seems to be the goto. I should have grabbed a small paint roller as the brush they give you is really not made for large objects like the dashboard. The flock applicator in the kit was fine enough for the job.
Pulled some stuff apart, taped some stuff up, slapped lacquer on it, and sent small bits all over the place. Looking back, I would have had a friend help apply the lacquer as part of the way through applying the lacquer I was worried about it drying up and sorta globbed some on and rushed the process. I did also miss some spots, but all in all am happy with the results. I'd say overall it's a 4/10 job, and the passenger airbag cover will definitely need to get redone but is quite a low priority. I'd also like to do the top of the cluster piece, but again was really just rushing through the job and didn't want to mask it off. Your outcome is always pretty proportional to the effort level haha.
Hi friends! Haven't updated this in a while because work and life got crazy, including working on this car to prep. Updating a bunch here this morning...
Things not worth mentioning in standalone posts:
-Resealed the oil pan
-Swapped the ebay G35 MC with a new one, old one actually blew out (and was likely already busted) the outer seal and dumped brake fluid into the booster
-Swapped to a new (used) booster
-Swapped out the brake line check valve as it was coated in brake fluid
-New leading and trailing spark plugs, slight misfire at 6k RPM no load resolved
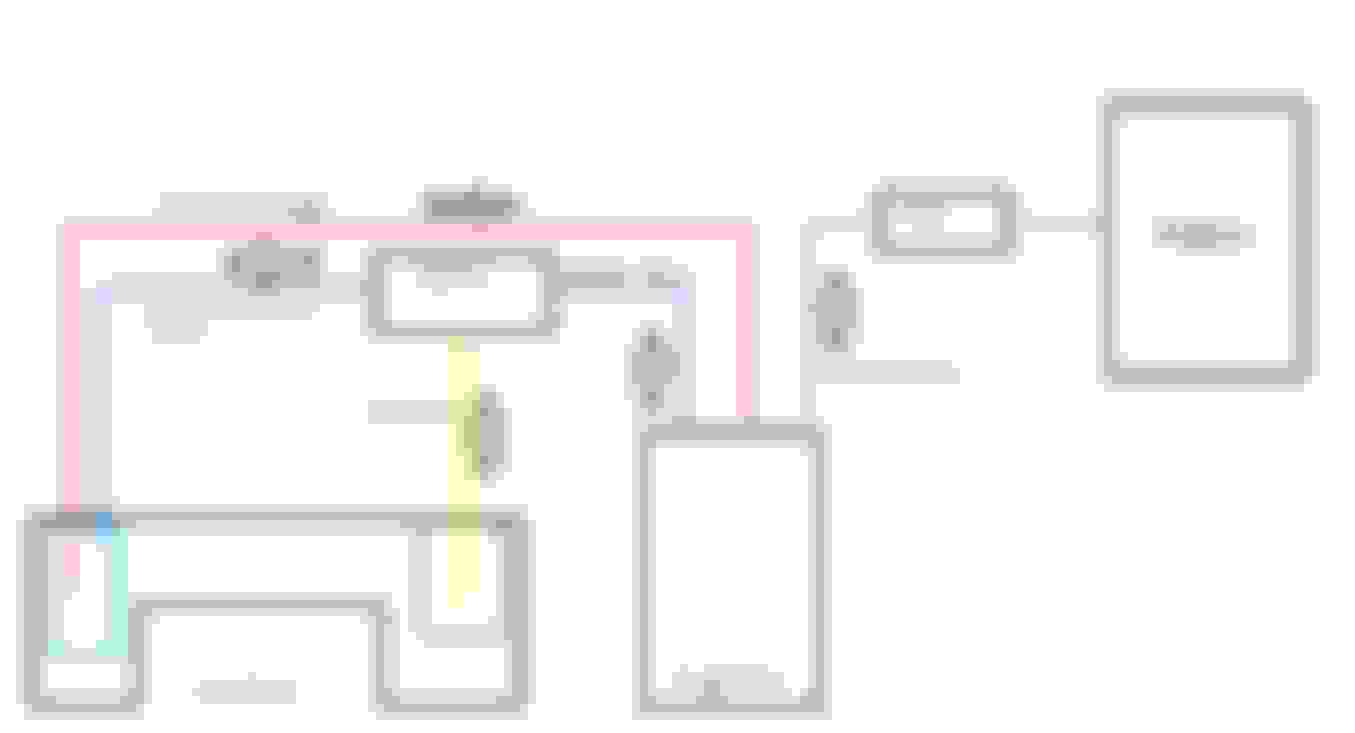
So, up to this point, I basically hated every modification I ever did with the fuel system, as it just made everything in tank not work. The root cause was that I was trying to stuff too much **** into one side of the tank sender, mainly caused by the fact there would no longer be a high pressure source to drive the siphon valve. If I could run a STOCK sender in tank with a nicely placed return line, in theory all of my problems would be solved.
The other issue was the placement. I threw the surge tank there in order to use minimal line and make things less prone to errors and to also make it quick. Adding a surge tank in between events last year was not the right move. I decided to do it right and throw it in the trunk this time while I was digging everything out.
This was the diagram I ended up using in order to map everything out, and the biggest change from before was that the siphon valve was going to be used externally. This was something I didn't really see done much, though it is pretty common for siphon lines on older saddle tanks (really, just Subarus... that's where the idea stemmed from) to go up and over the tank.. so I figured what would it matter if the valve was outside of the tank too!
So, off we went. I dropped the tank hoping I would have enough room to get at everything, and also planned to get rid of the pressure check stuff and charcoal canister while I was in there. More on that later...
Should also note, all photos may have some stuff out of sequence, or random parts thrown on the tank just to keep a sealed enough tank full of fuel covered up. 20 year old me wouldn't have cared, 30 year old me is way more scared of fuel tanks.. ugh.. age and mortality...
The idea was simple on the siphon side. Drill hole, add AN fitting, route line from the suction piece to the AN fitting. Easy. Before I did this, I ran some line a couple feet higher than the tank was sitting, and blew into the siphon valve to see if it would actually have the ability to move fluid much higher than the stock system could. Even with just my mouth, fluid was easily siphoned up so I continued on with project. I was really hoping that wouldn't have any issues, as the lack of suction would have been a show stopper.
I then weighed back and fourth between using an S1 or S2 sender as the lift pump. It wouldn't actually matter what I used.. but because I had already done some work with the S2 sender in place, and the clearance for fittings under the access panel was better, I chose to buy a new (used) S2 sender to use as the lift pump.
I did try to do it proper and buy a regulator block off from Fab9Tuning... but they decided to not get back to me after placing the order for a month. Only after sending them a "hello..." email did I get the response saying the parts weren't stocked and I could spend more money on some DeatschWerks something or other that wasn't at all relevant, so I just left the stock regulator in. The pressure should literally never get that high anyways.
I made sure to also drill the return line hole in a place where, once compressed, the line wouldn't hit anything to cause an uneven mating surface with the tank... the whole root issue of the last setup. Not shown in the photo is the Radium duckbill valve I ended up putting on the fitting end.
With that sorted, It was time to run some fuel lines. I chose to run them out and alongside the fuel filler as I knew I'd have clearance without hitting anything. On the passenger side, it was a bit tougher to clear the body of the car and it was smushed a bit more than I wanted... but that just means it wouldn't rub anything, right?!
The idea was to have all the lines run outside of the car, and then come up into the trunk into a serviceable bulkhead. It was at this point I realized I needed to get rid of all the charcoal canister stuff, and that the subframe needed to come out for proper access to clean everything up. No worries.
Random "we went to the track and broke a trans on the K Miata break!"
I was meant to be at the Gridlife event at Gingerman that weekend, but chose to not go as I knew the car would either: Leak fuel, and/or not have a safe fuel setup. So this work was all happening in parallel to a trans swap as well!
Okay, back to RX8s.
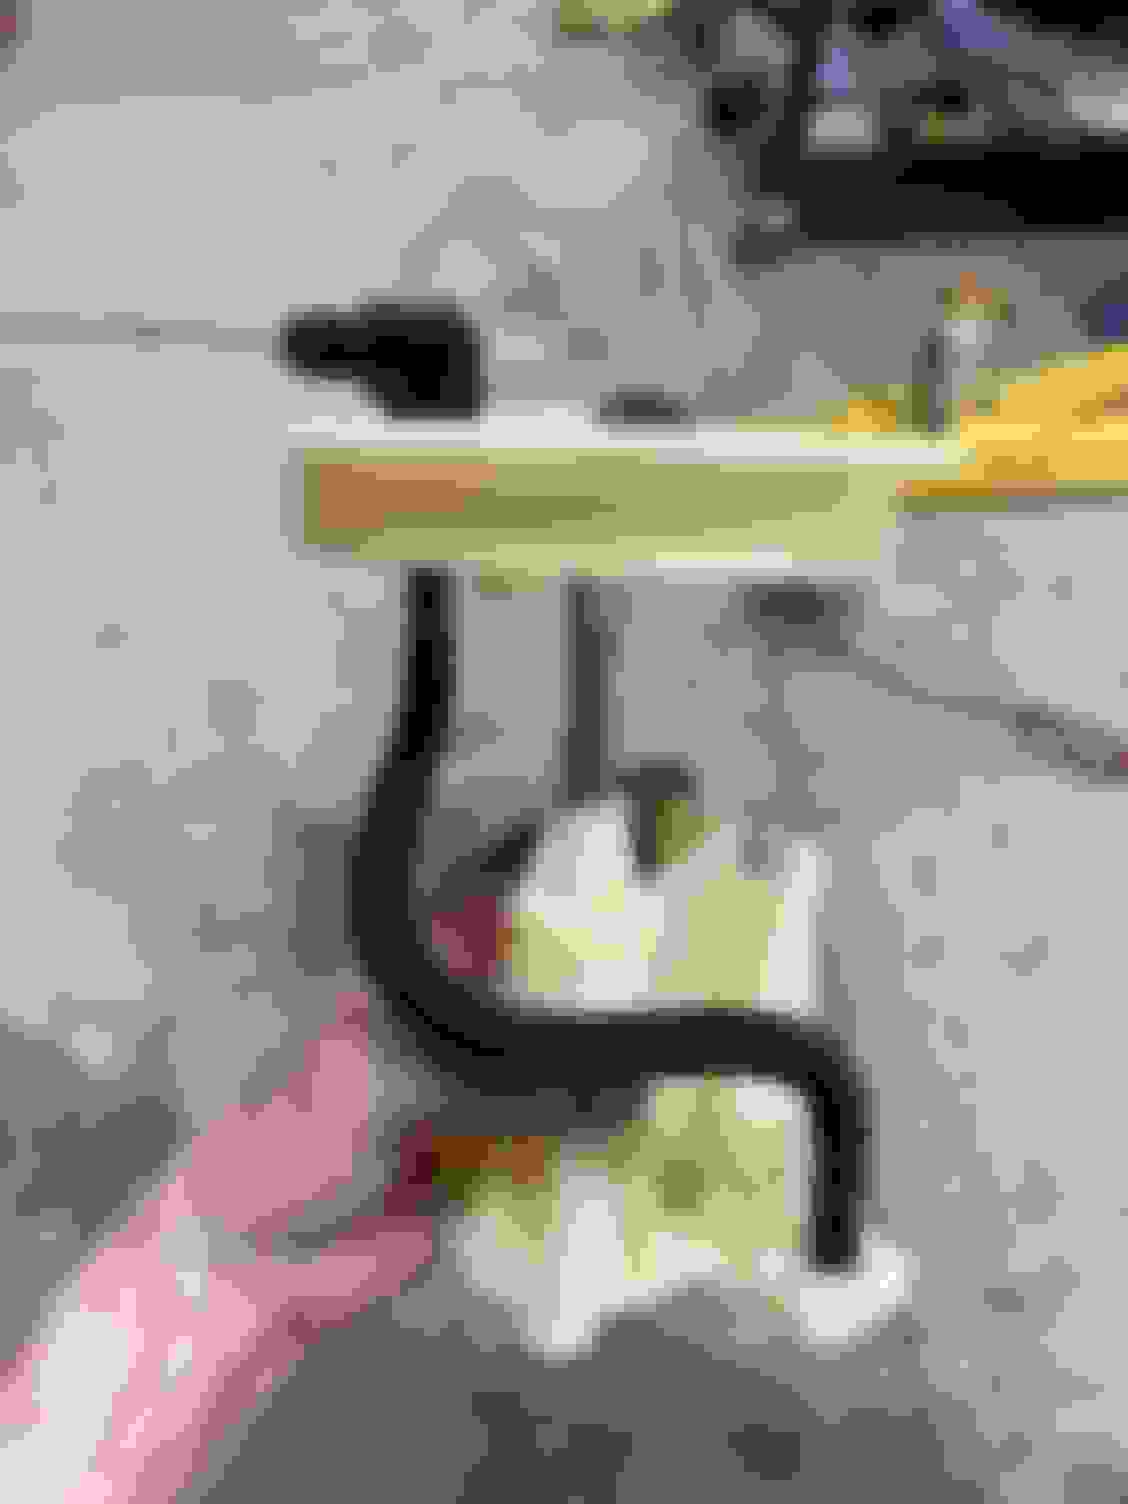
I mocked up kind of how I wanted everything to sit, and came up with this basic plan. The bolted in bulkhead was a tad smaller than I'd have liked, but all things said and done, it's perfectly fine. The biggest thing I wanted was access to the bottom side connections with the subframe in car, and it meets that criteria.
I'll spare everyone the agonizing pain of trying to get the right fittings and the right lengths, and having to completely change plans when one thing is sorted... but all you need to know is that for a week and a half, every 2 days I had an order into Summit Racing to get one or two more or different fittings in order to get everything sorted. This was the (mostly) end result.
For the fuel tank vent, I ended up putting all of the stock pressure measurement components back in, and used the stock vent with the purge line populated as it would, just bypassing the charcoal canister. I cut off the OEM 5/8 or so hose, and popped on some Subaru fuel hose I had laying around inline with a T. It worked out awesome, but I did have to kind of ziptie it up a bit higher than pictured to clear the diff once the rear subframe was back in. Not a huge deal, just will likely need to be serviced at some point in 5 years.
I should also note, I did away with the inline filter to the rail, as the in tank filter is now back in place. I kind of didn't like this, but in term of simplicity.. it is the right choice and there are multiple socks on multiple pumps to clean things up.
For wiring, I just made an inline extender from the existing harness to bridge the 2-3ft gap in cable, and used the same color wire as existing. Clean! I also added a 1/8 NPT port (blocked off currently) to add in a fuel pressure sensor to one of my boards to throw fuel pressure on CAN, because why not. Will swap a connector to run wiring for that, and have a bulkhead wiring connector plan coming later.
Things I am happy with:
-Line routing, tidied it up past that photo and with the subframe in everything hugs existing lines and has plenty of strain relief
-Bulkhead connections are easily accessed and labeled until the first time something leaks and melts the electrical tape (lol)
-Surge tank is well secured and plumbing is about as tight as I could get
Things I am not happy with:
-When rivnutting the bolt pattern for the bulhead, sheet metal got bent and now all the holes don't line up, 2/4 ain't too bad though
-Bulkhead is a little bit small
-Siphon fittings are a little bit janky and "not square"
-Diff clearance to purge lines is not ideal
The last task in all of this was getting some sort of "firewall". I use quotes, because it's more of a splash shield than a firewall.. mostly because doing it properly would require covering up the existing deck holes for the OEM speakers and amp. I did not do this, though I am planning to at least put in some cut metal block off plates at some point. The splash guard I did make was using some spare alumalite I had from the first splitter I made for the car. I attached it to the rear seat mounts to get a flat plane using rivnuts, and then drilled clearance holes for the mounting bolts. Easily removable if needed in the future!
I do plan to improve on this a bit in the future, but it works great for now as a minimum viable product.
That's all, fuel system works AWESOME, and worked great on the track (more on that in another post) down to ~2% fuel as read in on vehicle CAN at steady state. No leaks at the OEM pump interfaces anymore, and the siphon works fantastically. I would run ~20% fuel at the start of a session without cut until it was literally out of gas. HOT.
Gridlife Midwest Festival - Gingerman Raceway - June 6-9 , 2024
Heyoooo Midwest Fest. The best long track weekend ever has come around once again. These are getting significantly easier to write about as we all get better at the process of loading up tons of cars full of stuff and going racing. We had a crew of 4 cars (on track) and a few more support trucks/cars in our group this year, and the goal for me was simple. Test out new brakes, go faster than anything related to a 1:45 around this track. I had been locked in on that time since even before building the RX-8, so I REALLY wanted to get through that barrier. The other goal was to help my buddy in the K Miata get the engine dialed in a bit better, and bring him down in time. He had a shakedown at Gingerman two weeks prior, and we had a bunch of work to do to get the car 100%.
Everyone loaded up at my place early on Thursday morning, and while I'd love to apologize to the neighbors, I am pretty sure they get excited seeing cool cars too.
Got to the track, created home base, and that was that. Standard issue track things.
Because this was a festival event, we were running a festival competition style, which means we had 4 practice sessions that set the grid order for the first of 3 qualifying sessions. Times would only count towards competition in the qualifiers, with the top 5 going into a sprint session. I already knew I wasn't going to be in the top 5, but like I had mentioned my goals were totally abstracted from the competition itself.
The first practice session I went out and got a whole new feel for the car. The new brakes were FANTASTIC, and I was overbraking everywhere trying to dial back in my foot. Because I knew I was going to be slower, I also tried a few new things like not downshifting in spots, or trying 5th gear on the straight... it was a REALLY great session to just knock off cobwebs from the winter, and force myself into doing something different. For the first time in a long time, I felt like I had made some progress. The best time of the first session out was a 1:45.1... which was a PB by half a second. Boy howdy... I could work with that.
I was running tires from last season during this first session because I assumed I'd be way slower than anticipated. I had a new set of brand new tires I decided to swap on to for the next practice session of the day. My friend also said to stop braking and hucking the car into T2, and to just let the momentum of the car carry me though. My buddy in the Miata was doing this, and while in the last session I was overall faster than him, he had like a second on my because of that one turn. Message received.
After looking at some more data and determining is was NOT worth it to use 5th gear on the straight, and there was no point in downshifting into T7 if I just kept the momentum up and stopped using the brakes so much.
(Previous PB of a 1:45.6 and my first practice PB)
In the next session I went out for the next session and ran a 1:44.0. Turns out, there was a second in T2... good call! And with the new brakes a bit more understood, I could modulate them so much better to achieve more braking performance that ultimately led to more braking force without nose diving the **** out of the car and losing all the turn in grip that was required in such a low powered car. I was still overbraking a bit, but that's a limit I will forever creep up on instead of overdoing and backing off.
Track went cold at 8pm and the evening was spent eating awesome food made by my friend, and dialing in a really terrible open loop VE table on my buddy's K Miata. At the previous event his open loop fueling was running ~16:1 AFR at anything over 6800 RPM.. ooof. We also spent some time looking at data and talking about goals. We both had the goal of being in the 44s, with a stretch goal of being in the 42s for the weekend. I can't recall if he made it into the 44s at this point, but he was really fighting the engine not making any power.
9AM was the next morning's practice. I had cold tire pressures dialed in perfect, and the weather was about as good as it could ever be. This was going to be the last "good" session, as the drift cars and rabble rousers were going to be on track to kick off the weekend's festivalness and kick all sorts of marbles and dirt up on the track. In this session I battled a lot of traffic in the way, and not appropriately spacing myself out from cars. Typical time attack issues of a 450hp street car completely leaving you in the dust in the fast bits, only to be completely in the way on the twisties. In the fray, I was able to do a 1:43.9 while knowing there was a hell of a lot more time in there as on the hotlap the car giving me a bit of a tow down the back straight decided they needed to pit, and me souly being focused on "DO NOT MESS UP THIS LAP" going into T11, hit the brakes extremely early inline with the car pitting. No biggie, I was stocked with being in the 43!
Next up were the fun taxi sessions where we get to send TA/Drift/GLTC cars all out on track at the same with, with passengers! I love these sessions so much for the obvious reason of being able to share the fun we have with tons of people. I took a few people in our group out for rides who had never been on a track before, and it's just so awesome to watch someone experience that for the first time. 11/10 as always.
Last practice session of the day as just after lunch. It was a bit hotter out, the track had a lot of **** all of over, so I went out not really expecting much. I also still had some of that traffic in front of my on grid as we weren't running by class in the practice sessions, so I did what I called "turning off engineer brain" to stop pre-analyzing what the could COULD do with a given set of inputs, and just drove the snot out of it and reacted to what it WAS doing. Turns out, it's the right way to go about these things. I ran a 1:43.6 with ease with 3 other laps in that session being within .2 seconds. The car had a hell of a lot more in it, and I even messed up some turns and got held up (just a little) on that hot lap. After 3 years of scratching my head wondering how a 42 in this car was EVER possible, it finally seemed in reach and without a hail mary. Such great fun.
Practice was over, and it was time for the qualifiers and the actual competition to start. 5PM was the first session and I had a great position on grid with friend's both in front and behind me. I think it's really important to befriend those folks on the grid near you, it allows you to push each other further, and really not feel like you're in someone's way, or someone else is in your way. Team sport!
While sitting on grid waiting for the Sundae Cup cars to finish their session, I had an ABS light pop up on my dash. Huh. Well that's odd. I knew this would disable EBD and of course the ABS , so I tried a power cyle while on grid, but the ABS fault was still present. I figured I'd just deal with it on track, continuing the theme of turning my engineer brain off. As we were released I went in and did a brake check on the outside of the blend line in T2 and all felt pretty okay. The pedal was definitely not the same, but I could work through it. Go into T3 on the outlap, and just full lockup. I tried to modulate the brakes but no dice, and just went straight off. Looking back at the video what I could have done to keep on track was waaaay more obvious, but I think even with the failure the car would have been pretty undriveable even if I didn't fall of the track. It is funny to see myself turn the wheel after the fact as it's damn obvious that was never going to do anything, but that's the difference of being able to analyze without an impeding patch of grass coming up. I let everyone pass me by and took it easy enough and pitted out. The wheelspeed and GPS position data tells the story pretty well, haha!
(LF wheelspeed scaling is incorrect, so the number is wrong but the graph shape is the more important bit)
I pulled the car in and we checked for flatspots.. they didn't seem too too bad (more on this later... they were), and I ran the code to try to get start at what the issue was. FYI: If you run the car like an 02 Ford Focus, you can get ABS codes on most readers. Yay Ford braking parts!
I tried to hook up to the internet to see what the code meant in the service manual, and had 0 dice getting data. With thousands of people in the area this was always the case at festival. I assumed the pressure sensor was toast, but really needed more info to debug any further. Until then, I was scrubbing any other qualifying sessions. I decided to call my dad as cell phone service still existed, and asked him if he was in front of a computer. I had him look the code up in the service manual and this was the entry:
C1290: The pressure from the brake fluid pressure sensor when not braking exceeds specification
This still led me down the path that the sensor was broken, and I had new one sitting on a table in my garage. Of course. We checked all of the wiring to the sensor and unit, and it was all fine. I hooked up my tactrix and looked at the pressure data, which was reading totally fine. Hrm. I cleared the fault and wasn't able to get it to pop back up after some driving around the paddock, but this wasn't the confidence I needed to run the car on track with a potential failure at actual race pace. I decided to eat some dinner and drinks some beers and stew on what the issue was. I didn't think the pressure sensor was toast, I don't think it was because of heat that things went out of whack, and it wasn't until later it clicked. The brake switch. This is a tomorrow morning problem now.
I had adjusted the pedal a bit with the new MC and had just set the brake switch so that the lights weren't always on. I pulled up brake unit data again, and pinky toed the pedal. I was able to see MC pressure without the brake switch reading, and set the fault I had seen before immediately. Pressure in the system had in fact been detected without the module seeing that it was supposed to be braking. I clicked back the brake switch adjustment two clicks, popped it back in, and was no longer able to see MC pressure without the brake switch being pressed. Badass.
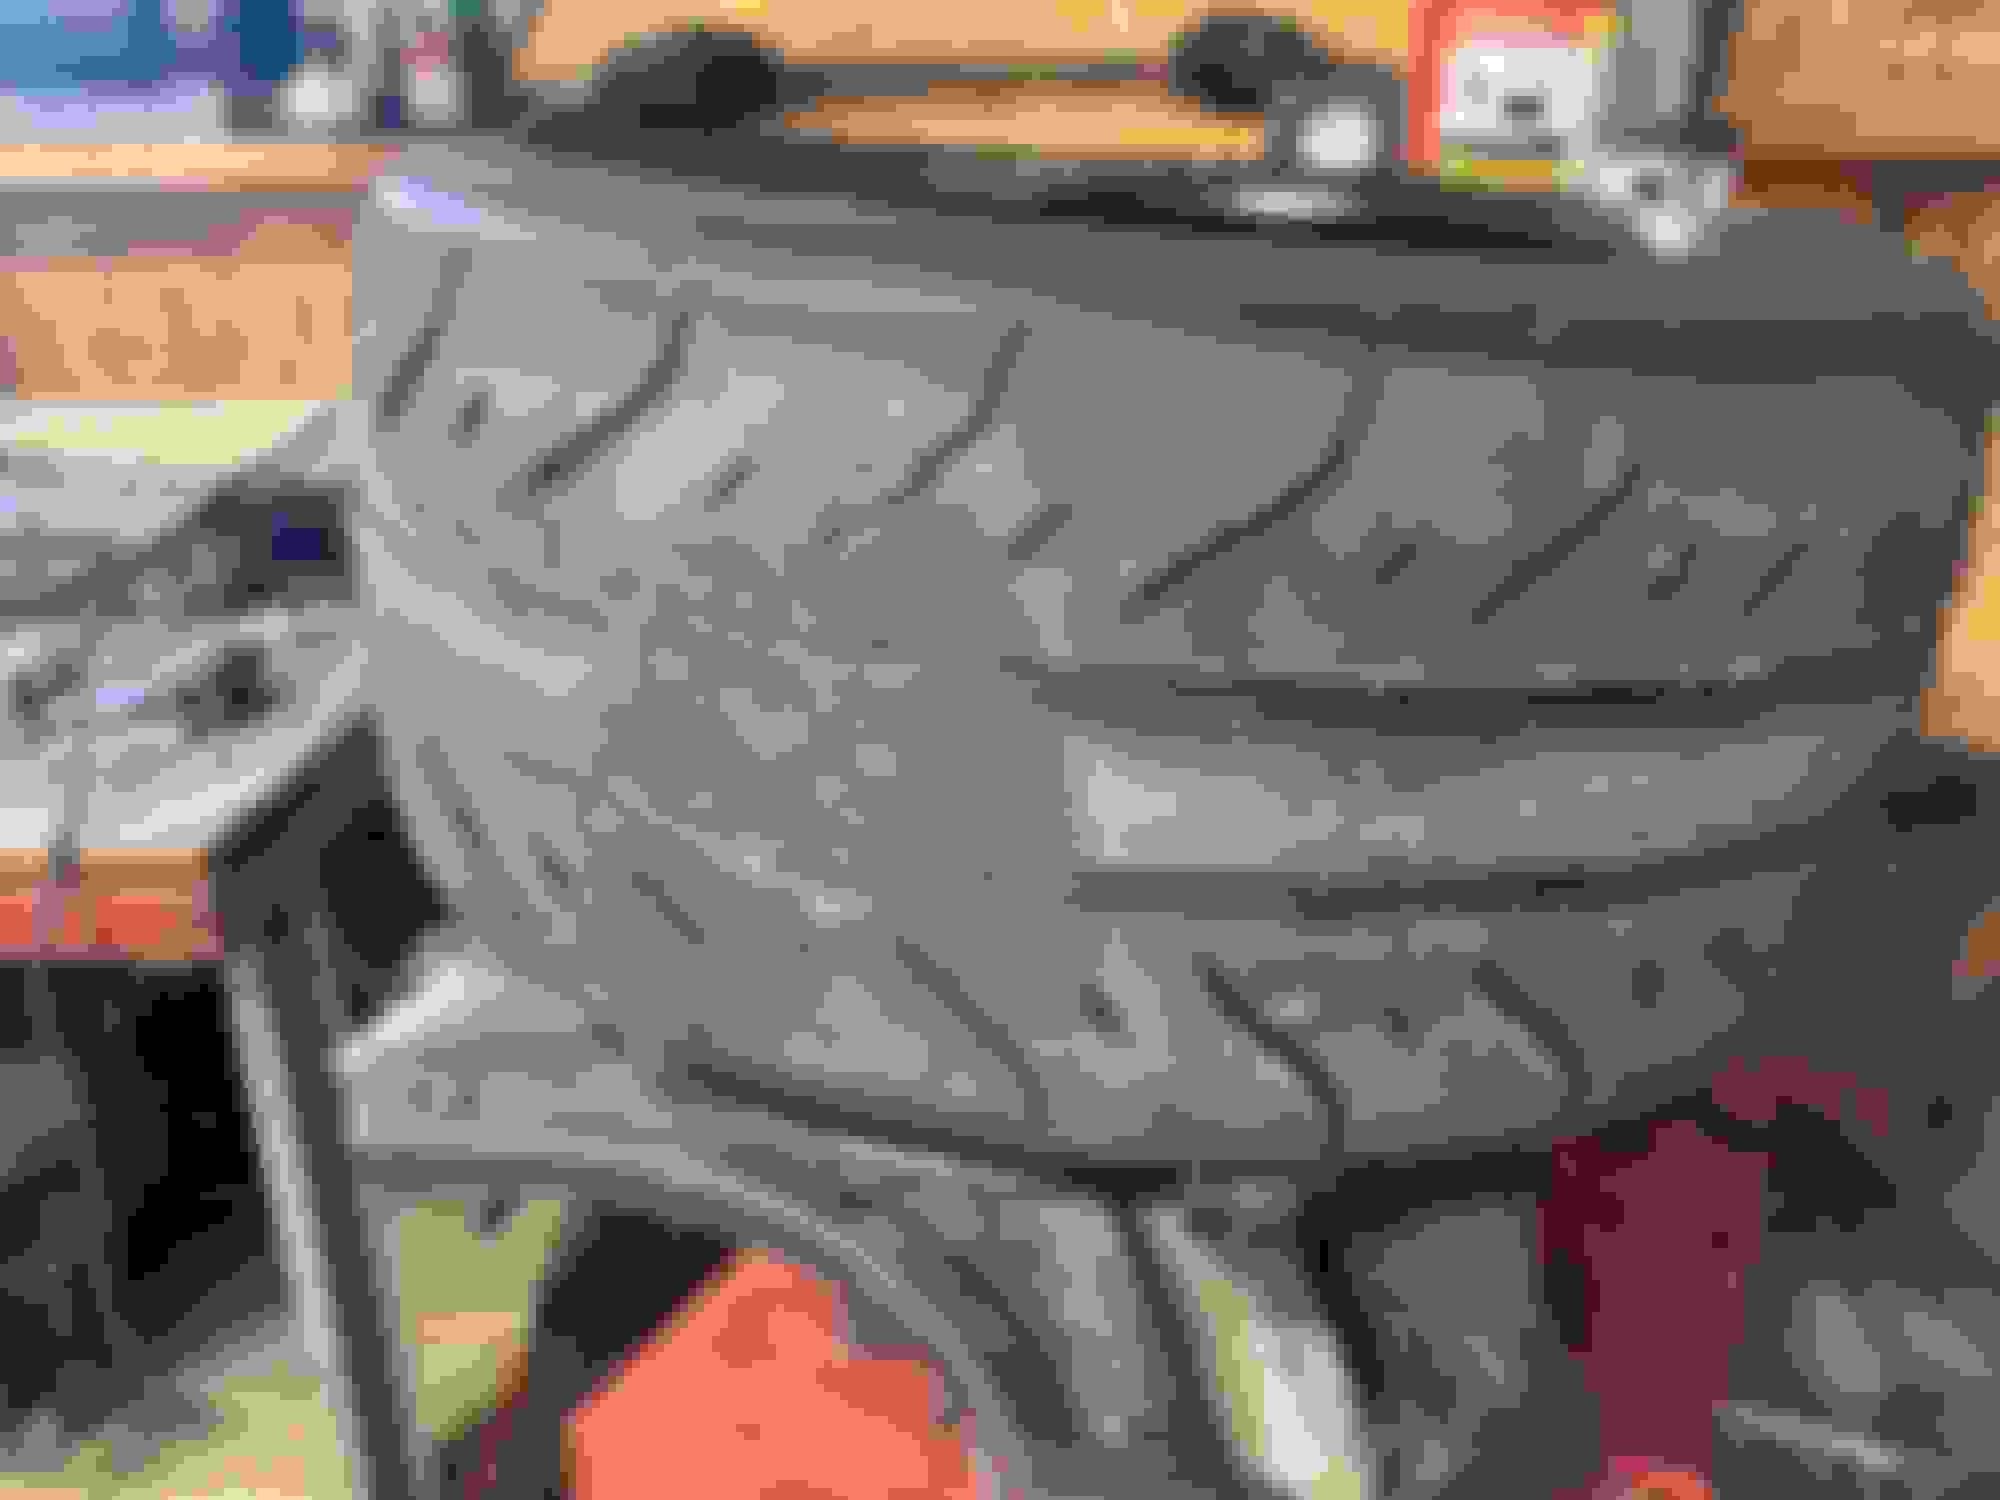
At this point I had missed the morning qualifier, so I went out for a test drive on Phoenix road to determine if my fix was vetted. Side note, I have no idea if the track or if the road was the right place to test this failure out or not... but it seemed slightly more moral to test on the street knowing what the failure mode was. All went well, so I had regained a bunch of confidence I had lost when you dance yourself off the track. I also didn't feel like the flat spots were too bad, and that I could drive through them. This would turn out to be a terrible choice after actually getting a good look at the tires, but these are things you learn the hard way sometimes.
I was able to grid up for the last qualifier after a chat with race control to get my name on the list. Since I didn't make a lap in the first quali, it was basically like I didn't even show up. My brain was back in engineer mode and with the tires vibrating like crazy, the best I was able to manage was a 1:44.4. A bit disappointing given the success I had in practice, but these are the struggles we all go through. I am sure I was not, am not, and will not be in the future the only person fighting a vehicle issue battle at these events. As disappointing as it was, I was all in all extremely happy with that time and was able to at least beat the few guys I had been on the grid next to the whole weekend. And hey! The car was fixed! That's a 10/10 issue debug if you ask me.
I ended up swapping the front tires back to the older ones for the taxi sessions he had left, and the grip the car had before the ABS failure was back. Live and learn.
Photo of one of the front tires back at home. Hindsight is a bitch, right?
I decided to party it up and call it a weekend even with one more session for us on Sunday morning. Being able to drop 2 seconds in a weekend and debug an issue with the car was all the satisfaction I needed. The fuel system worked flawlessly by the way, only to be bested by me literally not running enough gas in the car early on in the weekend, but being able to not cut any fuel (or leak any) down to 1% of tank read gas is awesome.
While trying to collect some thoughts after the fact, I wasn't exactly sure where the speed had come from. The only thing I did over the winter were the brakes, and 2 seconds to drop just driving is quite a lot. I think a lot of what I was able to do came from running the car at Lime Rock last year, a track where you are FORCED to use the momentum of the car to gain speed. I was able to limit drive the car a lot faster at that track, which I think gave me the confidence and knowledge that the car would be able to handing the extra speed I was giving it. Looking at previous lap data and videos, I am just faster all over the place and it makes sense to me that being forced to limit grip the car at faster speeds leads you to have much more grip confidence at lower speeds. Driving at new tracks is seriously the best way to hone driver skill. I am convinced.
We were also able to get my buddy's K Miata into the 43s as well, which was a 3 second improvement from 2 weeks ago. That's a hell of a weekend if you ask me.
Here are the results (holy hell 30 cars in class!):
Good job on the PBs and hopefully you can sort the abs nonsense out. It seems a lot of rx8 racers have gone to the way side of deleting DSC or starting with a non dsc chassis. Do you have a baseline time at this track before you did all the track mods?
I did a 1:48.31 with a relatively stock car with brake pads, tires, and coilovers in 2020, so I�m super happy with that progression.
I think the ABS issues are sorted, and going to a non DSC unit doesn�t really gain me much even though it would be the right starting point. With DSC disabled it�s basically the same unit. I don�t know what kind of EBD the sumitomo unit does, but I�m happy with the Bosch stuff currently. The fault it had was 100% my fault, not the unit.
Yeah, everybody I know who tracks/races or autocrosses RX8s is now on the nonDSC ABS unit. They all say it's much improve, not just in avoiding ice mode, but the ABS itself is better tuned. I'd def go that route. Finding the pumps still isn't crazy. Finding the mating harness is harder, but it's easy enough to just connect discrete wires with contacts to the mating pins on the pump and then pot it. On the other ends of the wires use any other type of connector like a Superseal or circular MIL, etc and use that to disconnect the pump from the harness.
With DSC disabled it’s basically the same unit. I don’t know what kind of EBD the sumitomo unit does, but I’m happy with the Bosch stuff currently.
it absolutely is not.
another member here ordered what we believe to be the non-ABS connector, but didn’t confirm to me if it was or not after it was ordered. Let me check on that.
.

 04-16-2024, 06:20 PM