DIY: Chargespeed Fender Vents Install
 01-12-2008, 10:32 AM
#1
RE雨&
Thread Starter

Join Date: Jun 2006
Location: Kuala Lumpur, Malaysia
Posts: 316
Likes: 0
Received 0 Likes
on
0 Posts
DIY: Chargespeed Fender Vents Install
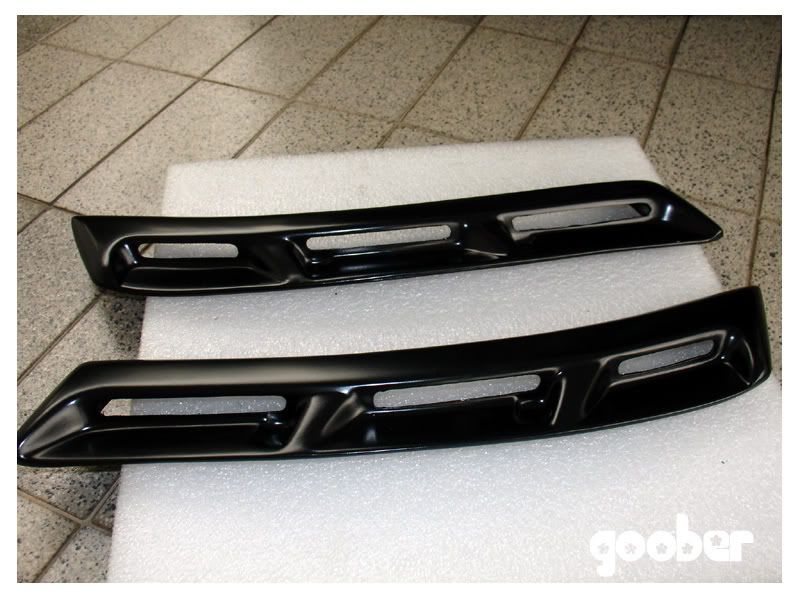
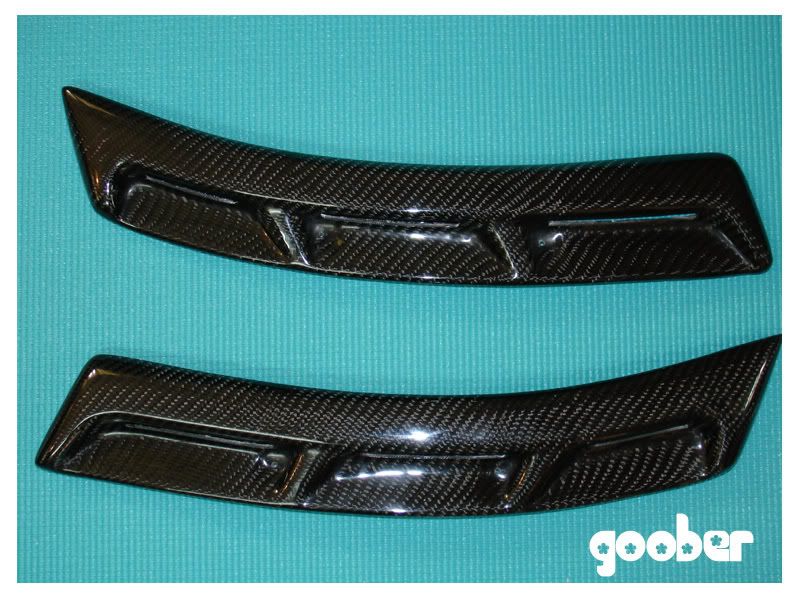
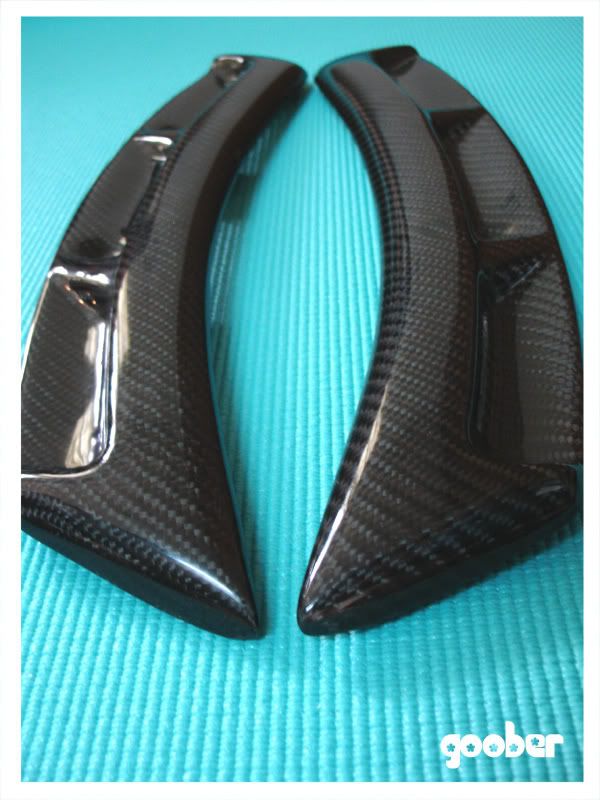
DIY: My Chargespeed Fender Vents.
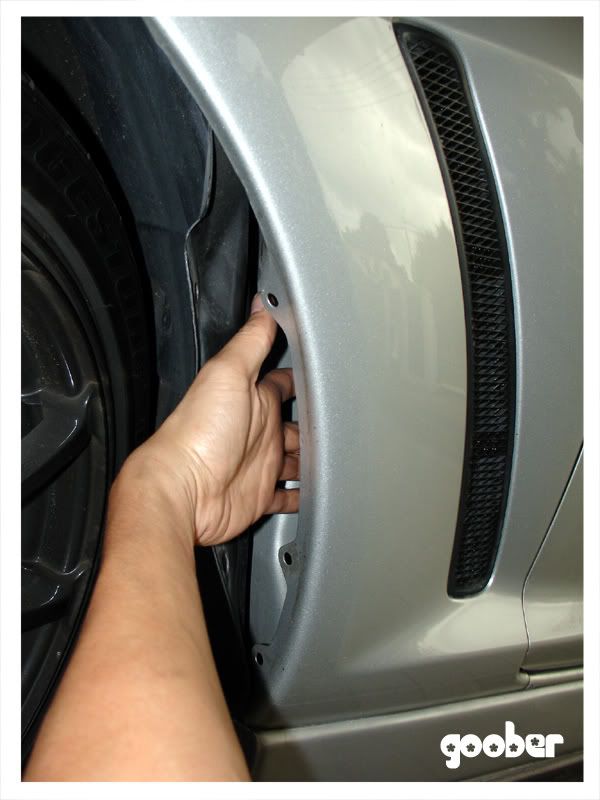
There are 3 screws to remove to get to the stock vents
Need a flexible hand like mine
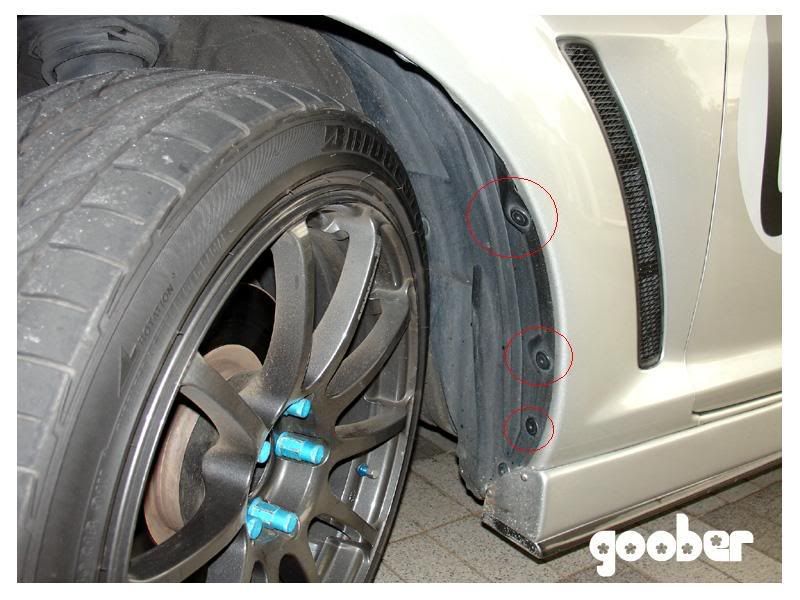
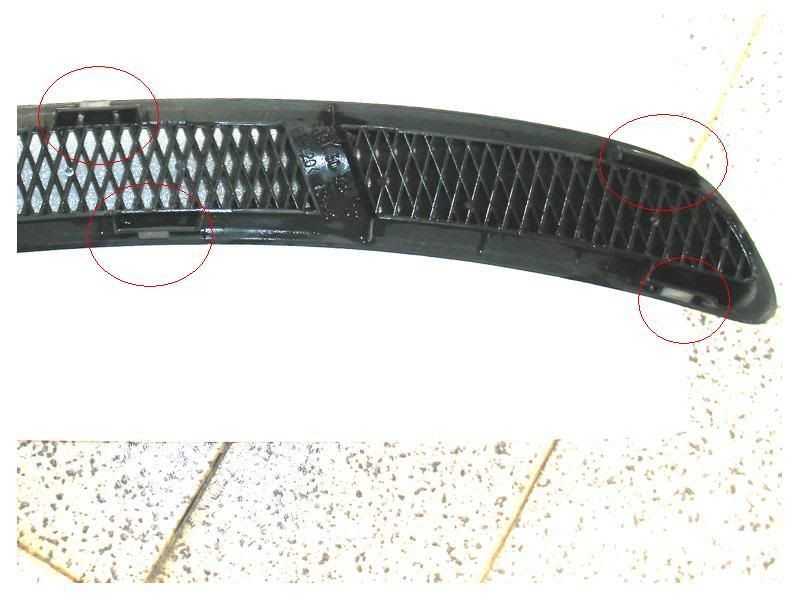
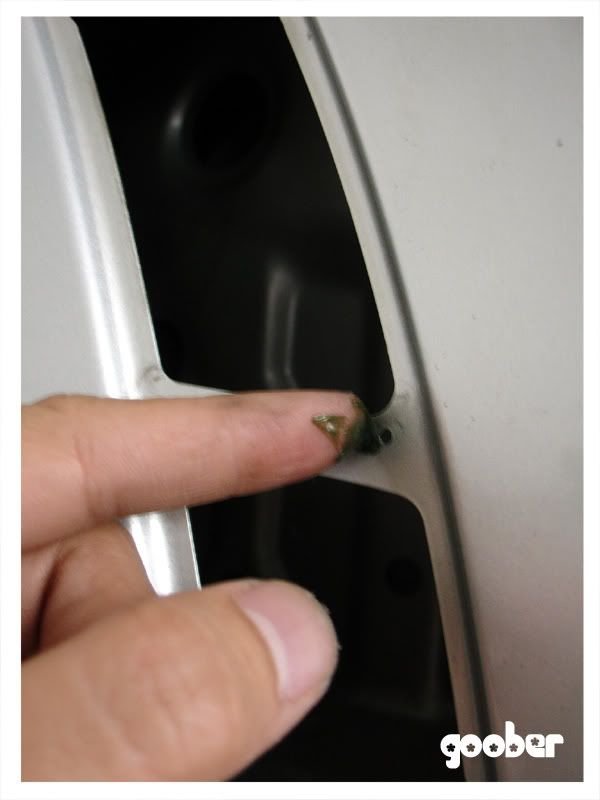
The stock vents are held by 6 clips. Just need to press them with your fingers from the inside
Circled in red are the clips
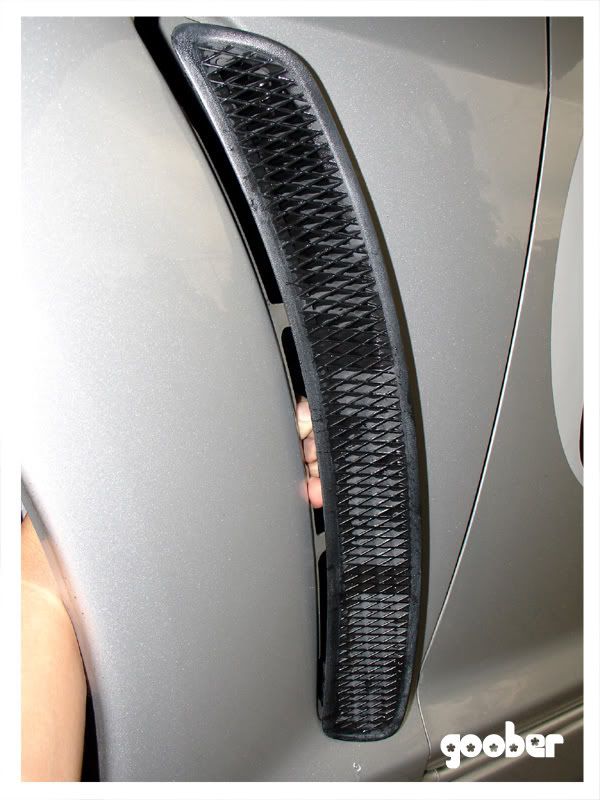
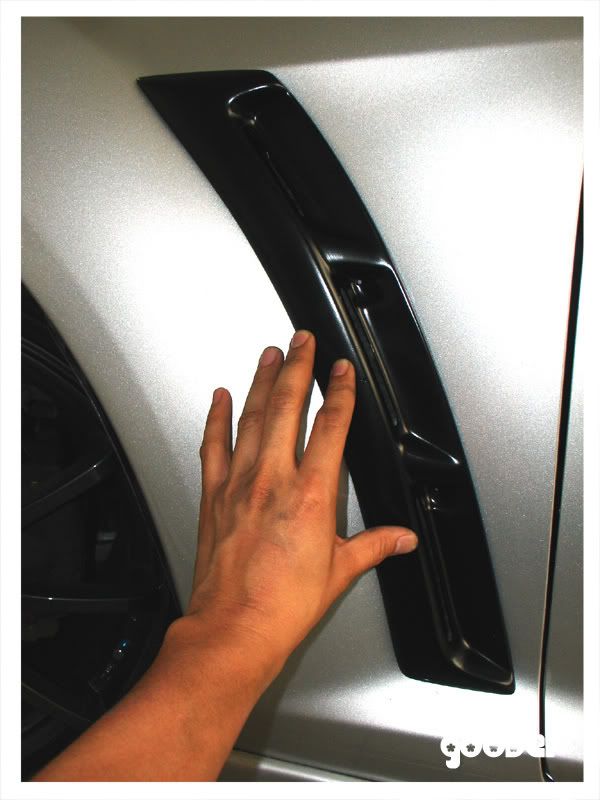
Here's how the fender looks like without the vents

Test Fit the Chargespeed Fender Vents first to get the position of the hole. Yes need to drill hole...2 holes to be precise
Mark the position of the holes with a pen or something sharp
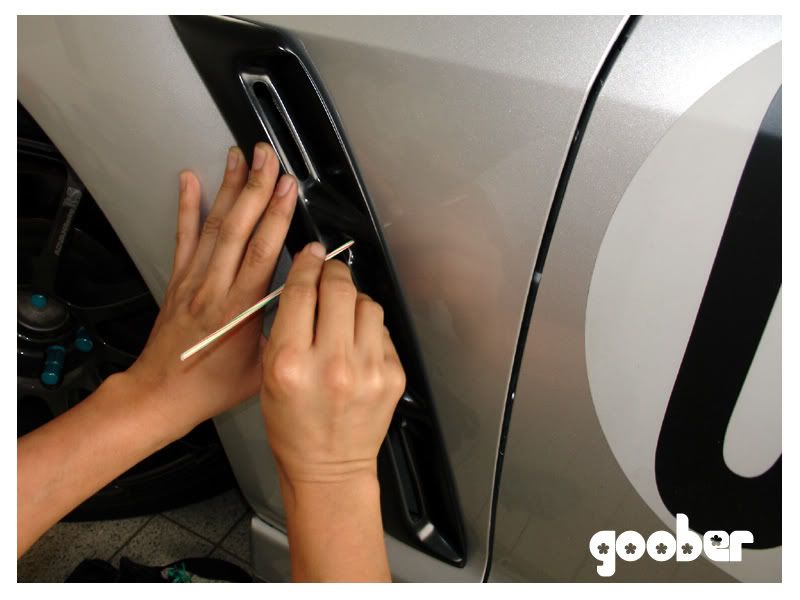
Drill away. Make sure the drill bit is the correct size otherwise ...big trouble

Here's how the holes look like - circled in red
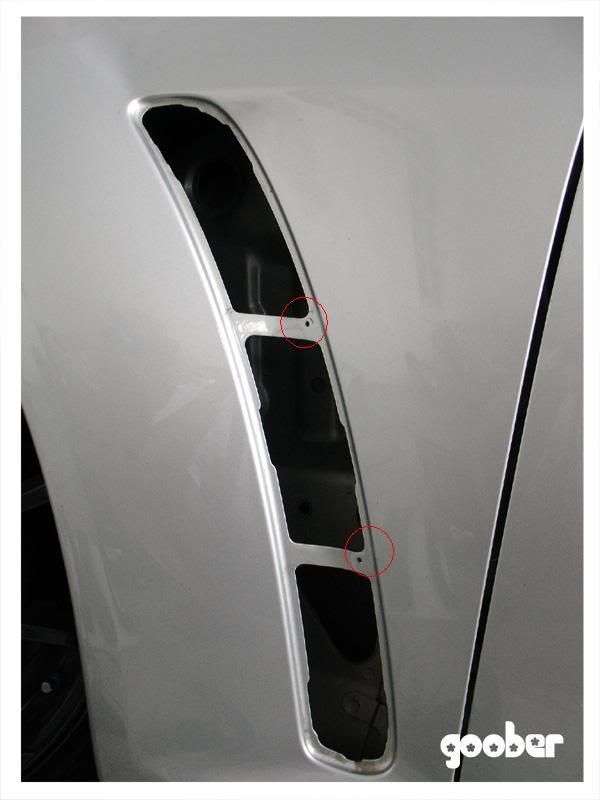
Put a little grease on the holes to prevent rust. Paint would be better.
Screw the Chargespeed Fender Vents on. Don't forget to put back the 3 screws taken off earlier in step 2

Taa Daa.... DIY Chargespeed Fender Vents install...

There are 3 screws to remove to get to the stock vents
Need a flexible hand like mine
The stock vents are held by 6 clips. Just need to press them with your fingers from the inside
Circled in red are the clips
Here's how the fender looks like without the vents
Test Fit the Chargespeed Fender Vents first to get the position of the hole. Yes need to drill hole...2 holes to be precise
Mark the position of the holes with a pen or something sharp
Drill away. Make sure the drill bit is the correct size otherwise ...big trouble
Here's how the holes look like - circled in red
Put a little grease on the holes to prevent rust. Paint would be better.
Screw the Chargespeed Fender Vents on. Don't forget to put back the 3 screws taken off earlier in step 2
Taa Daa.... DIY Chargespeed Fender Vents install...


 01-13-2008, 09:06 AM
#6
RE雨&
Thread Starter
Join Date: Jun 2006
Location: Kuala Lumpur, Malaysia
Posts: 316
Likes: 0
Received 0 Likes
on
0 Posts
Thanks guys. Believe it's both cosmetic and helps a little with directing the airflow too. Since the stock vents were just a mesh design, this one has a directional air vent...
 01-13-2008, 05:44 PM
#9
RE雨&
Thread Starter
Join Date: Jun 2006
Location: Kuala Lumpur, Malaysia
Posts: 316
Likes: 0
Received 0 Likes
on
0 Posts
01-13-2008, 07:54 PM
#10
I am a meat popcicle


 01-13-2008, 08:14 PM
#12

the vents aren't functional because there is no opening from the engine bay to have the air flow through it.
i was looking at these a while back, they do look good, but in one of your pics it seems like the vent holes don't completely cover the metal across the vent hole.
i was looking at these a while back, they do look good, but in one of your pics it seems like the vent holes don't completely cover the metal across the vent hole.
01-13-2008, 08:15 PM
#13
The RX-8 is missed
iTrader: (3)

Join Date: Aug 2005
Location: Houston, TX
Posts: 2,084
Likes: 0
Received 0 Likes
on
0 Posts
look good. got some pics from further away? not sure on the shape. i got some from a vendor here than more mimic the stock look (i can't think of the name of the company) but w/ the mesh behind the openings -- look good but the fitment wasn't great.


Thread
Thread Starter
Forum
Replies
Last Post
JimmyBlack
Series I Major Horsepower Upgrades
273
02-10-2020 10:23 PM
yurcivicsux
Series I Major Horsepower Upgrades
192
09-12-2017 10:54 PM