Taillights


 The whole "spider" thing is so funny! I thought I was the only one with a spider in the tail light.
 10-13-2006, 03:17 AM
#28
Registered Laker's Fan
Join Date: Aug 2003
Location: By da beach, Cali.
Posts: 302
Likes: 0
Received 0 Likes
on
0 Posts
Originally Posted by kwescott
The unfortunate part about our tailights, is that they have a lot of contours that makes it very difficult to apply vinyl to. I didn't have enough patience to do it myself, so I asked my fiance to do it. She is very careful, and willing to take the time to make things as good as possible. If you do it yourself, you will have a couple of areas that will be prone to small air bubbles. If you took the material to a window tinting shop, they may have some better techniques to make the install look perfect.
Kwescott, you have one special lady. That was very sweet of her to have done that for you. I think she did one heck of a good job.
Now, back to the subject at hand, I install clear bra, so I can you guys a few tips. Follow this link for some good instructions here. You can probably get away using some type of credit card, but make sure that you wrap it with with a paper towel, so that you don't scratch the film. Or, just buy a squeeggee you can pick one up just about anywhere. The squeeggee will help squeeze the excess solution and any air bubbles.
 10-13-2006, 09:06 AM
#31
Originally Posted by MissyK
As far as I know theres no alternative of taillights. You could just smoke them or tint them red for something different.......
And for fenders u can get chrome painted 1s or carbon fibre
And for fenders u can get chrome painted 1s or carbon fibre
chrome painted? are you serious? link?

 10-16-2006, 03:22 PM
#40
Scuderia
iTrader: (6)

Join Date: Jan 2005
Location: Buckeye Country
Posts: 1,955
Likes: 0
Received 0 Likes
on
0 Posts
Originally Posted by kwescott
I used the "red-out" kit from Ebay. It is a vinyl type material that you have to apply to the outside of the lens. Most people who see the lights don't even realize that anything has been done to them...I guess because that is an area of the 8 which is rarely modded...so no one ever expects it.
The material is good for 5 years, it is an outdoor grade...so it is durable. I've had it on for over a month now. It still looks like the day I put it on.
The unfortunate part about our tailights, is that they have a lot of contours that makes it very difficult to apply vinyl to. I didn't have enough patience to do it myself, so I asked my fiance to do it. She is very careful, and willing to take the time to make things as good as possible. If you do it yourself, you will have a couple of areas that will be prone to small air bubbles. If you took the material to a window tinting shop, they may have some better techniques to make the install look perfect.
As for pics.....I guess I could put up one. I kinda want to keep the lights under wraps for now....but I will definately put up a thread after SS9.
10-16-2006, 03:36 PM
#41
One ball, corner pocket

Join Date: Apr 2004
Location: Fontucky, right next to Patriotville
Posts: 2,053
Likes: 0
Received 1 Like
on
1 Post
yeah, but if they came red, then you know there would be cheesy looking altezzas on ebay. At least out Altezza lights look nice and have the extra detailing in them that you would never find on an aftermarket light.
As for the red film, and the contours of the lights....if you have little to no patience, this is not something for you. If you do have patience but little skill, then buy two of the kits, because you will more than likely do a veyr poor job on your first light. The kit doesn't come with enough material to cover two lights and make a mistake.
I bought a generic kit 12'' by 6'' to do my corners...and have more than enough to do some more.
If you want to have early success, just cover your corners...with either black or red tint. The maybe you'll have an idea of what to look forward to on the taillights.
10-16-2006, 03:39 PM
#42
One ball, corner pocket
Join Date: Apr 2004
Location: Fontucky, right next to Patriotville
Posts: 2,053
Likes: 0
Received 1 Like
on
1 Post
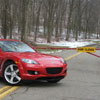
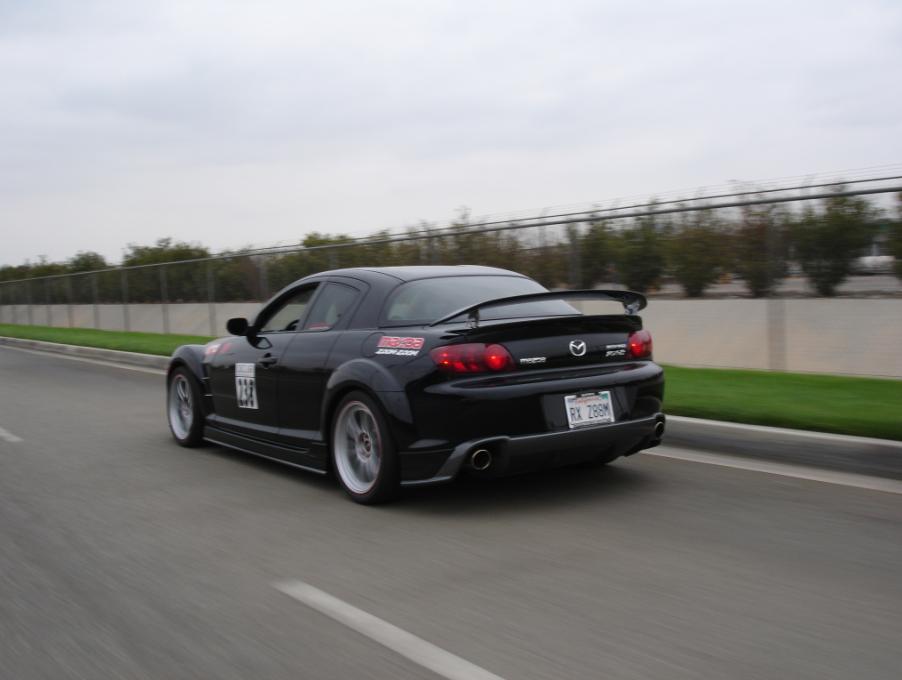
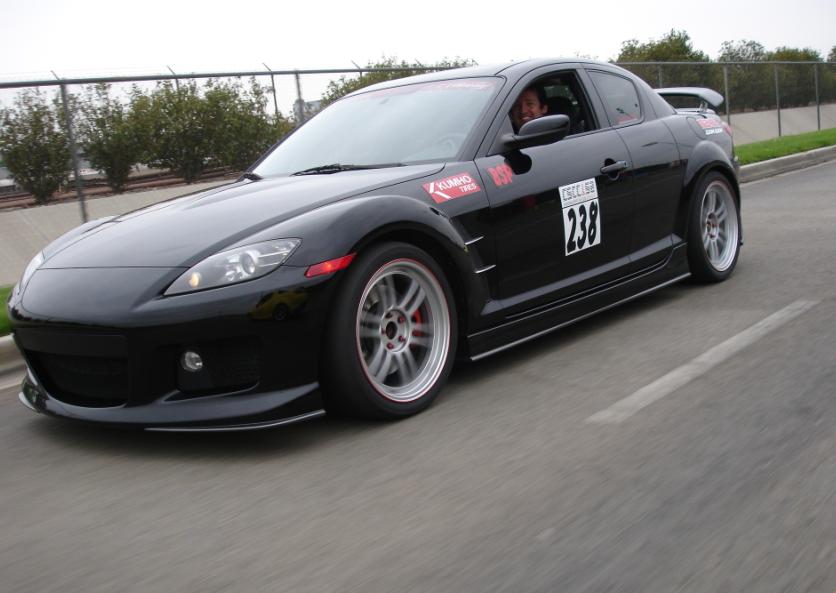
here's some blurry action shots....you can see how the rear looks, as well as the sides with the red corners.
Last edited by kwescott; 10-16-2006 at 03:42 PM.
10-16-2006, 03:48 PM
#43
Scuderia
iTrader: (6)
Join Date: Jan 2005
Location: Buckeye Country
Posts: 1,955
Likes: 0
Received 0 Likes
on
0 Posts
Originally Posted by kwescott
yeah, but if they came red, then you know there would be cheesy looking altezzas on ebay. At least out Altezza lights look nice and have the extra detailing in them that you would never find on an aftermarket light.
As for the red film, and the contours of the lights....if you have little to no patience, this is not something for you. If you do have patience but little skill, then buy two of the kits, because you will more than likely do a veyr poor job on your first light. The kit doesn't come with enough material to cover two lights and make a mistake.
I bought a generic kit 12'' by 6'' to do my corners...and have more than enough to do some more.
If you want to have early success, just cover your corners...with either black or red tint. The maybe you'll have an idea of what to look forward to on the taillights.
As for the red film, and the contours of the lights....if you have little to no patience, this is not something for you. If you do have patience but little skill, then buy two of the kits, because you will more than likely do a veyr poor job on your first light. The kit doesn't come with enough material to cover two lights and make a mistake.
I bought a generic kit 12'' by 6'' to do my corners...and have more than enough to do some more.
If you want to have early success, just cover your corners...with either black or red tint. The maybe you'll have an idea of what to look forward to on the taillights.
 I'm in Ohio, do you think the film will hold up in our climate?
10-16-2006, 03:58 PM
I'm in Ohio, do you think the film will hold up in our climate?
10-16-2006, 03:58 PM
#44
One ball, corner pocket
Join Date: Apr 2004
Location: Fontucky, right next to Patriotville
Posts: 2,053
Likes: 0
Received 1 Like
on
1 Post
Originally Posted by RA-Eight
Thanks for the tip. I installed the MS sides myself, so hopefully that gave me a higher threshold of patience! I'm in Ohio, do you think the film will hold up in our climate?
I'm in Ohio, do you think the film will hold up in our climate?I guess I'm spoiled here in California, I never have to worry about weather, and the affects it may have on the car or my mods. I just have to worry about California Highway Patrol and their abilities to deflate my excitement with fix-it tickets.
 10-17-2006, 07:48 PM
#47
#1 Legend
iTrader: (1)
Join Date: May 2004
Location: TEXAS
Posts: 3,904
Likes: 0
Received 0 Likes
on
0 Posts
Originally Posted by kwescott
I used the "red-out" kit from Ebay. It is a vinyl type material that you have to apply to the outside of the lens. Most people who see the lights don't even realize that anything has been done to them...I guess because that is an area of the 8 which is rarely modded...so no one ever expects it.
The material is good for 5 years, it is an outdoor grade...so it is durable. I've had it on for over a month now. It still looks like the day I put it on.
The unfortunate part about our tailights, is that they have a lot of contours that makes it very difficult to apply vinyl to. I didn't have enough patience to do it myself, so I asked my fiance to do it. She is very careful, and willing to take the time to make things as good as possible. If you do it yourself, you will have a couple of areas that will be prone to small air bubbles. If you took the material to a window tinting shop, they may have some better techniques to make the install look perfect.
As for pics.....I guess I could put up one. I kinda want to keep the lights under wraps for now....but I will definately put up a thread after SS9.
The material is good for 5 years, it is an outdoor grade...so it is durable. I've had it on for over a month now. It still looks like the day I put it on.
The unfortunate part about our tailights, is that they have a lot of contours that makes it very difficult to apply vinyl to. I didn't have enough patience to do it myself, so I asked my fiance to do it. She is very careful, and willing to take the time to make things as good as possible. If you do it yourself, you will have a couple of areas that will be prone to small air bubbles. If you took the material to a window tinting shop, they may have some better techniques to make the install look perfect.
As for pics.....I guess I could put up one. I kinda want to keep the lights under wraps for now....but I will definately put up a thread after SS9.
 10-17-2006, 11:30 PM
#49
 10-17-2006, 11:35 PM
#50
One ball, corner pocket
Join Date: Apr 2004
Location: Fontucky, right next to Patriotville
Posts: 2,053
Likes: 0
Received 1 Like
on
1 Post
Originally Posted by tiltmode43
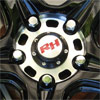
car looks great kwescott! Did you pinstripe the rpf1s with red? imo it adds to your look overall, I like it. Also, what size wheels are you running?
Yes, I added a 1/4 inch red pinstripe around the outside lip, along with some red lugs. These are just for track days. They are 18x9.5 +40 offset on all 4, with Kuhmo V710's in the 285 width. They fit beautifully at all corners. I have the MS suspension as well.
Street Trim
19x8.5 and 19x9.5 Volk GT7
Last edited by kwescott; 10-17-2006 at 11:41 PM.