When you click on links to various merchants on this site and make a purchase, this can result in this site earning a commission. Affiliate programs and affiliations include, but are not limited to, the eBay Partner Network.
Hi everyone just wanted to share the gauge pod I made to house 3 Défi BF gauges
The backstory is that I couldn't find a gauge pod that I truly liked. The only one that interested me was the RE Amemiya, but it was only available as RHD...
As for building one from scratch, it seemed pretty difficult to plan and achieve good results. Here's what I ended up doing:
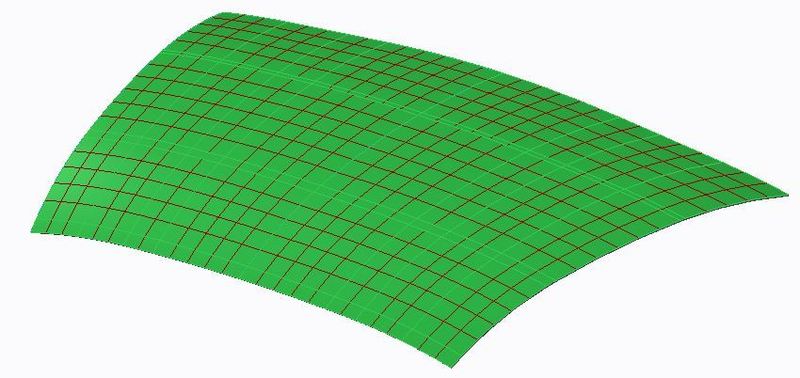
I first modeled my dash's center console using a contour Gauge Duplicator. Took a while, but I ended up with a surface pretty close to stock.
The idea was not to match it perfectly, but rather give me an idea what space I had for the pod in terms of depth, width and angle, etc.
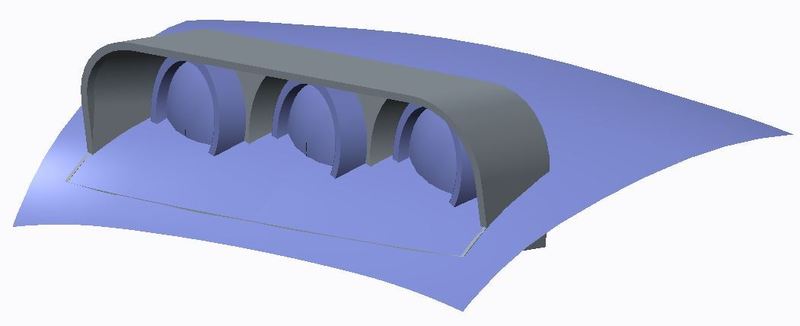
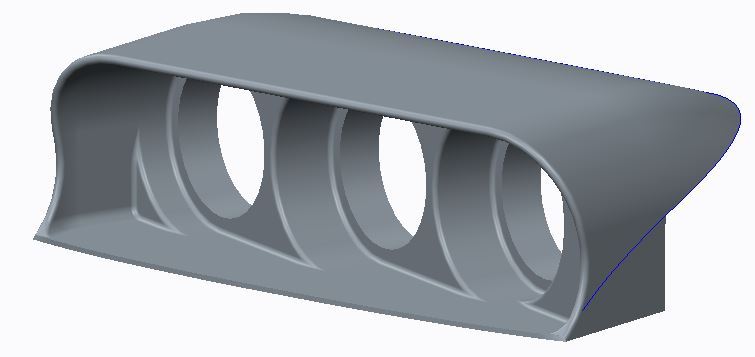
Then, I modeled the basic layout of the gauge. I calculated the angle of all gauges to match with the driver’s orientation, and offset the surface so the housing’s front stays straight. I also made a small hood to prevent the sun from shining in the gauges.
Finally I added the curvature at the back, added a few radiuses and cut the part to match the RX8’s dash surface.
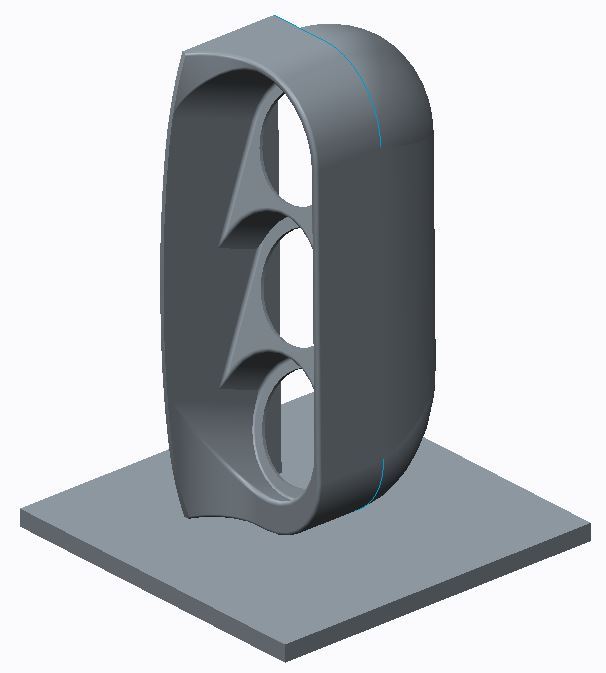
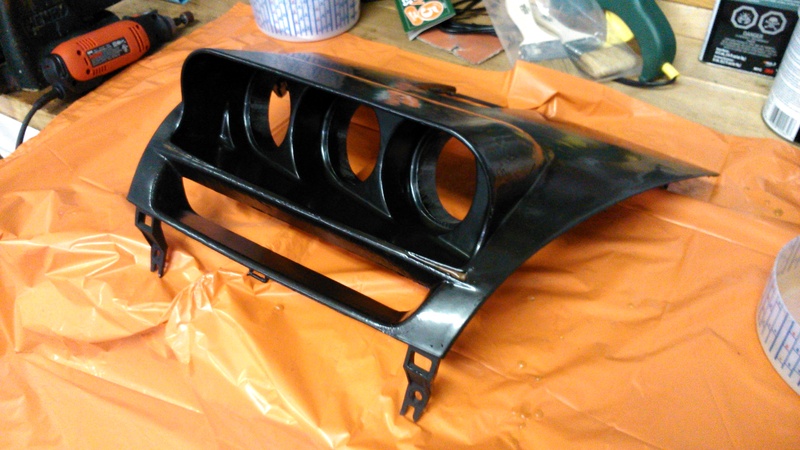
Next, I 3D printed the part in ABS using a dimension Elite 3D printer. One thing to note is that 3D printing builds the part by creating layers of thin plastic. The orientation of the part in the printer is important for 2 reasons: - The part is weaker between the layers, as it tends to delaminate if the part is bended. - Curved surfaces are better defined when printed along the x/y axis. Curves following the z axis will tend to be rougher.
This is why I printed the gauge pod tall ways like this:
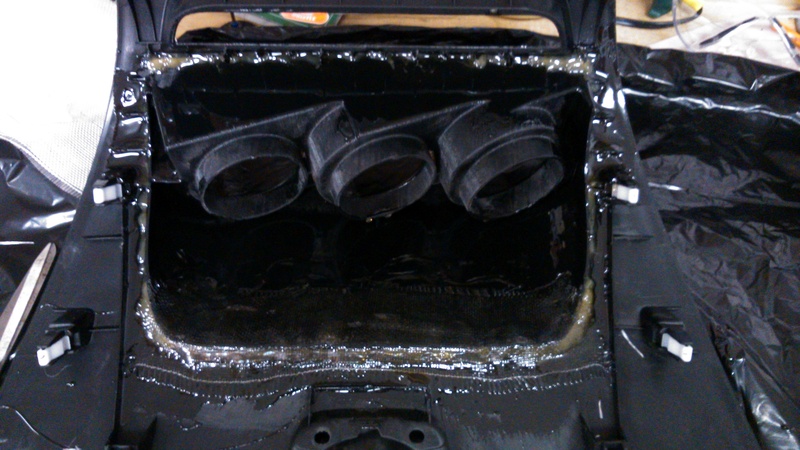
After dismantling the center dash piece, I made sure there was enough space in there for the gauge pod, which I designed to recess a bit in the dash. No problem there since this space is made to accommodate the GPS screen on other models. I’ve marked the dash piece using the gauge pod as my template for width and guestimated the depth (a bit short to make adjustments). I cut the opening with a dremmel and adjusted the fit as I went along (sorry, no pics of this part).
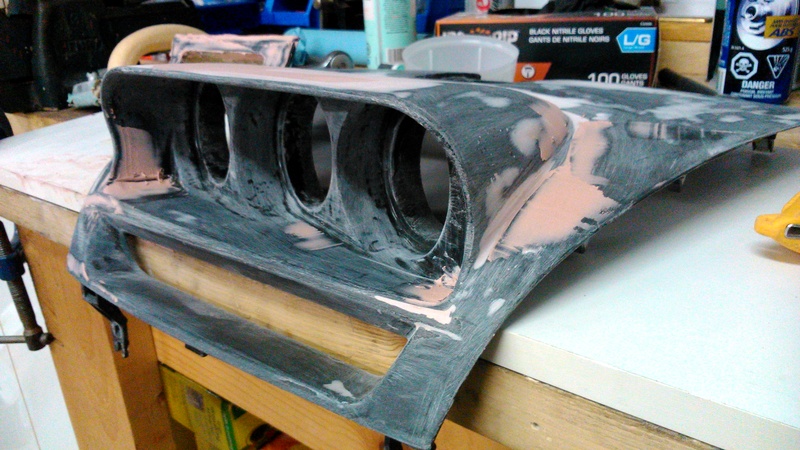
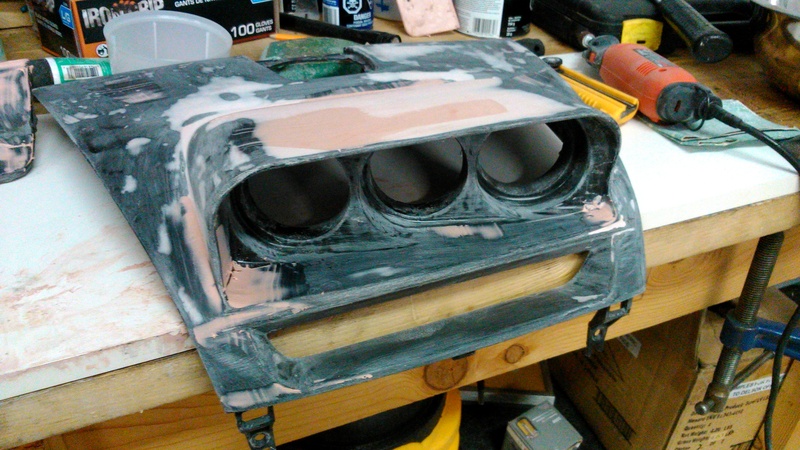
I then tacked the part in place at the bottom using hot glue, sanded roughly the two parts and applied a layer of fibreglass resin on top. This helped eliminate the gap between the two parts and smoothed out the 3D printed part
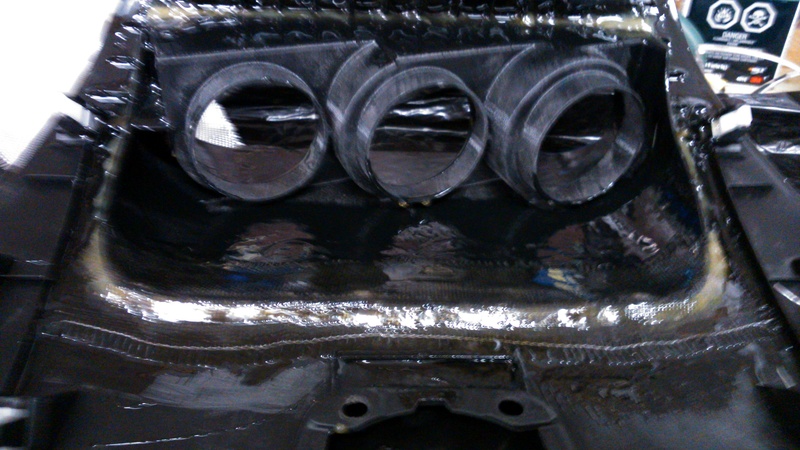
Next I applied some actual fibreglass underneath the assembly to strengthen the bond between the two parts.
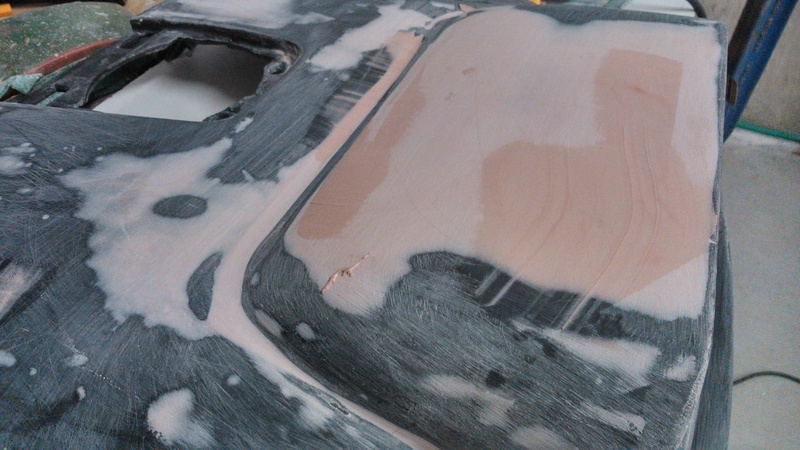
Next was the long process of Sanding, bondo, repeat... Using finer grit every at pass. I also used some filling primer in the final stages of the prep and ended with 300 wet sand.
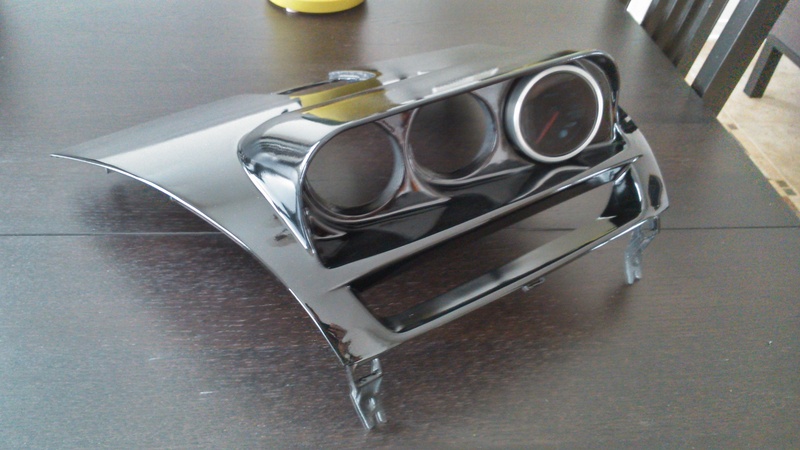
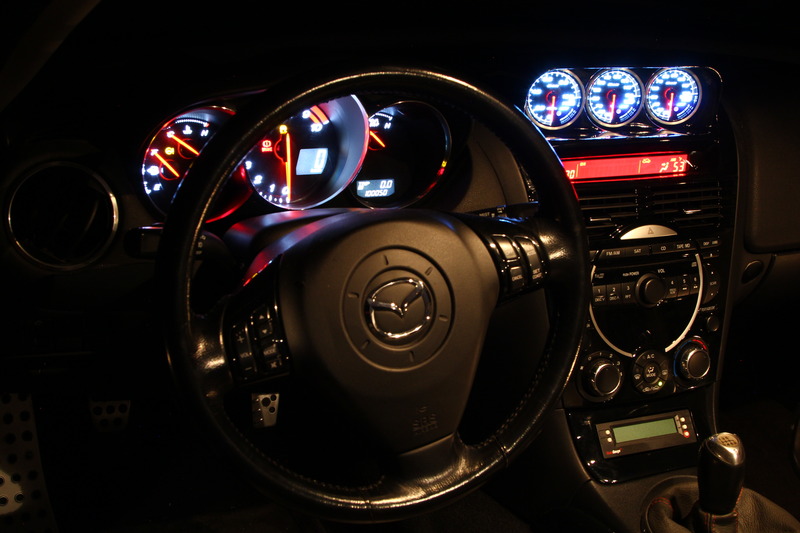
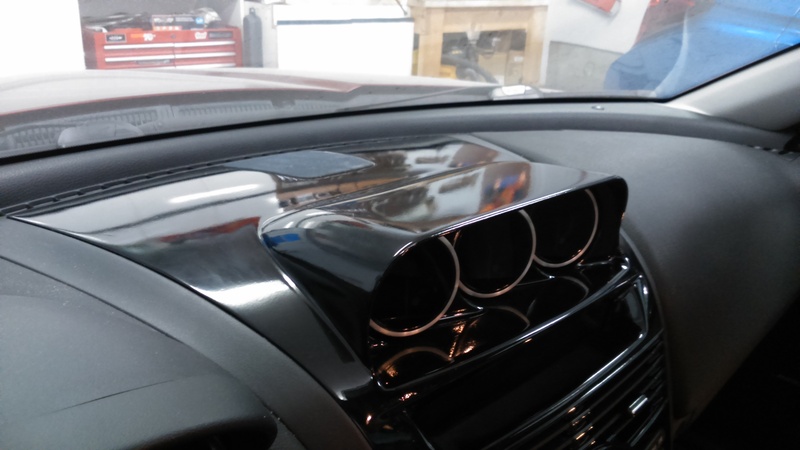
The final painting process was done using 2 coats of gloss black paint and 2 coats of clear (looks chrome somehow, but it's really black).
And here’s the final result:
If you’re interested in this gauge pod, I’m not looking to sell it as a finished product, but I would be happy to share the CAD file and customise it to your needs if necessary. Just send me a PM with the gauges you intend to use and I’ll get back to you.
Nice job, I was looking to get a 3D printer this spring, I'll hit you up for the Cad files if I get it. Not sure if I'm making my own or just buy the kit, my buddy has one he put together about 2 or 3 years ago, I think it was one of the early MakerBot ones. Do you have a 12X12 surface?
Nice job, I was looking to get a 3D printer this spring, I'll hit you up for the Cad files if I get it. Not sure if I'm making my own or just buy the kit, my buddy has one he put together about 2 or 3 years ago, I think it was one of the early MakerBot ones. Do you have a 12X12 surface?
The 3D printers have gone down a long way and are becoming more affordable then ever. The only issue with home 3D printers is that they often use building material only, and no support material. This means that for complex shapes, it has to make support columns out of the same building material as the part, which have to be trimmed down once the part is done. It may not be the end of the world, but it's definitely something to look into.
The gauge pod's size (printed tall ways) is: 3.1"x6"x10.12"(height) for the 60mm gauge size.
I will work on a 52mm gauge size this weekend, which will most likely reduce the overall dimensions a bit
I see that now on the rendering. You could make this one on an 8x8 as long as you can go that high, it all depends on what you have. Again, thanks for sharing.
Thanks, can't wait to try them out on the road, but the weather hasn't cooperated so far. If all goes well, I shoud be able to get the car out next week.
I wanted to say that you did an awesome job creating this template! I would like to use 3No. 52mm gauges and my car is a right hand drive. Is there any way you have that template made? If the only template you have is the one you have showed on this website, I would gladly take a look at the file and try to make adjustments my self.
I wanted to say that you did an awesome job creating this template! I would like to use 3No. 52mm gauges and my car is a right hand drive. Is there any way you have that template made? If the only template you have is the one you have showed on this website, I would gladly take a look at the file and try to make adjustments my self.
Let me know,
Thank you!
Thanks for all the good words!
I guess you should be able to mirror the part and it will give you the RHD version.
The irony is that I really liked the Re-Amemiya Cluster, but they only made it in RHD. Mine was styled based on it, but converted to LHD.
I'll send you the link by PM
Just noticed a chinese knockoff brand on alibaba is selling a cheap re-amemiya copy, but using some of my images as "examples" of installation... never mind mine is LHD, uses the oem cover for center speaker grill and doesn't have the same cover shape...
They even have the nerve to watermark MY pictures...
Not sure if I should be flattered or salty about it, but I guess that's just what china does...
Hah. It's an achievement I think. There's a product out there that uses my DIY as the instructions, which was hilarious to both me and the seller when I ended up buying said product to replace what I hacked together in DIY.
Hi Cajun,
Yep, I'm still sharing the CAD for it, just sent you a PM with the link to download.
Let me know if you need advice for the build and feel free to post the results if you do end up making it
 02-17-2016, 10:35 PM