Semi - DIY Ipod Mount
 05-10-2007, 07:53 PM
#1

Semi - DIY Ipod Mount
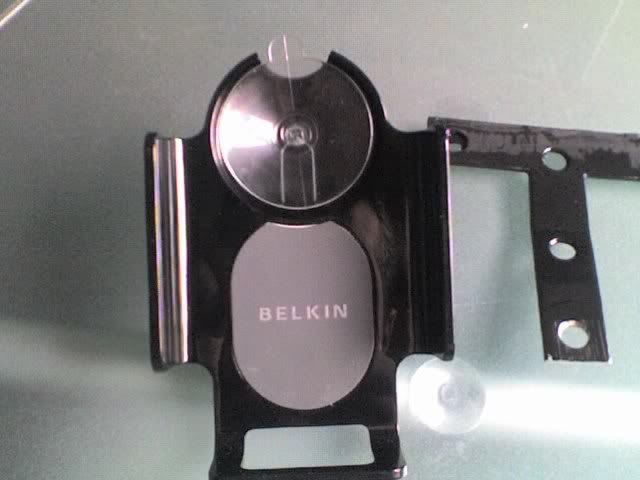
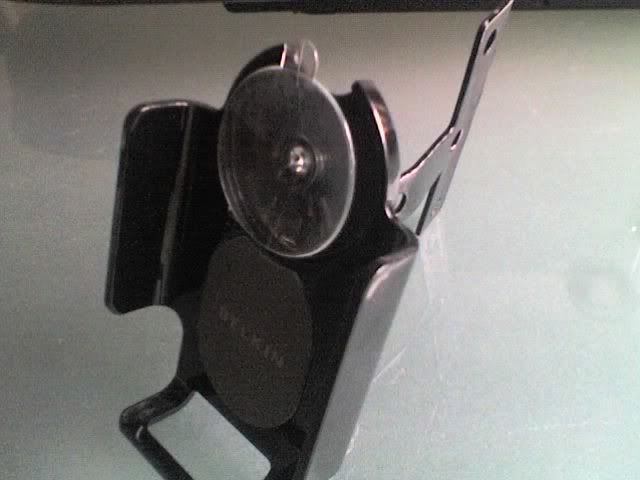
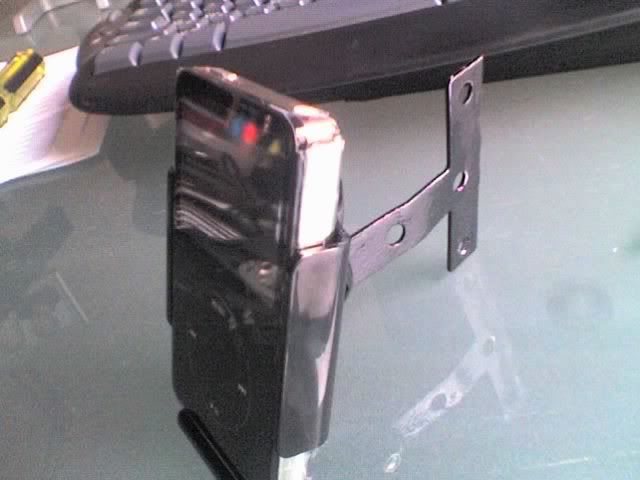
Not entirely DIY... I took a Belkin Tune Dock
and then:
1- removed cup holder attachment from Tune Dock
2- removed plastic screw coming out of tune dock
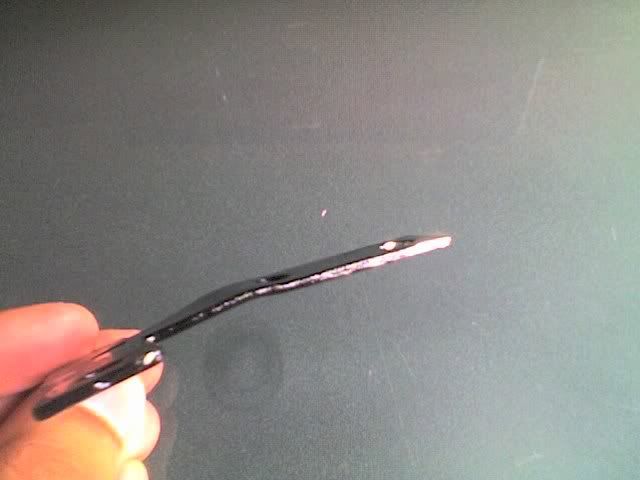
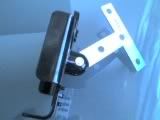
3- bent a T-bracket slightly, painted black
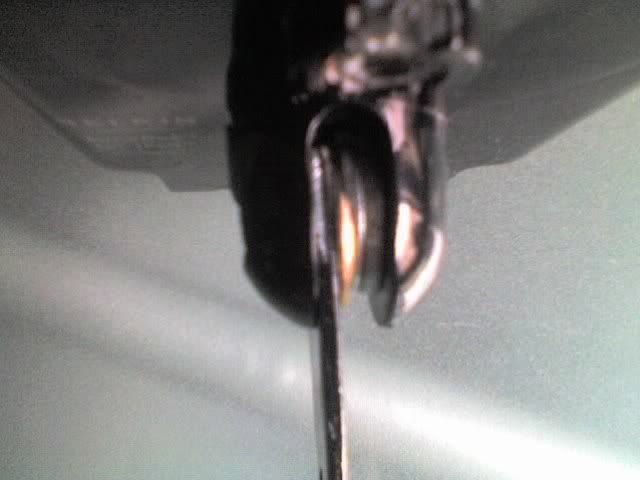
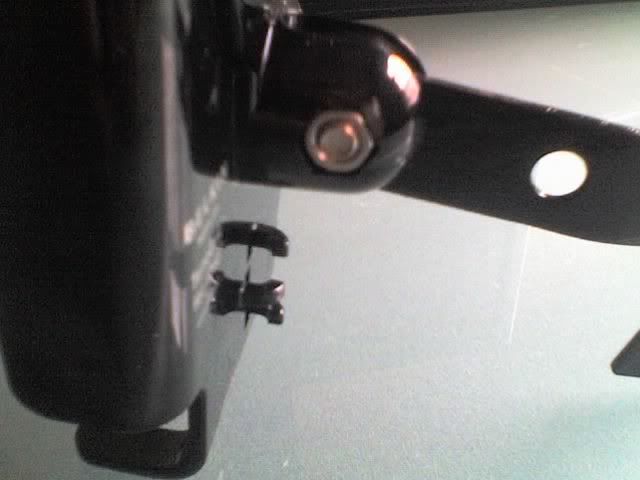
4- fitted T Bracket in place of Original Plastic Screw, dont over tighten or you wont be able to adjust the tilt for different sunlight angles. Use Washers liberally to fill in gap singe the original screw flange is pretty thick and the T bracket is not
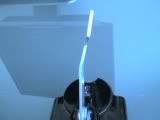

5- screwed T Bracket in gap between glove box and dash on the left.
5a- open glove box
5b- look at dash plastic surrounding glove box
5c- lay T bracket flush against the side of the dash facing the glovebox,so when the glovebox is closed the bracket is sandwiched inbetween Dash and Glove box
5d- mark the screw holes
5c- screw the tbracket in place
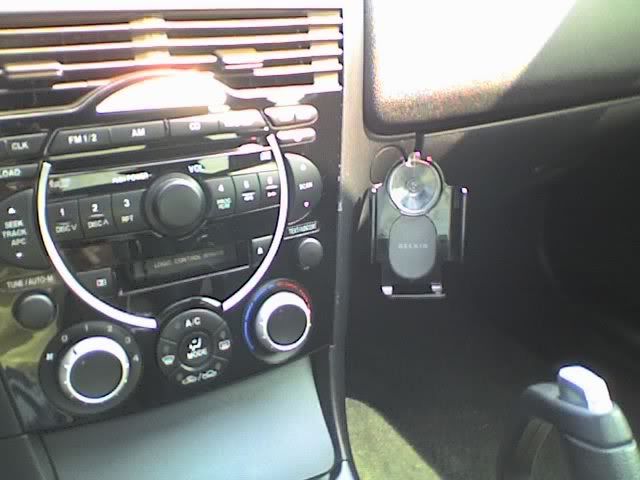
Note: I prebent the T bracket to the proper angle BEFORE I painted so the paint wouldnt damage, and before I screwed it in place so it wouldnt rip the screws out
Alternatively: you can use those plastic trimpiece snaps in place of screws if you can find some slim enough
I connect my ipod via belkins auto charger that connects to the dock connector and uses a line level signal tapped into the HU.
enjoy.
-Irfan
and then:
1- removed cup holder attachment from Tune Dock
2- removed plastic screw coming out of tune dock
3- bent a T-bracket slightly, painted black
4- fitted T Bracket in place of Original Plastic Screw, dont over tighten or you wont be able to adjust the tilt for different sunlight angles. Use Washers liberally to fill in gap singe the original screw flange is pretty thick and the T bracket is not
5- screwed T Bracket in gap between glove box and dash on the left.
5a- open glove box
5b- look at dash plastic surrounding glove box
5c- lay T bracket flush against the side of the dash facing the glovebox,so when the glovebox is closed the bracket is sandwiched inbetween Dash and Glove box
5d- mark the screw holes
5c- screw the tbracket in place
Note: I prebent the T bracket to the proper angle BEFORE I painted so the paint wouldnt damage, and before I screwed it in place so it wouldnt rip the screws out
Alternatively: you can use those plastic trimpiece snaps in place of screws if you can find some slim enough
I connect my ipod via belkins auto charger that connects to the dock connector and uses a line level signal tapped into the HU.
enjoy.
-Irfan
Last edited by irfan; 05-10-2007 at 07:56 PM.
 05-10-2007, 08:23 PM
#2
Oh and BTW- I have a 9.53 HU... does this mean im SOL for getting an ipod connector to hook into the HU? I really want steering wheel controls so i dont have to fumble with the ipod when driving to change songs... but i want to retain the scroll wheel functions so i can still change albums and artists when i need to, then go back to the steering wheel controls for changing tracks.
The Custom Aux In mod i used has alternator whine... a line ground loop isolator plus an aftermarket RF Ipod remote that i could mod to fit the steering wheel would end up running 50-75 bucks.. but if i want the Audiolink its 120+50 for HU upgrade?
The Custom Aux In mod i used has alternator whine... a line ground loop isolator plus an aftermarket RF Ipod remote that i could mod to fit the steering wheel would end up running 50-75 bucks.. but if i want the Audiolink its 120+50 for HU upgrade?
 06-05-2007, 07:31 AM
#4
ya ive been looking at that... im jsut weary of sending out the HU, and an extra hundred on top of 120 might get a little steep especially since my lease ends in 15 months
06-13-2007, 03:07 AM
#5

i just recently got my mazda ipod hook up... the thing confuses the hell out of me. the guy said it pays songs from my playlists but its playing songs i dont even have on my playlists. and i'll play it by artist and it will skip from biggy small to ziggy marley. what happened to the other people!

Thread
Thread Starter
Forum
Replies
Last Post
ShellDude
RX-8 Parts For Sale/Wanted
5
10-01-2015 09:55 PM
yankeepicker
Series I Trouble Shooting
3
09-11-2015 05:42 PM