Synthetic's Zex Nitrous Install vid.
 08-10-2010, 01:17 AM
#1
ThEy MaDe Me Do It
Thread Starter
iTrader: (7)

Join Date: Oct 2008
Location: Stump Creek, PA
Posts: 894
Likes: 0
Received 0 Likes
on
0 Posts
Synthetic's Zex Nitrous Install vid.
http://www.youtube.com/watch?v=7q_9K5ahUXI
Forgive me if I left anything out, a little tired right now.
0. Mounted Purge/Heater switchs to center console aux compartment. Mounted controller switch in ashtray.
1. Mounted bottle straight within trunk.
2. Ran nitrous line through the grommet in the trunk up to engine bay along fuel line.
3. Wired bottle heater ground in trunk, and then ran power through center console and connected it to aux power and then to the switch.
4. Mounted controller to brake booster and connected nitrous line.
5. Drilled a hole under the hood latch cable, then connected main controller power to fuse box which I ran inside the car to the ashtray, then back out to the controller.
6. Mounted the purge and drilled a hole in the wall to run the line. Then I ran the power into the cig power to the switch, and back out to the purge
7. Connected the TPS wire to the controller.
8. Drilled intake for nitrous nozzle, then connected the line from nozzle to the controller.
9. Took off the alternator/bracket to get to stock fuel line/put on new fuel line and connected it to the controller.
10. Put alternator/bracket back on and double checked everything. Good to go.
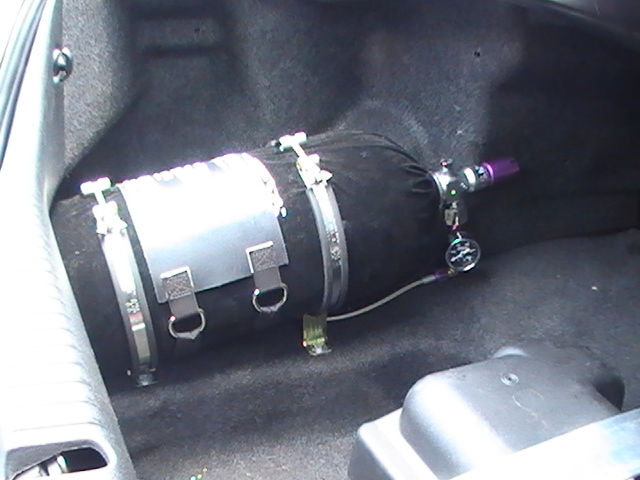
Just a picture to show the finished product in my trunk.
Forgive me if I left anything out, a little tired right now.
0. Mounted Purge/Heater switchs to center console aux compartment. Mounted controller switch in ashtray.
1. Mounted bottle straight within trunk.
2. Ran nitrous line through the grommet in the trunk up to engine bay along fuel line.
3. Wired bottle heater ground in trunk, and then ran power through center console and connected it to aux power and then to the switch.
4. Mounted controller to brake booster and connected nitrous line.
5. Drilled a hole under the hood latch cable, then connected main controller power to fuse box which I ran inside the car to the ashtray, then back out to the controller.
6. Mounted the purge and drilled a hole in the wall to run the line. Then I ran the power into the cig power to the switch, and back out to the purge
7. Connected the TPS wire to the controller.
8. Drilled intake for nitrous nozzle, then connected the line from nozzle to the controller.
9. Took off the alternator/bracket to get to stock fuel line/put on new fuel line and connected it to the controller.
10. Put alternator/bracket back on and double checked everything. Good to go.
Just a picture to show the finished product in my trunk.
Last edited by syntheticdarkness; 08-10-2010 at 01:31 AM.
 08-10-2010, 01:32 AM
#2
I zoom therefore I am.

nice video... little slow in parts but still nice for people who are looking to tackle this themselves.
edit: CRH beat me to it
I'm just wondering why you didnt go with the BHR throttle body spacer since everything else in your build was so stealthy
edit: CRH beat me to it
I'm just wondering why you didnt go with the BHR throttle body spacer since everything else in your build was so stealthy
08-10-2010, 01:38 AM
#3
ThEy MaDe Me Do It
Thread Starter
iTrader: (7)
Join Date: Oct 2008
Location: Stump Creek, PA
Posts: 894
Likes: 0
Received 0 Likes
on
0 Posts
Unless my eyes deceive me, you may have two problems. 1) Your nitrous nozzle is mounted backwards and will be spraying the MAF sensor. 2) Even when mounted so as to spray toward the engine, the nozzle may be too close to the MAF sensor and could cause erratic readings while spraying.
At 2:39 in the video is where I think I am seeing this. Compare your nozzle to this photo;
http://www.zex.com/Pages/47/Nozzles.aspx
At 2:39 in the video is where I think I am seeing this. Compare your nozzle to this photo;
http://www.zex.com/Pages/47/Nozzles.aspx
Nope, it's the right way
 . If I have any problems I'll be getting the throttle spacer, but right now I gotta wait, lol sold out. I haven't ran it yet to see what happens, but if there is a problem I will update it.
08-10-2010, 01:46 AM
. If I have any problems I'll be getting the throttle spacer, but right now I gotta wait, lol sold out. I haven't ran it yet to see what happens, but if there is a problem I will update it.
08-10-2010, 01:46 AM
#4
ThEy MaDe Me Do It
Thread Starter
iTrader: (7)
Join Date: Oct 2008
Location: Stump Creek, PA
Posts: 894
Likes: 0
Received 0 Likes
on
0 Posts
I plan on buying your spacer here within the month, or when you get more, but I will see how it runs here within the week to see what happens. I seen someone had the fuel splicer, wish I had that since there are some sharp pieces under the intake there lol.
08-10-2010, 01:55 AM
#5
ThEy MaDe Me Do It
Thread Starter
iTrader: (7)
Join Date: Oct 2008
Location: Stump Creek, PA
Posts: 894
Likes: 0
Received 0 Likes
on
0 Posts
Well for now I have 30R9 with high pressure fuel line clamps. I will probably keep it that way if there are no problems, and so far it's been about a month and 4,000 miles with no problems knock on wood  . I know the hoses I bought, once on you gotta cut them to take them off, so you gotta make sure you have it on the way you want it right of the bat
  , but I was lucky and bought a little more then I needed lol.
. I know the hoses I bought, once on you gotta cut them to take them off, so you gotta make sure you have it on the way you want it right of the bat , but I was lucky and bought a little more then I needed lol.


 09-25-2017, 11:32 PM
#11
New Member

Join Date: Sep 2017
Posts: 5
Likes: 0
Received 0 Likes
on
0 Posts
TPs
Great video. I am installing a wet system as well. However i am not sure which is the correct tps wire to select? 2 of the wires is giving me 4.8v and one is 5.1v. The rest of the wires im sure is not it. Can you help????


Thread
Thread Starter
Forum
Replies
Last Post
JimmyBlack
Series I Major Horsepower Upgrades
273
02-10-2020 10:23 PM