Notices
Series I Tech Garage The place to discuss anything technical about the RX-8 that doesn't fit into any of the categories below.

Smutterbutter Build

Thread Tools
 
Search this Thread
 
Rate Thread
 
Old 01-13-2015, 07:05 PM
  #176  
Registered
iTrader: (10)
 
GK1707's Avatar
 
Join Date: Jan 2012
Location: Queens, NY
Posts: 1,051
Likes: 0
Received 6 Likes on 6 Posts
Originally Posted by Smutterbutter
And the plot thickens...

Attachment 207517

Extreme lightweight rotor prototype!

Woah thats some lightening. Any specific reason you decided to lighten the rotors that much and how many grams were shaven off?
Old 01-13-2015, 08:01 PM
  #177  
Super Moderator
 
ASH8's Avatar
 
Join Date: Apr 2005
Location: Australia
Posts: 10,869
Received 322 Likes on 229 Posts
SmutterB..

I Really admire the challenges before you, many are not new.

It can be 'disheartening' when you put it all together, initial compressions look factory until she is revved up and something gives way (always what is attached in or to Rotors).

In the mid 70's, young and stupid I tried installing the OEM 2 piece Mazda Apex Seals (carbon) Mazda used in 10A engines, but only in the Auto's for whatever reason, the 4 speed Manual 10A's used only the one piece A Seals.

Cut a long story short, the Main internal rotor parts are/were identical in Man/Auto 10As apart from these Apex Seals and Springs, in the end after engine warm up we had bad compressions, engine out and new OE single A Seals back in...all good.

My thoughts concern your 'lighter' cut out Rotors area for the Side Seals and or SS Springs.
Would any New Side Seals have to be deeper in size (rotor cut out area)?.
I can perhaps see S Seal compression blow out/ or warping SS @ high RPM.?

Good Luck...
Old 01-13-2015, 08:12 PM
  #178  
Listen...you smell that?
Thread Starter
 
Smutterbutter's Avatar
 
Join Date: Sep 2012
Location: Pewaukee, WI
Posts: 228
Likes: 0
Received 2 Likes on 2 Posts
Guys! The lightweight rotor caption was 100% B.S! Hahaha. It's true purpose is as a jig to grind side seals. Pics to follow...
Old 01-13-2015, 09:24 PM
  #179  
Super Moderator
 
ASH8's Avatar
 
Join Date: Apr 2005
Location: Australia
Posts: 10,869
Received 322 Likes on 229 Posts
Ott
Old 01-14-2015, 07:46 AM
  #180  
Listen...you smell that?
Thread Starter
 
Smutterbutter's Avatar
 
Join Date: Sep 2012
Location: Pewaukee, WI
Posts: 228
Likes: 0
Received 2 Likes on 2 Posts
Smutterbutter Build-forumrunner_20150114_074212.jpg

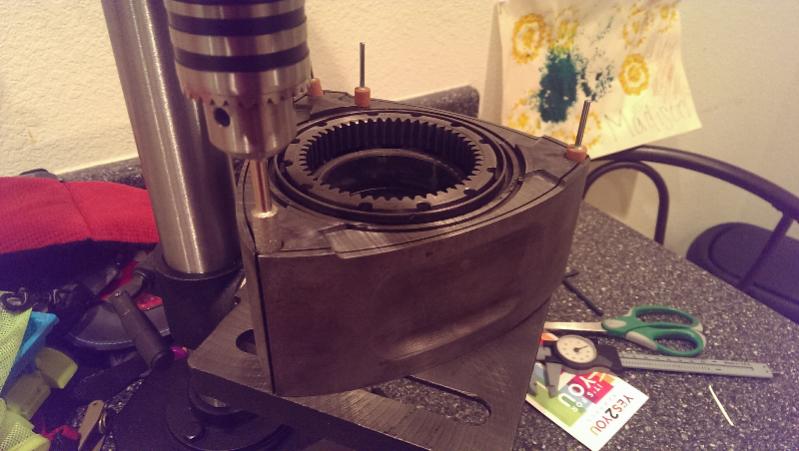
This is my set up for grindind those side seals. Corner seals are about 11mm in diameter or 7/16th. I was able to find various grinding bits that were 10mm locally but nothing exactly 11mm. After scouring the interwebs I came across a 11mm grinding stone, bad news is it has to come from China so I won't get it for a month.
Old 03-24-2015, 09:47 AM
  #181  
Listen...you smell that?
Thread Starter
 
Smutterbutter's Avatar
 
Join Date: Sep 2012
Location: Pewaukee, WI
Posts: 228
Likes: 0
Received 2 Likes on 2 Posts
Big update! After much trial and error and sacrificing about a dozen side seals to the Rotary gods I managed to get all my side seal to corner seal clearances to 0.002-0.003in. Grinding those seals was probably the most difficult part of my build...so far. In hindsight, I probably could've just went with the standard seals and been fine. But driving around knowing I passed up on some extra compression would drive me crazy.
Old 03-24-2015, 09:54 AM
  #182  
Listen...you smell that?
Thread Starter
 
Smutterbutter's Avatar
 
Join Date: Sep 2012
Location: Pewaukee, WI
Posts: 228
Likes: 0
Received 2 Likes on 2 Posts
Here goes nothing! new front stationary gear, yellow dot bearing going in used front iron


Last edited by Smutterbutter; 03-24-2015 at 09:58 AM.
Old 03-24-2015, 10:12 AM
  #183  
Listen...you smell that?
Thread Starter
 
Smutterbutter's Avatar
 
Join Date: Sep 2012
Location: Pewaukee, WI
Posts: 228
Likes: 0
Received 2 Likes on 2 Posts
First impressions of Hylmar: That is some sticky ****. Had a couple tubes from Atkins that were about 2 years old, unopened. It came out fine, but after only 10-15 sec turned incredibly tacky and clumped up easily. I had a larger tube from a local race shop that was only bought a few months ago, much more manageable and gave plenty of time to spread it evenly.

Used housings I found on ebay, the guy I bought them from was premix only so I was able to use his oil injection plugs to keep stuff from falling in there


Dowels in, probably a little more hylomar than necessary...


Last edited by Smutterbutter; 03-24-2015 at 10:19 AM.
Old 03-24-2015, 10:23 AM
  #184  
Yank My Wankel
iTrader: (4)
 
Carbon8's Avatar
 
Join Date: Nov 2009
Location: Buffalo, NY
Posts: 2,207
Likes: 0
Received 6 Likes on 6 Posts
This is turning into a 5 year plan.

Good to see progress.
Old 03-24-2015, 10:53 AM
  #185  
Listen...you smell that?
Thread Starter
 
Smutterbutter's Avatar
 
Join Date: Sep 2012
Location: Pewaukee, WI
Posts: 228
Likes: 0
Received 2 Likes on 2 Posts
Originally Posted by Carbon8
This is turning into a 5 year plan.

Good to see progress.


Free time isn't always free..


First Solo event in less than a month, gonna be some late nights in my future.
Old 03-24-2015, 04:36 PM
  #186  
Listen...you smell that?
Thread Starter
 
Smutterbutter's Avatar
 
Join Date: Sep 2012
Location: Pewaukee, WI
Posts: 228
Likes: 0
Received 2 Likes on 2 Posts
New front rotor, new yellow dot rotor bearing


New E-shaft just for the hell of it as well, very happy to see it comes with new pilot bearing/seal installed, one less thing for me to screw up.


Old 03-24-2015, 04:39 PM
  #187  
Super Moderator
 
ASH8's Avatar
 
Join Date: Apr 2005
Location: Australia
Posts: 10,869
Received 322 Likes on 229 Posts
I dip my hat to you...for doing it..

Been nearly 30 years since I overhauled a 12A.

When you get this close to any rotary engine (inside) you "get it" at just how special these engines are.
Old 03-24-2015, 04:41 PM
  #188  
Super Moderator
 
ASH8's Avatar
 
Join Date: Apr 2005
Location: Australia
Posts: 10,869
Received 322 Likes on 229 Posts
Too hard to see from Pics, but the journals/e shaft bearings and oil control rings look a little 'dry', you are lubricating with engine oil?...be generous.
Old 03-24-2015, 06:10 PM
  #189  
Listen...you smell that?
Thread Starter
 
Smutterbutter's Avatar
 
Join Date: Sep 2012
Location: Pewaukee, WI
Posts: 228
Likes: 0
Received 2 Likes on 2 Posts
Originally Posted by ASH8
Too hard to see from Pics, but the journals/e shaft bearings and oil control rings look a little 'dry', you are lubricating with engine oil?...be generous.
Yeah due the fact that I really have absolutely no idea what I'm doing I was very unsure about how much hylomar, vasoline, oil, whatever was too little or too much.

The oil control rings were oiled well when installed, gave the eshaft a once over also. Other than that the rotors, bearings, and housings have a fair amount of Vaseline covering them.
Old 03-24-2015, 09:31 PM
  #190  
Listen...you smell that?
Thread Starter
 
Smutterbutter's Avatar
 
Join Date: Sep 2012
Location: Pewaukee, WI
Posts: 228
Likes: 0
Received 2 Likes on 2 Posts
Originally Posted by ASH8
I dip my hat to you...for doing it..

Been nearly 30 years since I overhauled a 12A.

When you get this close to any rotary engine (inside) you "get it" at just how special these engines are.
Agreed. Gorgeous. Hopefully they're not going extinct.
Old 03-24-2015, 09:34 PM
  #191  
Listen...you smell that?
Thread Starter
 
Smutterbutter's Avatar
 
Join Date: Sep 2012
Location: Pewaukee, WI
Posts: 228
Likes: 0
Received 2 Likes on 2 Posts
There have definitely been more than a few moments during this build when I found my self saying "Well, hope I got that right..." This was one of those times. Everything went in smooth as silk but it being my first time I won't really know until I try to start this thing up.

New OEM Apex seals/springs in!

Old 03-24-2015, 09:49 PM
  #192  
Registered
 
xKp5609x's Avatar
 
Join Date: Dec 2014
Location: New England
Posts: 235
Received 1 Like on 1 Post
What water seals did you use? BTW good stuff so far, i hope this build will last you and have no problems!
Old 03-24-2015, 10:19 PM
  #193  
Super Moderator
 
ASH8's Avatar
 
Join Date: Apr 2005
Location: Australia
Posts: 10,869
Received 322 Likes on 229 Posts
Originally Posted by Smutterbutter
Yeah due the fact that I really have absolutely no idea what I'm doing I was very unsure about how much hylomar, vasoline, oil, whatever was too little or too much.

The oil control rings were oiled well when installed, gave the eshaft a once over also. Other than that the rotors, bearings, and housings have a fair amount of Vaseline covering them.
We would ensure the OCR would be lying in a small pool of engine oil, including e-shaft seat and journals before side iron(s) would mated and locked down...check...

LOVE your WORK son!
Old 03-25-2015, 09:16 AM
  #194  
Listen...you smell that?
Thread Starter
 
Smutterbutter's Avatar
 
Join Date: Sep 2012
Location: Pewaukee, WI
Posts: 228
Likes: 0
Received 2 Likes on 2 Posts
Originally Posted by xKp5609x
What water seals did you use? BTW good stuff so far, i hope this build will last you and have no problems!
All seals are MAZDA OEM
Old 03-25-2015, 06:55 PM
  #195  
Listen...you smell that?
Thread Starter
 
Smutterbutter's Avatar
 
Join Date: Sep 2012
Location: Pewaukee, WI
Posts: 228
Likes: 0
Received 2 Likes on 2 Posts
Towel box doubled as my assistant to get the middle iron on


Starting to get some "spooge" factor from all the Hylomar, really hope thats not happening into where the rotors live.


Old 03-25-2015, 07:00 PM
  #196  
Listen...you smell that?
Thread Starter
 
Smutterbutter's Avatar
 
Join Date: Sep 2012
Location: Pewaukee, WI
Posts: 228
Likes: 0
Received 2 Likes on 2 Posts
TIP for any future DIY'ers out there: The RX8 O-ring kit from Mazdaspeed does NOT include the main pulley bolt o-ring...naturally, since that would be absurd to include every o-ring needed in one group.

I believe the Atkins version of the O-ring kit does indeed include EVERY o-ring needed.
Old 03-25-2015, 07:08 PM
  #197  
Registered
iTrader: (25)
 
TeamRX8's Avatar
 
Join Date: Apr 2005
Posts: 26,823
Likes: 0
Received 2,056 Likes on 1,676 Posts
I was wondering if that would happen with the excess hylomar too ...
Old 03-25-2015, 07:18 PM
  #198  
Listen...you smell that?
Thread Starter
 
Smutterbutter's Avatar
 
Join Date: Sep 2012
Location: Pewaukee, WI
Posts: 228
Likes: 0
Received 2 Likes on 2 Posts
Originally Posted by TeamRX8
I was wondering if that would happen with the excess hylomar too ...
I think I'm ok. I Put the bulk of it down by the oil pan, I tried my best to keep it to a minimum around the water seals. Something like this:


Old 03-25-2015, 08:26 PM
  #199  
Listen...you smell that?
Thread Starter
 
Smutterbutter's Avatar
 
Join Date: Sep 2012
Location: Pewaukee, WI
Posts: 228
Likes: 0
Received 2 Likes on 2 Posts
Installed a new coolant pipe into the rear iron about 6 months ago...
New rear stationary gear/yellow dot bearing and Mazmart oil pressure regulator

Had a brief panic attack when didn't seem to have an O-ring that fit the rear gear like on my Mazdatrix/Atikins DVD's, then I noticed the groove cut into the rear iron that magically fit my last O-ring perfectly.


Old 03-26-2015, 06:35 AM
  #200  
Registered
 
rotatoe's Avatar
 
Join Date: May 2014
Posts: 11
Likes: 0
Received 0 Likes on 0 Posts
Awesome!lookin good so far! Lol I'm just starting to rebuild also, what's your total so far if you don't mind me asking?


You have already rated this thread Rating: Thread Rating: 0 votes,  average.

Quick Reply: Smutterbutter Build


All times are GMT -5. The time now is 07:28 PM.