
DIY: Brake Bleeding/Flushing
 01-17-2011, 07:38 PM
#1

DIY: Brake Bleeding/Flushing
I have been asked so I am going to make this DIY for you guys. There are two ways to do this, I will outline each. The first will be a one man process, the second will be a two man process. You do not need any special tools or crazy devices so save your money. Never use DOT 5 fluid in an ABS system. If you are not completely comfortable don't try this.
Read all steps before attempting
Rear Caliper Ready To Bleed: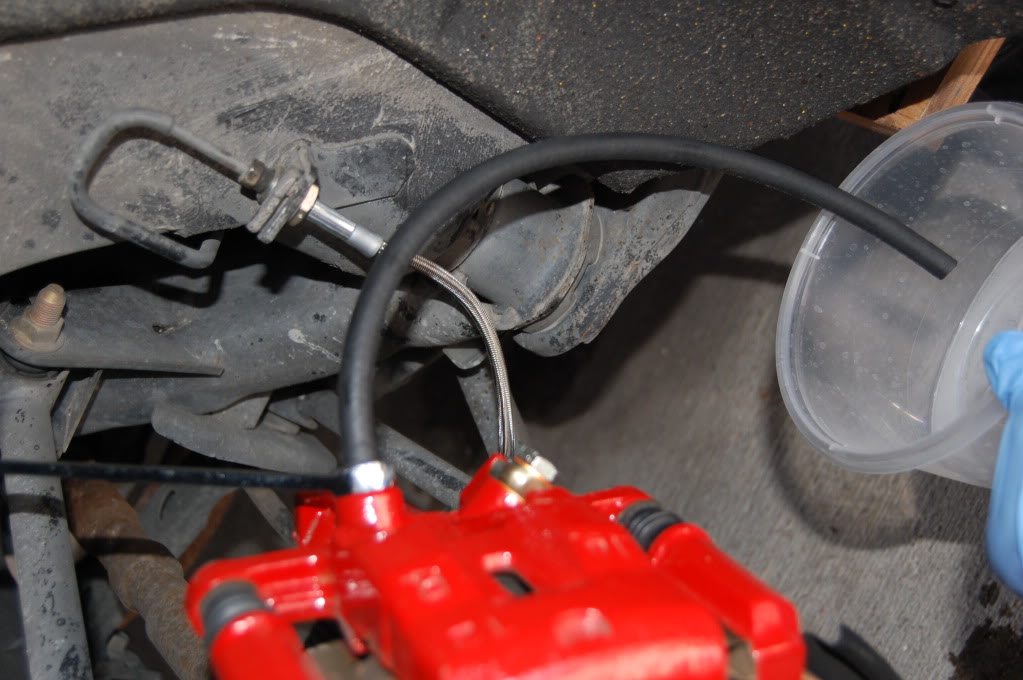
Front Caliper Ready To Bleed: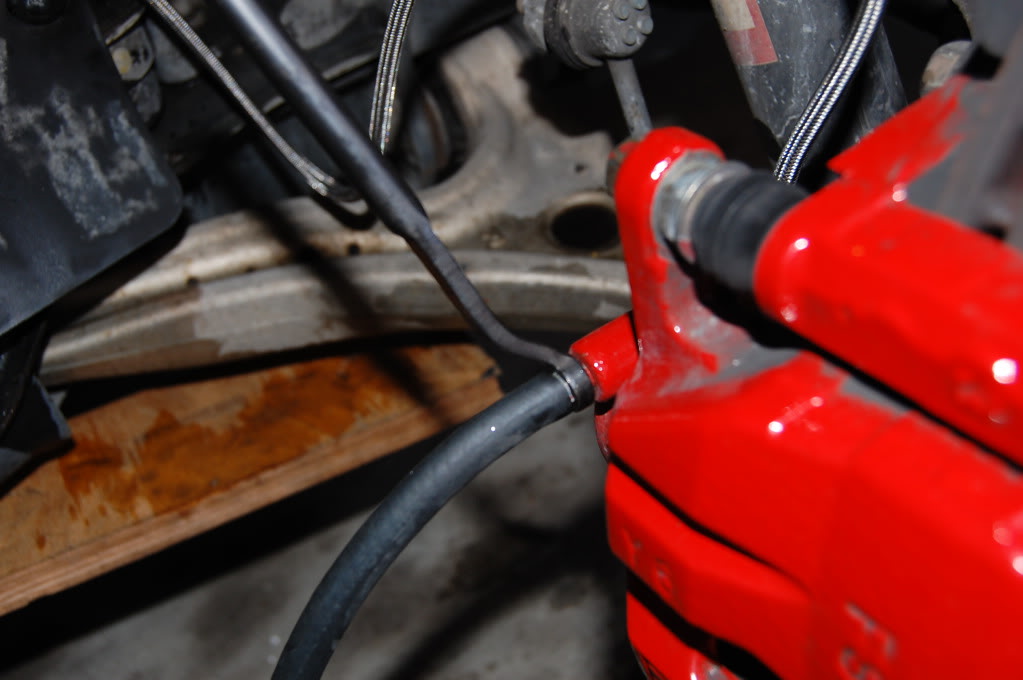
One man system
Step one is gather your tools:
8mm bleeding wrench, and a 10mm line wrench will work perfectly as seen in this photo: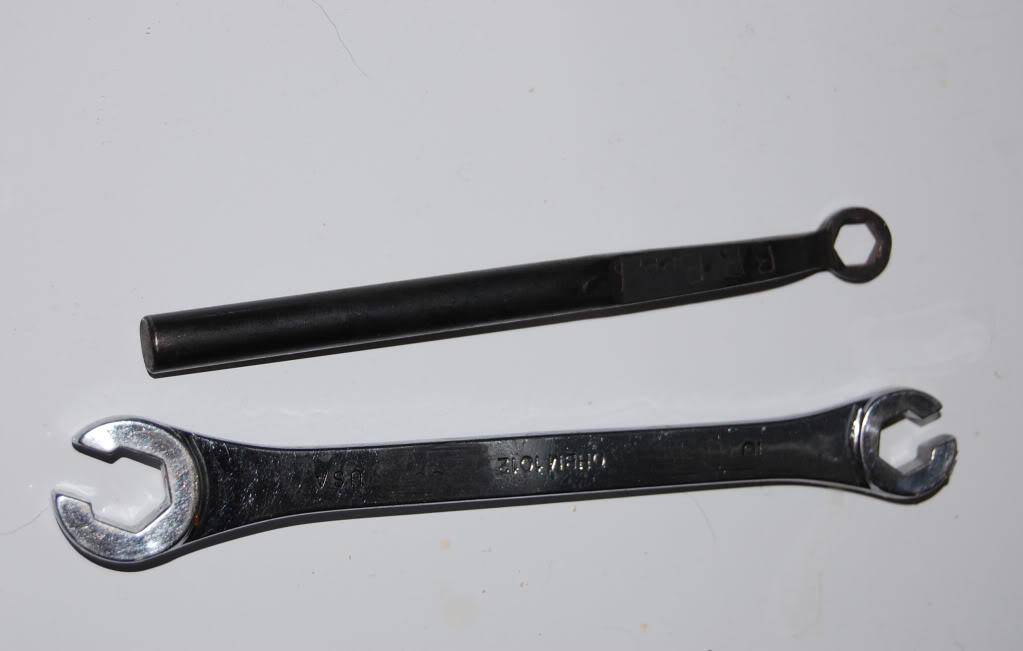
3/16th vacuum or fuel line,1ft in length, as seen here: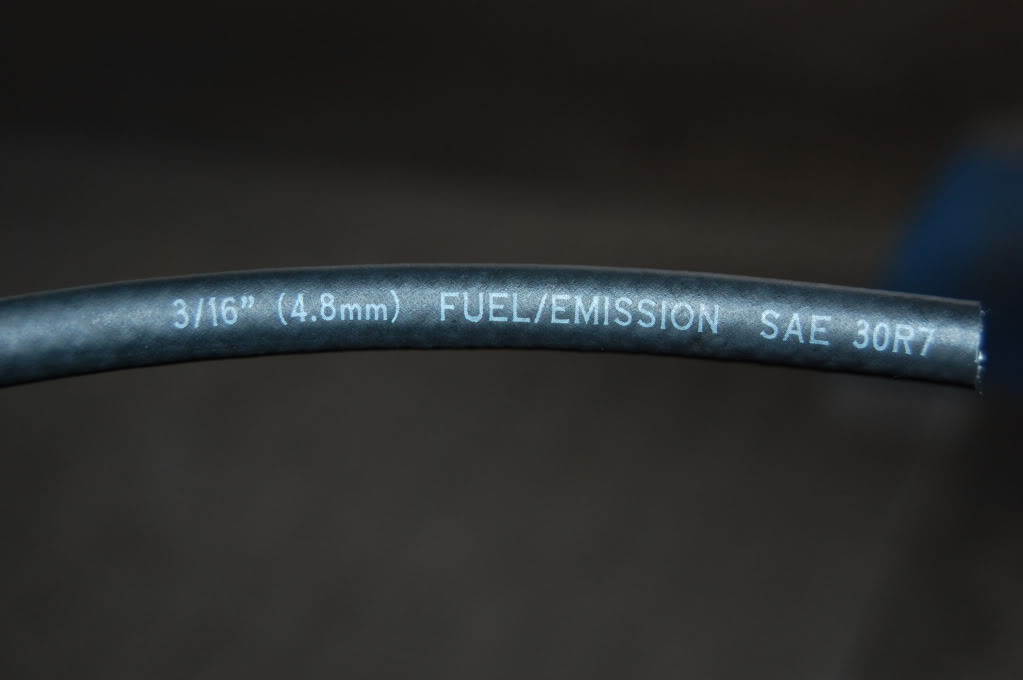
A plastic cup of any kind.
You may also use an 8mm/10mm double ended bleeding wrench.
Step Two:
Starting from the Right Rear you will be going in this order: Right Rear, Left Rear, Right Front, Left Front.
Step Three:
Fill the master cylinder reservoir. Leave the cap off and then goto the caliper you are bleeding. Place the wrench on first, then the 3/16th line. Place the cup under the drain hose.
Step Four:
This will be done 4 times. You will open the bleeder valve and wait for the fluid to start draining. It will drip for a while. Watch the color of the fluid going into the cup. Once you start to get crystal clear fluid then shut the valve.
Step Five:
Clean up the caliper you just finished bleeding. Use a paper towel around the rubber hose before pulling it off. Holding the paper towel over the bleeder valve to prevent brake fluid from touching anything remove the rubber hose and clean up the job you just did.
Step Six:
Re-fill the master cylinder and return to step 3. Repeat this 3 more times until all four brakes have been bled.
This process takes a lot of time. So you must be patient. It does work though I did it on my own vehicles, and vehicles in the shop for years.
Two Man Process
Step one is gather your tools:
8mm bleeding wrench, and a 10mm line wrench will work perfectly as seen in this photo:
3/16th vacuum or fuel line,1ft in length, as seen here:
A plastic cup of any kind.
You may also use an 8mm/10mm double ended bleeding wrench.
Step Two:
Remove the bleeder valve cover and place it in a safe spot. One person should be inside the car and one at the caliper being bled.
Step Three:
After filling the master cylinder and leaving the cap off, start from the Right Rear moving in this direction(Right Rear, Left Rear, Right Front, Left Front).
Step Four:
Place the wrench (10mm Rear, 8mm Front) on the bleeder valve, then the 3/16th rubber hose on the bleeder valve.
Step Five:
Have the person inside the car press on the brake pedal.
Step Six:
Once they are putting pressure on the brake pedal very gently open the bleeder valve. Not much, a tiny bit should get the air flowing.
Read the next step first. Its very important NOT to lift up on the pedal when the bleeder valve is open. This will suck air into the system.
Step Seven:
The person at the brake caliper will know when the air/fluid stops moving. Once it stops moving he should close the bleeder valve, and then tell the person to get another bite.
Step Eight:
Repeat this until no more air, and no more dirty fluid is seen. Once its crisp clean fluid you are ready to clean up. To clean up you place a paper towel over the the bleeder valve before pulling the rubber hose off. Once the hose and wrench are off clean up the caliper. Make sure no brake fluid touches anything especially paint!
Make sure to monitor the master cylinder. Never allow it drop below half. This should especially be done after you have bled a caliper.
Step Nine:
Move to the next caliper in line and repeat this until all four are done.
The final step is to check for leaks. Go back around and make sure nothing is leaking and all the bleeder valves were closed properly. Then drive the vehicle make sure its all working great, park it and check for fluid leaks again. You will see a stain if any leaks are present.
Last edited by DocBeech; 01-17-2011 at 07:47 PM.


 09-01-2011, 08:04 PM
#6
Registered

Many ABS systems require special electronic equipment to cycle the ABS controller to fully bleed and flush it. I don't know if this is the case with the system Mazda uses, but it would be very good information to know.
09-08-2011, 10:28 AM
#7
No, you don't need to electronically bleed the system unless you have replaced the ABS module. Which would require those tools anyways. Just bleed the system until you get clear liquid out. The brake fluid in the middle of the lines will actually be just fine. The reason you will find bad brake fluid is from the heat of the brakes more towards the rotors and calipers. The fluid running to the rear wheels around the area of the middle of the car will be fine, and un affected. So unless you replaced your abs I wouldn't over think it.
09-08-2011, 11:12 AM
#8
Registered
09-08-2011, 11:45 AM
#9

There are additional 1 man ways of doing this. You can add speedbleeders. Some people swear by them and some against them. You can use a vacuum pump and instead of gravity bleeding you suck the fluid out. There are several types of pumps you can use. Most people use a pump that utilizes compressed air, but you can also buy a vacuum hand pump. Both work fine. If you use compressed air, be sure you have an inline mositure filter to be sure the compressed air is dry and no moisture is transfered to the fluid. I am not sure it could happen but I have heard people claim it can.
Lastly an additional step I like to add. Use a vacuum pump and remove as much fluid from the master cyclinder before filling it or bleeding the brakes. This helps to speed up the process of getting all the old fluid out and prevents unnecessary dirty/old fluid to be sent through the lines. If you dont do this, you are continually using dirty fluid to flush your brakes. The more times you refill the master cylinder the more you delute the old fluid, but it is still better to start with as clean as possible.
A tip for those seriously neglected brake systems and people using the manual bleed method. I learned this while working at a general automotive reapir garage. We saw a lot of bad brake fluid and neglected brake systems.
-Do not push the brake pedel all the way to the floor until after you have flushed a lot of fluid through the master cylinder, otherwise you may ruin your master cylinder.
WHY: During normal day to day braking you only use maybe half of the possible brake travel. If your fluid is dirty, there is commonly a build up of contamination on the cylinder past the point of regular piston travel. So when you bleed the brakes you are now pushing the piston and seals into the contamination zone which can damage a seal and cause a brake master cylinder failure.
Solution: Be carefull, get the old fluid out of the master before bleeding and flush a lot of fluid though the system, slowly working your pedel travel lower and lower. Dont jump in and push the pedel straight to the floor. Start by slowly working half the pedel, then 3/4 then 100%
 12-27-2012, 10:29 AM
#11
hey i went to advanced auto and got the equipment required for this. However they didnt have any line wrenches so they recommended a 10mm crescent with an opposite bleed end. Will this suffice?
 12-28-2012, 10:30 AM
#13

You can and should pump the brake pedal during the one man process. The key is have a long tube and run it vertical above the caliper (I usually hook in up over a coil on the suspension spring) before going down to the catch container. This traps a vertical column of fluid above the bleed screw before it cascades down into the catch container; air bubbles float up or are pushed to the top of the fluid and air doesn't get back into the caliper. Don't pump the pedal fast, just a steady pump down and steady release back with a slight pause in between each.
 05-25-2013, 02:10 PM
#15
Registered

After following all this, with each push down being impossible until I opened the bleed valves, I had a nicely flushed system.
Then I switched on the ignition and my foot went to the floor. Pumping the brake pedal does nothing
The fluid was always topped up.
She's an R3 so there's no bleed on the master cylinder.
Moved seals on master cylinder by moving pedal too far?
Any thoughts?
Then I switched on the ignition and my foot went to the floor. Pumping the brake pedal does nothing
The fluid was always topped up.
She's an R3 so there's no bleed on the master cylinder.
Moved seals on master cylinder by moving pedal too far?
Any thoughts?
Last edited by Ian_D; 05-25-2013 at 02:29 PM.
05-21-2016, 08:40 PM
#17
///// Upscale Zoom-Zoom
The series 2 has a float or another object that prevents fully emptying the reservoir. I improvised using a spray nozzle added to a standard syringe. Worked by going around the float to exhaust the reservoir.
05-26-2016, 09:10 AM
#18
///// Upscale Zoom-Zoom
Has anyone found another work around for the "float" to quickly empty the brake reservoir? Here's my DIY tool comprising a dropper plus a used WD-40 tube to bypass the brake float to remove dirty fluid ahead of brake line bleeding.
02-04-2023, 03:44 PM
#19
Registered
Does anyone know how this process works with speedbleeders? Would anyone be kind enough to tell me. I was planning on doing them tomorrow. (brakes, clutch, master cylinder).
I have all the parts, going to the store to get some brake fluid and 8mm and 10mm wrenches. I have speed bleeder bleeding bags too.
If anyone could help I would greatly appreciate it.
Thanks,
Chad
I have all the parts, going to the store to get some brake fluid and 8mm and 10mm wrenches. I have speed bleeder bleeding bags too.
If anyone could help I would greatly appreciate it.
Thanks,
Chad
02-04-2023, 10:15 PM
#20
Registered
Also, I got the 8mm and 10mm wrenches today, but they don't fit the speed bleeders? Do they fit the caliper bleeders when I take them off? Also, can I use a ratchet for the speed bleeders, or do I have to use a wrench? Thanks.
02-05-2023, 12:53 PM
#21
Registered
I did the speedbleeding on the brakes, clutch, and master cylinder. The brakes work, but the clutch is dropping right to the floor with only a tap to it. I've tried rebleeding and MC bleeding, and still won't work. Should I try putting the original bleeder back in? Maybe the speedbleeder is faulty. I would appreciate anything.
Thanks,
Chad
Thanks,
Chad
02-05-2023, 01:28 PM
#22
Registered
fixed. Just to let others know, because I have been reading - the speedbleeder advertised for the clutch slave cylinder on our car is wrong. It's too loose. I put the original bleeder back, and now it works. If you look at both of them together, there is a slight difference in girth, not length.
Hope this helps.
Chad
Hope this helps.
Chad

Thread
Thread Starter
Forum
Replies
Last Post
hufflepuff
Series I Wheels, Tires, Brakes & Suspension
6
05-30-2016 10:45 AM
Road Cone
RX-8 Parts For Sale/Wanted
5
11-06-2015 01:52 PM