
DIY: Fog Light Tint Yellow SII
 01-28-2011, 09:56 AM
#1
Living is best Modified.
Thread Starter

DIY: Fog Light Tint Yellow SII
Fog lights used to be a status symbol, like Xeon/HID lights with blue colors. I would look at cars passing by with these fog lights, knowing they're brand new and got the latest technological marvels in them - CD players. Adding a tint to the fog light will decrease the brightness. The tint is acting like a filter - for every other wavelength of color except yellow. So doing this modification will actually decrease your vision. There is another reason to have a fog light besides the mythed "Cuts through the fog better":
- I like to believe that having yellow fog lights signals to other drivers that they need to drive carefully. Trust me, In south carolina's cities, a warning that the road may be a little bit slippery is far from a bad thing. )Everyone that has driven on the interstate, when it rains, in Columbia knows what i'm talking about.)
Check with your local law enforcement for tint laws. But generally if you're pulled over for tint, you can take it off at that moment. It's not a big deal. If you tint too much with paint, you'll have a trip. You will have to go through the whole sanding process, and then polish, clean... It's a hassle to apply and a hassle to get off.
Tip: Working with vinyl during the cold is a very difficult task. Thankfully for this tutorial we just need to detach our fog lights... which really doesn't require anything more than a philips head (PH2 For that perfect fit) screw driver and hands. If you want to work on fog lights when it's cold outside, park your car inside the garage or take out the fog lamp and work on it inside. Grab a beer and Take some time for the car, or fog lamp to warm up to room temp.
Materials To complete:
1. Scrubbing Bubbles (If it's good enough for my butt, it's good enough for light)
2. Glass cleaner. [Armorall Auto Glass]
3. Polishing Sponge or applicator.
4. Heat gun
5. Exacto Knife
6. Yellow Vinyl - (DecalFx, Grafixplastics, RVinyl
________________________________
Prepare The Materials::
Step 1- Turn off the car. I didn't disconnect the negative battery terminal.
Step 2- Remove the headlamp assembly. Remove the bottom plastic piece by pulling out towards you. There will be two tabs on either side.
Step 3- Remove the three screws holding the assembly to the car. Two will be on the outside and one on the inside.
Step 4- Remove the fog light bulb (9006). (LH) Twist the connector in a 1/8th circle downwards. (RH) Twist the connector 1/8th right.
Step 5- Wash and rinse. Road grime, dirt, insects, small creatures may have made your fog light a new home. I had 17,000 miles of highway, dirt roads and wood. Not to mention those pesky road bullets.This general clean will get the worst off the foglamp. Do not worry about streaks, as the next step should wipe all that away. The foglights looked really bad at this stage, so no pictures were taken.
Step 6- Polish and clean. Using the Auto Glass cleaner, clean it for the final time. Now that the worst has gone. You'll want to use a polishing sponge, I used work bathroom tissues. Again, this is good enough for people's butts...
Step 7- Cut the vinyl into a [8 in. x 4 in.] sheet.
Step 8- Turn on the heat gun. Set it to 350 or the closest setting.
The vinyl will help protect the fog lamp, so getting the headlamp looking good will help retain it's value.
________________________________
Installing::
Step 1- Use the Auto glass cleaner to wet the outside. You can apply the glass cleaner two ways (A or B). To save you my headache, i'll show you what not to do:
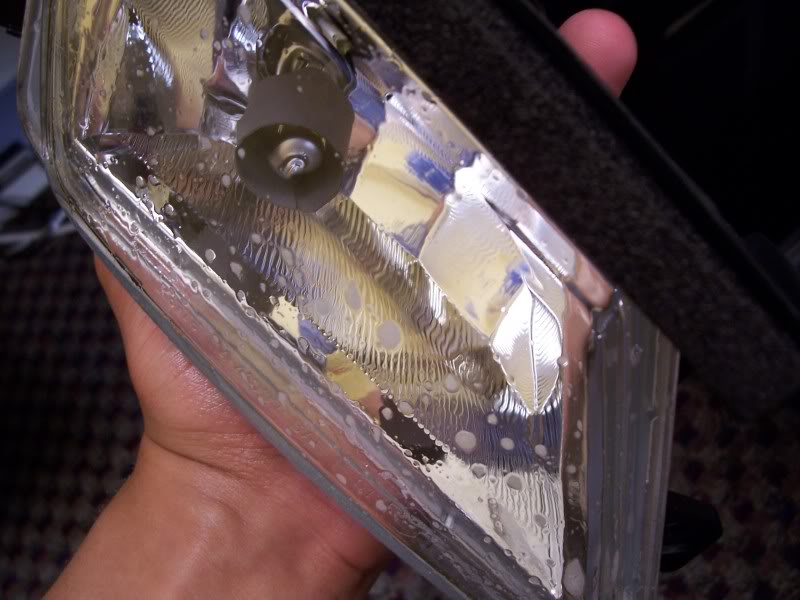
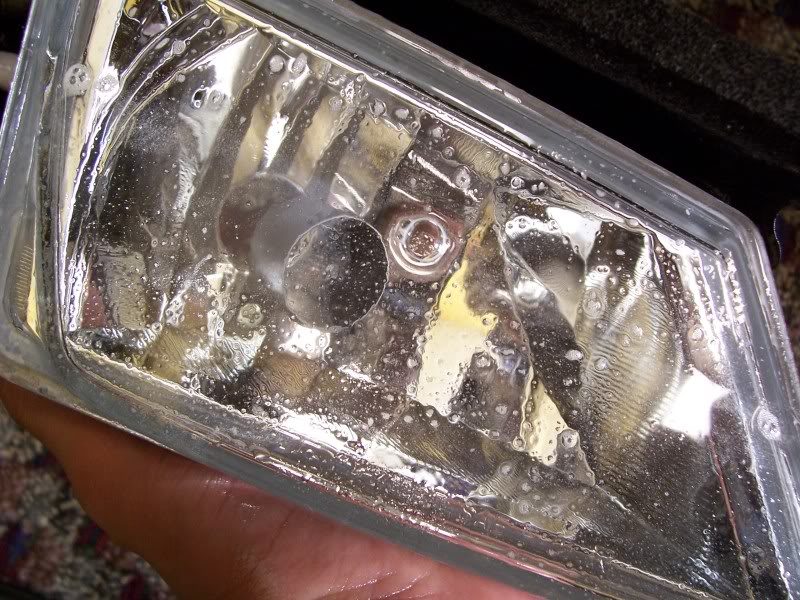
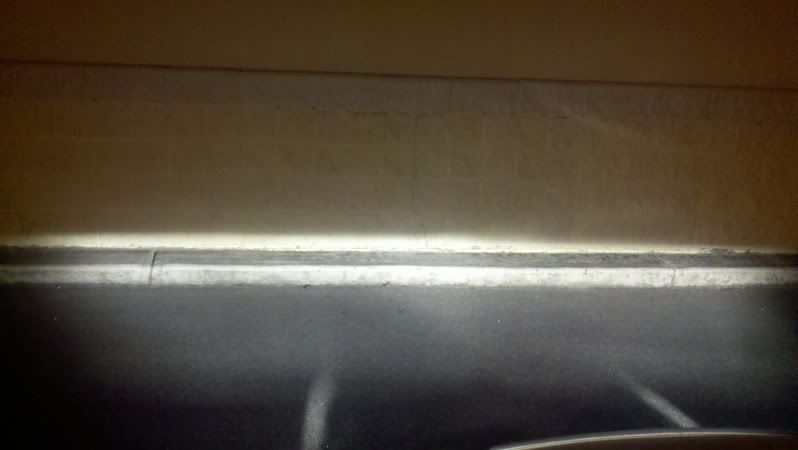
A: If you press on the glass cleaner and get fine mist over a wide area, you'll create small bubble in the cleaner. When you put on the vinyl, the small bubbles will not go away and it'll look like you did not clean the headlight and left dirt smear. (What you don't want. Before and Result Next Three pictures)
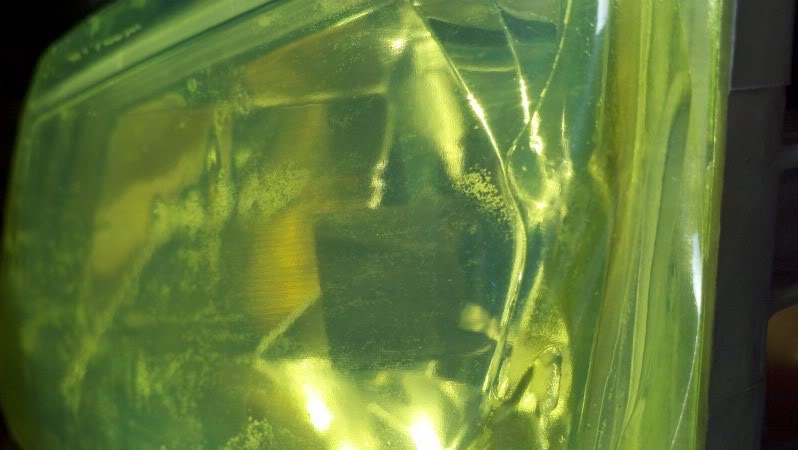
B: You'll want to just "bead" the glass cleaner onto the headlamp. It does not take a lot of cleaner. Just a little bit. (What you do want. Next picture)
Step 2- Peel off the vinyl. Spray the back vinyl with the same bead effect. The back of the vinyl was the paper-side
Step 3- Put the Vinyl, wet-side down, ontop of the wet fog light.
Step 4- Move the vinyl around so it'll cover all of the outside lens. You can leave most of the extra stuff at the bottom, so you won't need to cut so much of the top side.
Step 5- Spray the outside of the vinyl with auto glass cleaner. Use a finger to hold down the vinyl. From the middle, Gently Push out with your polishing sponge. Let the sponge do all the work here. Push out to all the areas. You'll see bubbles, and folds. That's okay. You just need to get the vinyl on.
Step 6- Use the heat gun, and warm up the vinyl that's attached to the lens. You'll see the bubble pop up. The hot air expands the bubbles. Heat up the vinyl facing sideways, pointing down.
Tip: Apply more cleaner to the surface if you notice any scuff marks.
Tip: The air bubbles you are working with should be facing up, towards the roof/sky. If you work at the bubbles that are pointed down, you'll end up with these bubbles floating through the vinyl - towards the sky. This'll save you some trouble with growing bubbles.
Step 7- Spray the vinyl again with more glass cleaner. With the polishing sponge, again push out with gentle force out to the ends. Use the sponge to get the middle crease.
--- Repeat Step 6 and 7 until you've gotten most of the bubbles out.
Step 8- You'll get to a point that you'll need to get the outer edges down. Heat up one side of the vinyl, still pushing out from the middle - or close to a bubble, go across and push down on the edge, folding the vinyl over the lens.
--- Repeat Step 8 for all sides. Once. Do not worry about getting rid of all of the bubbles yet.
Step 9- Use the exacto knife, cut small lines at the corners of the fog lamp. This will help decrease the stress on the vinyl when you fold them over and make the whole process easier.
Step 10- Use patience. Use the damp sponge and the heat gun to weed out those bubble and smooth out the vinyl. You may need to exacto knife a few folds.
You'll be rewarded with professional looking fog tint without bubbles
________________________________
Pictures::
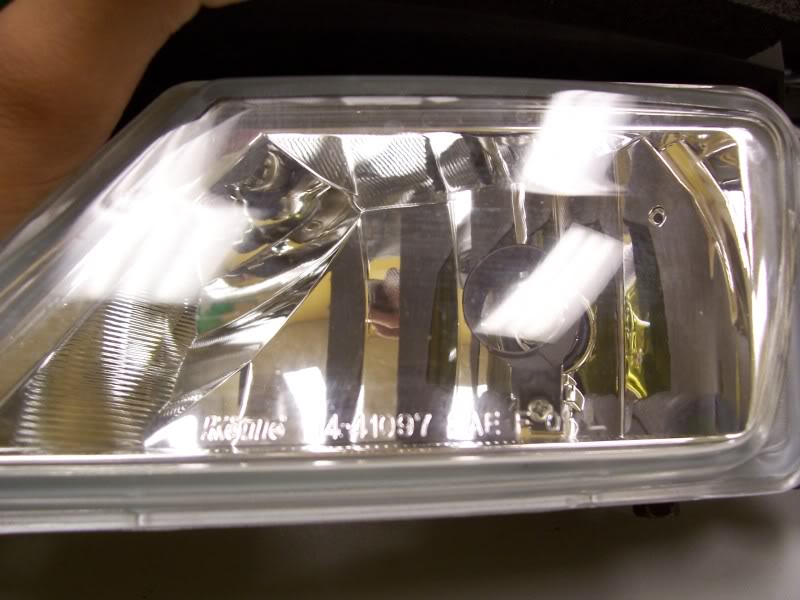
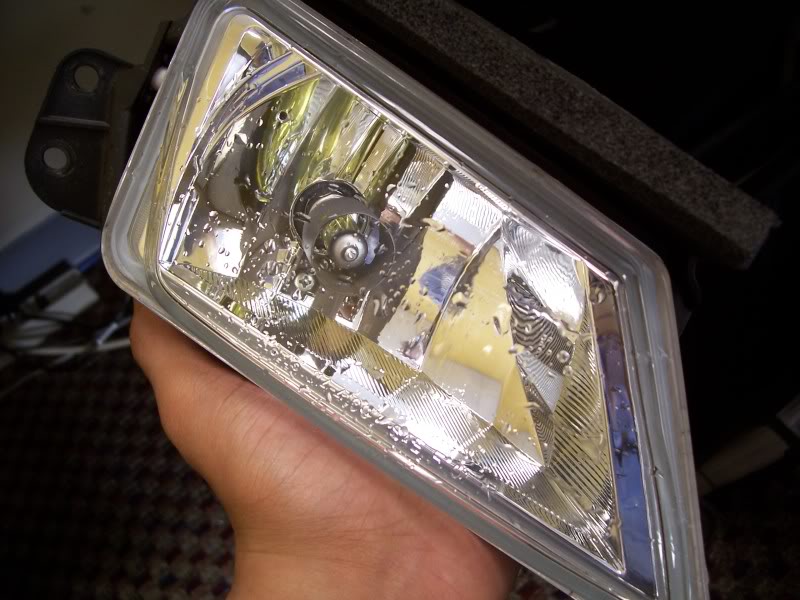
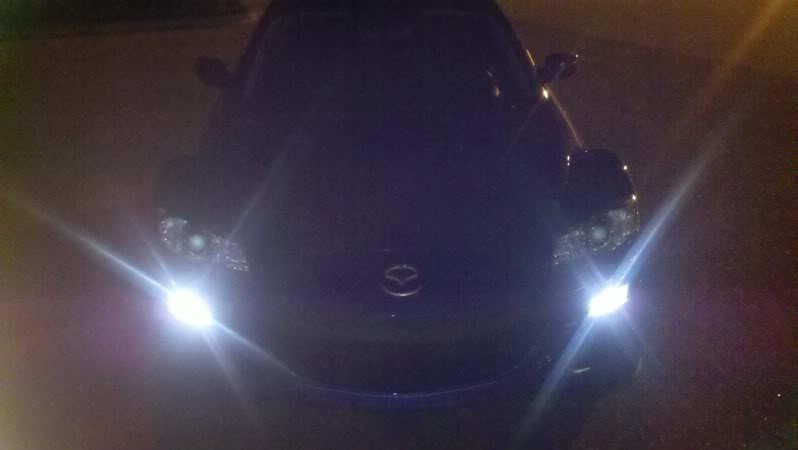
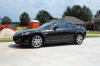
Before (Stock Foglamp / Bulb [Sylvania EcoBulb 9006):
RX-8 Stock Foglamp with Stock Bulbs ((Atleast to me) from 7~ feet away: (Next two pictures)
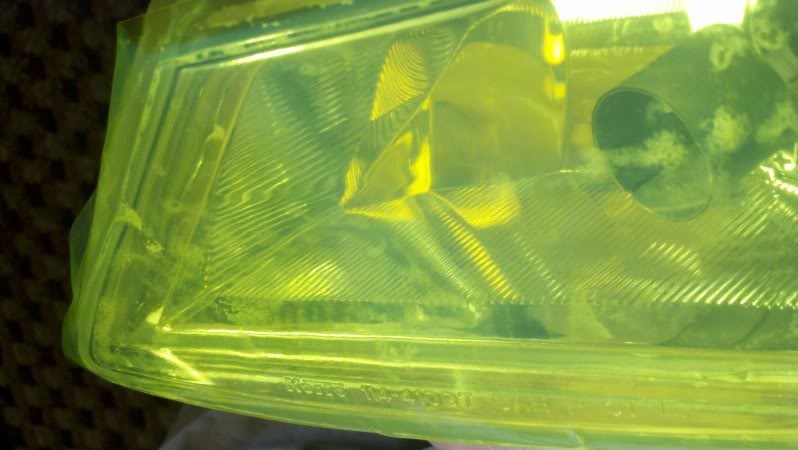
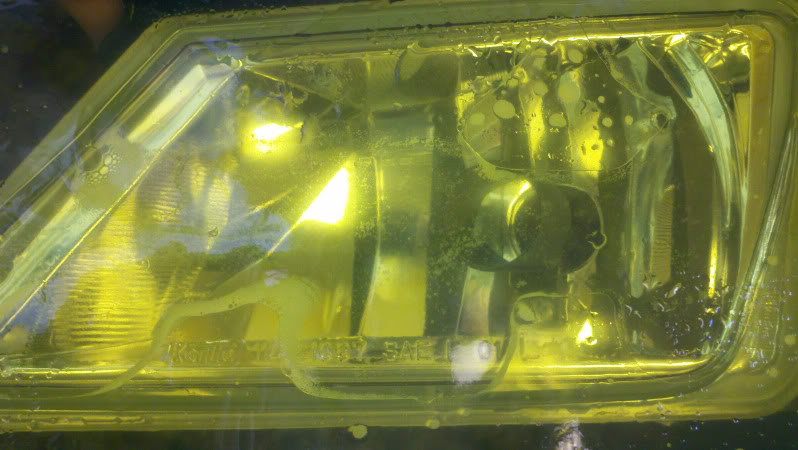
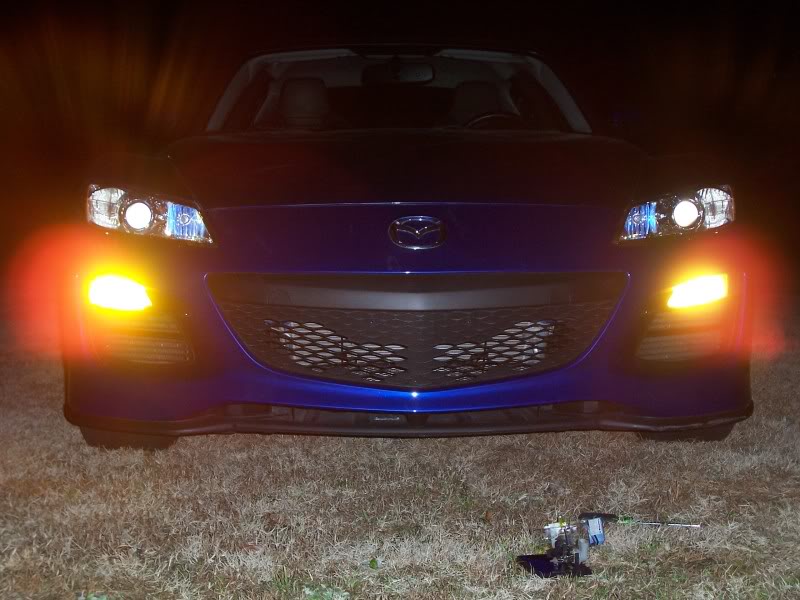
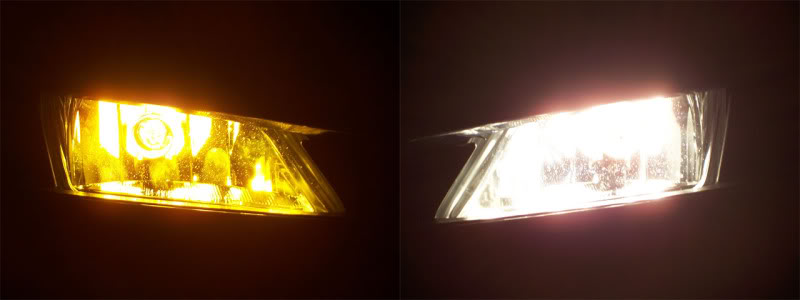
After:
Left (Ho�n Endurance Fog Light + Yellow Tint). Right (Stock 9006 bulb + Yellow Tint).
The tint and yellow bulb produces a really pure yellow color. The Tint and white bulb produces a pale yellow.
Left (Ho�n Endurance Fog Light). Right (Stock 9006)
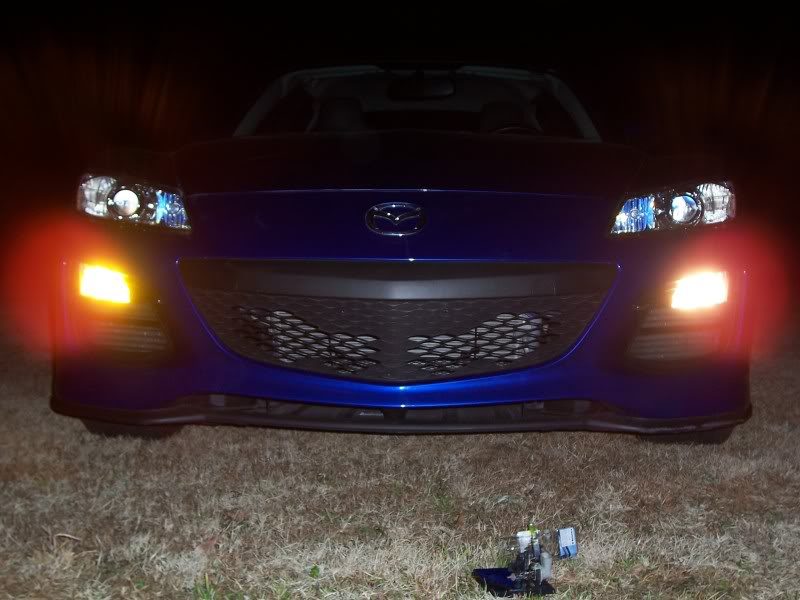
Left (Stock 9006). Right (Ho�n Endurance Fog Light)

________________________________
Conclusion::
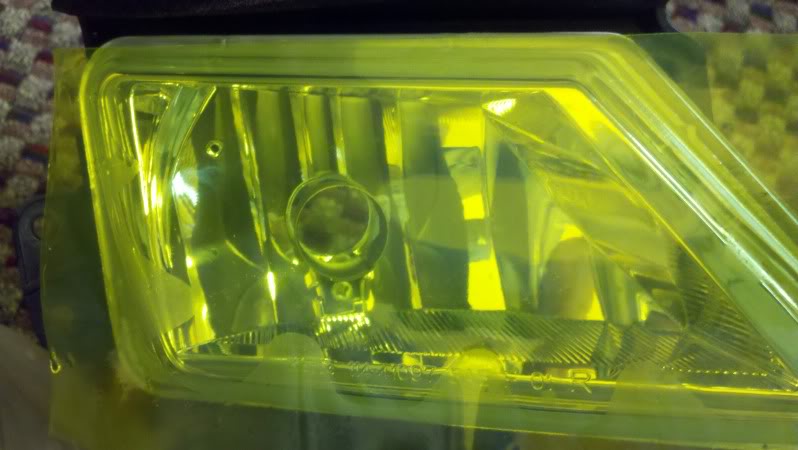
Yellow tint from DecalFX (In all fairness to DecalFX, I don't have any other tint suppliers to try) isn't really "Yellow". It's more of a yellow with a green tint, although not as strong as the pictures show it. Keep in mind the green hue is something that can be seen during the daytime.
Remember all that "tint can decrease your light" talk? It decreased it a lot more than I thought. After driving in town (with spots of no light), with only the fog lights with and without the tint... I can see a difference in the output on the same road, at the same night (Weather conditions will be mostly the same).
After going through the comparison myself, I decided - after all this work - not to use the tint. The Hoen bulb is plenty yellow enough and does not decrease my visibility. It's yellow and doesn't make me blind. I'm a happy camper. Also, because someone mentioned that I should - i checked the degrees of the "Yellow" The yellow was everywhere I looked around the lamp when it was on - with the Hoen bulb. Plenty awesome.
As for the tint: it looks cool, and it's unique. But as far as safty and functionality is concerned - looking cool isn't enough for me to keep the tint on. I require my car to still be functional, while looking it's best.
- I like to believe that having yellow fog lights signals to other drivers that they need to drive carefully. Trust me, In south carolina's cities, a warning that the road may be a little bit slippery is far from a bad thing. )Everyone that has driven on the interstate, when it rains, in Columbia knows what i'm talking about.)
Check with your local law enforcement for tint laws. But generally if you're pulled over for tint, you can take it off at that moment. It's not a big deal. If you tint too much with paint, you'll have a trip. You will have to go through the whole sanding process, and then polish, clean... It's a hassle to apply and a hassle to get off.
Tip: Working with vinyl during the cold is a very difficult task. Thankfully for this tutorial we just need to detach our fog lights... which really doesn't require anything more than a philips head (PH2 For that perfect fit) screw driver and hands. If you want to work on fog lights when it's cold outside, park your car inside the garage or take out the fog lamp and work on it inside. Grab a beer and Take some time for the car, or fog lamp to warm up to room temp.
Materials To complete:
1. Scrubbing Bubbles (If it's good enough for my butt, it's good enough for light)
2. Glass cleaner. [Armorall Auto Glass]
3. Polishing Sponge or applicator.
4. Heat gun
5. Exacto Knife
6. Yellow Vinyl - (DecalFx, Grafixplastics, RVinyl
________________________________
Prepare The Materials::
Step 1- Turn off the car. I didn't disconnect the negative battery terminal.
Step 2- Remove the headlamp assembly. Remove the bottom plastic piece by pulling out towards you. There will be two tabs on either side.
Step 3- Remove the three screws holding the assembly to the car. Two will be on the outside and one on the inside.
Step 4- Remove the fog light bulb (9006). (LH) Twist the connector in a 1/8th circle downwards. (RH) Twist the connector 1/8th right.
Step 5- Wash and rinse. Road grime, dirt, insects, small creatures may have made your fog light a new home. I had 17,000 miles of highway, dirt roads and wood. Not to mention those pesky road bullets.This general clean will get the worst off the foglamp. Do not worry about streaks, as the next step should wipe all that away. The foglights looked really bad at this stage, so no pictures were taken.
Step 6- Polish and clean. Using the Auto Glass cleaner, clean it for the final time. Now that the worst has gone. You'll want to use a polishing sponge, I used work bathroom tissues. Again, this is good enough for people's butts...
Step 7- Cut the vinyl into a [8 in. x 4 in.] sheet.
Step 8- Turn on the heat gun. Set it to 350 or the closest setting.
The vinyl will help protect the fog lamp, so getting the headlamp looking good will help retain it's value.
________________________________
Installing::
Step 1- Use the Auto glass cleaner to wet the outside. You can apply the glass cleaner two ways (A or B). To save you my headache, i'll show you what not to do:
A: If you press on the glass cleaner and get fine mist over a wide area, you'll create small bubble in the cleaner. When you put on the vinyl, the small bubbles will not go away and it'll look like you did not clean the headlight and left dirt smear. (What you don't want. Before and Result Next Three pictures)
B: You'll want to just "bead" the glass cleaner onto the headlamp. It does not take a lot of cleaner. Just a little bit. (What you do want. Next picture)
Step 2- Peel off the vinyl. Spray the back vinyl with the same bead effect. The back of the vinyl was the paper-side
Step 3- Put the Vinyl, wet-side down, ontop of the wet fog light.
Step 4- Move the vinyl around so it'll cover all of the outside lens. You can leave most of the extra stuff at the bottom, so you won't need to cut so much of the top side.
Step 5- Spray the outside of the vinyl with auto glass cleaner. Use a finger to hold down the vinyl. From the middle, Gently Push out with your polishing sponge. Let the sponge do all the work here. Push out to all the areas. You'll see bubbles, and folds. That's okay. You just need to get the vinyl on.
Step 6- Use the heat gun, and warm up the vinyl that's attached to the lens. You'll see the bubble pop up. The hot air expands the bubbles. Heat up the vinyl facing sideways, pointing down.
Tip: Apply more cleaner to the surface if you notice any scuff marks.
Tip: The air bubbles you are working with should be facing up, towards the roof/sky. If you work at the bubbles that are pointed down, you'll end up with these bubbles floating through the vinyl - towards the sky. This'll save you some trouble with growing bubbles.
Step 7- Spray the vinyl again with more glass cleaner. With the polishing sponge, again push out with gentle force out to the ends. Use the sponge to get the middle crease.
--- Repeat Step 6 and 7 until you've gotten most of the bubbles out.
Step 8- You'll get to a point that you'll need to get the outer edges down. Heat up one side of the vinyl, still pushing out from the middle - or close to a bubble, go across and push down on the edge, folding the vinyl over the lens.
--- Repeat Step 8 for all sides. Once. Do not worry about getting rid of all of the bubbles yet.
Step 9- Use the exacto knife, cut small lines at the corners of the fog lamp. This will help decrease the stress on the vinyl when you fold them over and make the whole process easier.
Step 10- Use patience. Use the damp sponge and the heat gun to weed out those bubble and smooth out the vinyl. You may need to exacto knife a few folds.
You'll be rewarded with professional looking fog tint without bubbles
________________________________
Pictures::
Before (Stock Foglamp / Bulb [Sylvania EcoBulb 9006):
RX-8 Stock Foglamp with Stock Bulbs ((Atleast to me) from 7~ feet away: (Next two pictures)
After:
Left (Ho�n Endurance Fog Light + Yellow Tint). Right (Stock 9006 bulb + Yellow Tint).
The tint and yellow bulb produces a really pure yellow color. The Tint and white bulb produces a pale yellow.
Left (Ho�n Endurance Fog Light). Right (Stock 9006)
Left (Stock 9006). Right (Ho�n Endurance Fog Light)
________________________________
Conclusion::
Yellow tint from DecalFX (In all fairness to DecalFX, I don't have any other tint suppliers to try) isn't really "Yellow". It's more of a yellow with a green tint, although not as strong as the pictures show it. Keep in mind the green hue is something that can be seen during the daytime.
Remember all that "tint can decrease your light" talk? It decreased it a lot more than I thought. After driving in town (with spots of no light), with only the fog lights with and without the tint... I can see a difference in the output on the same road, at the same night (Weather conditions will be mostly the same).
After going through the comparison myself, I decided - after all this work - not to use the tint. The Hoen bulb is plenty yellow enough and does not decrease my visibility. It's yellow and doesn't make me blind. I'm a happy camper. Also, because someone mentioned that I should - i checked the degrees of the "Yellow" The yellow was everywhere I looked around the lamp when it was on - with the Hoen bulb. Plenty awesome.
As for the tint: it looks cool, and it's unique. But as far as safty and functionality is concerned - looking cool isn't enough for me to keep the tint on. I require my car to still be functional, while looking it's best.
Last edited by RogueTadhg; 01-28-2011 at 07:45 PM. Reason: Review & Conclusion.

 01-30-2011, 02:15 AM
#3
Sunlight Silver Bias

Join Date: May 2010
Location: Kirkland, WA
Posts: 1,259
Likes: 0
Received 0 Likes
on
0 Posts
Looks awesome! Haven't really seen too many people going and doing the yellow fog routine. Would you consider getting some yellow HID H11's to make them EXTRA awesome/yellow? Some 3000k HID's from v-leds.com/ddmtuning.com would be good stuff on that beast.

 01-30-2011, 06:31 PM
#5
Registered
Join Date: Sep 2010
Location: Ponchatoula, LA
Posts: 100
Likes: 0
Received 0 Likes
on
0 Posts

 01-30-2011, 11:06 PM
#8
Registered

Join Date: Oct 2009
Posts: 49
Likes: 0
Received 0 Likes
on
0 Posts
RogueTadHg, did you do the same fog-light rewire modification that was done on the series 1 so that the main headlight did not to be on to make the fog lights turn on? If you know the wiring procedure, or what needs to be done, please let me know!
01-31-2011, 08:55 AM
#9
Living is best Modified.
Thread Starter
I did think about going down that road. and went as far as to buy the vled's hid kit (3K) for the 9006. But really when it comes down to it - I couldn't see myself using something that I know, off the bat, isn't going to be 100% the best.
My future plans with the fog light is not going to be so simple: Purchasing a small projector, opening the fog lights, retrofit a projector (D2S hopefully), cutting a hole for the projector, fitting it, sealing it, painting it, testing the line...
It's going to be a lot more work, and more time consuming

 02-01-2011, 09:57 AM
#10
Living is best Modified.
Thread Starter

 02-10-2011, 12:00 AM
#12
Sunlight Silver Bias
Join Date: May 2010
Location: Kirkland, WA
Posts: 1,259
Likes: 0
Received 0 Likes
on
0 Posts
I don't condone using HID kits. Mostly because of Glare, and the light is not going to be crisp.
I did think about going down that road. and went as far as to buy the vled's hid kit (3K) for the 9006. But really when it comes down to it - I couldn't see myself using something that I know, off the bat, isn't going to be 100% the best.
My future plans with the fog light is not going to be so simple: Purchasing a small projector, opening the fog lights, retrofit a projector (D2S hopefully), cutting a hole for the projector, fitting it, sealing it, painting it, testing the line...
It's going to be a lot more work, and more time consuming
Can you please explain what glare you're referring to from the foglights? The S1 foglights, for instance, have light caps on them, so there is no glare coming from them. I put in some 5k's for my foglights, and they are no different in terms of glare than your average halogen bulbs (H11). However, if you were to do this to projectorless headlights, then you're going to get random beams of light causing glare.
Can you explain your glare issue again? Maybe I don't understand.
02-10-2011, 04:55 AM
#13
Living is best Modified.
Thread Starter
I was explaining that if you were to add a HID kit without projectors, you'd get unwanted glare. Since you've done a fog light kit conversion can you take a wall shot of your fog lights with the HID kit? Hopefully I'm talking out of my *** about glare becoming an issue with fog lights.
Keep in mind, Series 2 has different fog light bulbs: 9006. As I understand it the numbers help determine how the light needs to be reflected off the lamp and onto the road. I didn't try the HID kit when I bought one from vLEDs. I'd rather not have to mess with wiring when it's cold as **** outside (no garage).
Keep in mind, Series 2 has different fog light bulbs: 9006. As I understand it the numbers help determine how the light needs to be reflected off the lamp and onto the road. I didn't try the HID kit when I bought one from vLEDs. I'd rather not have to mess with wiring when it's cold as **** outside (no garage).
02-10-2011, 10:15 AM
#14
Sunlight Silver Bias
Join Date: May 2010
Location: Kirkland, WA
Posts: 1,259
Likes: 0
Received 0 Likes
on
0 Posts
Yeah, I'll take a picture tonight, hopefully I can do some good justice witht he pictures. And the HID's are a plug and play system, all you gotta do is find a place to slap the ballasts on to and you're golden :-o
02-14-2011, 05:12 PM
#17
:D

Join Date: May 2010
Location: Bay Area, Ca
Posts: 2
Likes: 0
Received 0 Likes
on
0 Posts
I've done this to my car.. but I'm feel like changing up the look b/c i liked the clear foglight look during the day instead... do you think these lights would look as yellow as the yellow tint?
http://www.rotaryfx.com/product_p/lig1016.htm thx guys
http://www.rotaryfx.com/product_p/lig1016.htm thx guys
02-14-2011, 05:32 PM
#18
Living is best Modified.
Thread Starter
The yellow tint will further cut the light waves down to a more yellowed yellow.
It looks like that bulb only has a strip of yellow, not a full yellow bulb. I doubt that bulb is yellow from all angles if the bulb only has a strip. I have heon, happy with them, yellow in all ways.

The hoen are the right-most bulb.
It looks like that bulb only has a strip of yellow, not a full yellow bulb. I doubt that bulb is yellow from all angles if the bulb only has a strip. I have heon, happy with them, yellow in all ways.
The hoen are the right-most bulb.
02-19-2011, 08:55 PM
#19
Registered

Join Date: Dec 2010
Location: Dearborn Heights, MI
Posts: 229
Likes: 0
Received 0 Likes
on
0 Posts
06-18-2014, 09:01 AM
#20

I've done this to my car.. but I'm feel like changing up the look b/c i liked the clear foglight look during the day instead... do you think these lights would look as yellow as the yellow tint?
Fog Light Halogen Replacement Bulbs Yellow thx guys
Fog Light Halogen Replacement Bulbs Yellow thx guys
I know this is a old thread, but for anyone who runs in to it. The bulbs above suck.
Would not recommend them. Not very yellow at all, and mine burned out in less than 6months too.


Thread
Thread Starter
Forum
Replies
Last Post