
DIY: VoltPhreaks Lithium Iron (LiFePO4) Battery Install
 04-14-2011, 12:20 PM
#1

DIY: VoltPhreaks Lithium Iron (LiFePO4) Battery Install
Edit on 1/20/2012: I no longer recommend installing a LiFePO4 battery in the engine bay. See post #31 of this thread for details.
Here in New England, we have short racing seasons followed by long, cold winters. The off-season for me is a time to plan year ahead, drool over the latest go-fast parts, and update my wish-list in case a pile of money suddenly falls from the sky. This winter, I was dreaming of high-flow cats, racing seats, shocks, tires, and batteries.
I’ve had five months to answer the question: if I can only buy one part for my car this year, what will it be? I have a decent baseline to start from, and all of the low-hanging fruit is already done. My next upgrade would be of the incremental variety. After losing the local SCCA autocross points championship last year by 0.007 seconds, I understand that every hundredth of a second counts.

As the season approached, I worked my wish list down to two fundamental options: less weight, or more horsepower. Horsepower helps you in the straights, while less weight helps you in acceleration, braking, and turning. Horsepower also has mass-appeal, while weight savings is only sexy to 0.001% of the population. A co-worker recently lost a lot of respect for my RX8 when she discovered it does not have air-conditioned seats. “Air conditioned seats would add weight,” I told her. “So?”.
In the end, I want to win on the autocross course more than I want high-fives from casual auto enthusiasts at work, so I went with weight savings over hp. My four guiding principles for weight loss: 1) More is better 2) Higher in the chassis is better 3) Further forward is better 4) It has to be rules-compliant. The biggest, heaviest, furthest-forward brick of weight in the car is the battery. Luckily, the SCCA STX rule set allows me to swap it out with any size model of the same voltage. My decision was made.
Now that I’ve decided to replace my battery, there are options and trade-offs. One decision I made long ago is that I am not willing to trade performance for reliability. All lead acid batteries are essentially similar: less weight means less capacity. To reduce the weight of the battery by 75%, I would need to reduce capacity (and reliability) by 75%. The only other option is lithium. All the weight savings without an unacceptable loss of capacity (but it comes at a price).
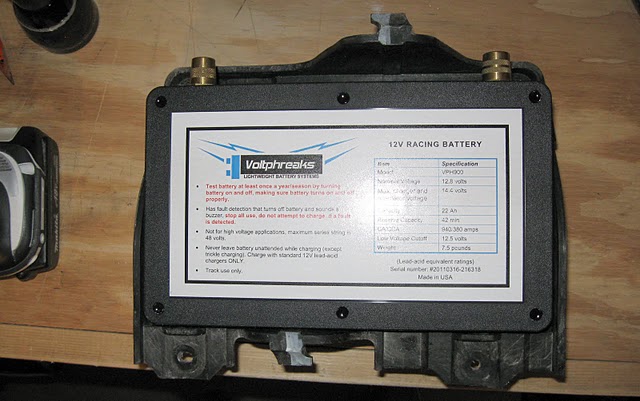
In the end, I decided on the VoltPhreaks VHP900 series. Voltphreaks have been around for several years, and their products have been successfully used in a variety of applications. I have wanted one ever since I heard about them on the Lotus forum years ago.
Specs on the VPH900:
Item Specifications
Model Number VPH900
Nominal voltage 12.8 volts
Cranking Amps (CA) 1020 amps
Cold Cranking Amps (CCA) 570 amps
reserve capacity (RC) 42 minutes
Capacity 22 Ah
terminal type SAE post, M6 male, M6 female (click for images)
working temperature -22�F to 140�F (max 170�F)
dimensions 10 x 6 x 3" (not including terminals)
weight 7.5 pounds
At 7.5 lbs, it’s about 30 lbs less than the high capacity Mazda OEM battery and still large enough that I feel comfortable letting the car sit for a week without a battery tender.
Next: The install
Here in New England, we have short racing seasons followed by long, cold winters. The off-season for me is a time to plan year ahead, drool over the latest go-fast parts, and update my wish-list in case a pile of money suddenly falls from the sky. This winter, I was dreaming of high-flow cats, racing seats, shocks, tires, and batteries.
I’ve had five months to answer the question: if I can only buy one part for my car this year, what will it be? I have a decent baseline to start from, and all of the low-hanging fruit is already done. My next upgrade would be of the incremental variety. After losing the local SCCA autocross points championship last year by 0.007 seconds, I understand that every hundredth of a second counts.

As the season approached, I worked my wish list down to two fundamental options: less weight, or more horsepower. Horsepower helps you in the straights, while less weight helps you in acceleration, braking, and turning. Horsepower also has mass-appeal, while weight savings is only sexy to 0.001% of the population. A co-worker recently lost a lot of respect for my RX8 when she discovered it does not have air-conditioned seats. “Air conditioned seats would add weight,” I told her. “So?”.
In the end, I want to win on the autocross course more than I want high-fives from casual auto enthusiasts at work, so I went with weight savings over hp. My four guiding principles for weight loss: 1) More is better 2) Higher in the chassis is better 3) Further forward is better 4) It has to be rules-compliant. The biggest, heaviest, furthest-forward brick of weight in the car is the battery. Luckily, the SCCA STX rule set allows me to swap it out with any size model of the same voltage. My decision was made.
Now that I’ve decided to replace my battery, there are options and trade-offs. One decision I made long ago is that I am not willing to trade performance for reliability. All lead acid batteries are essentially similar: less weight means less capacity. To reduce the weight of the battery by 75%, I would need to reduce capacity (and reliability) by 75%. The only other option is lithium. All the weight savings without an unacceptable loss of capacity (but it comes at a price).
In the end, I decided on the VoltPhreaks VHP900 series. Voltphreaks have been around for several years, and their products have been successfully used in a variety of applications. I have wanted one ever since I heard about them on the Lotus forum years ago.
Specs on the VPH900:
Item Specifications
Model Number VPH900
Nominal voltage 12.8 volts
Cranking Amps (CA) 1020 amps
Cold Cranking Amps (CCA) 570 amps
reserve capacity (RC) 42 minutes
Capacity 22 Ah
terminal type SAE post, M6 male, M6 female (click for images)
working temperature -22�F to 140�F (max 170�F)
dimensions 10 x 6 x 3" (not including terminals)
weight 7.5 pounds
At 7.5 lbs, it’s about 30 lbs less than the high capacity Mazda OEM battery and still large enough that I feel comfortable letting the car sit for a week without a battery tender.
Next: The install
Last edited by BRODA; 01-20-2012 at 05:32 PM. Reason: See last post
 04-14-2011, 12:20 PM
#2
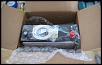
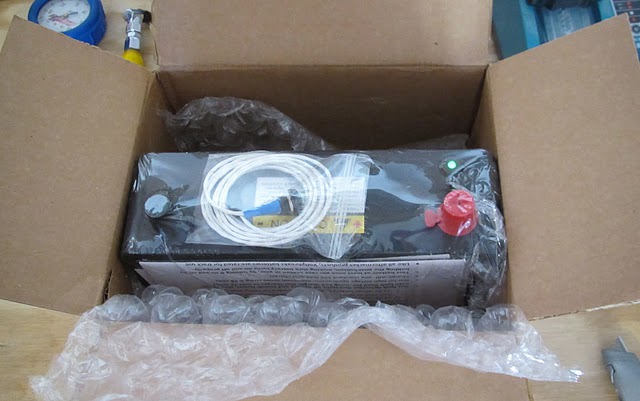
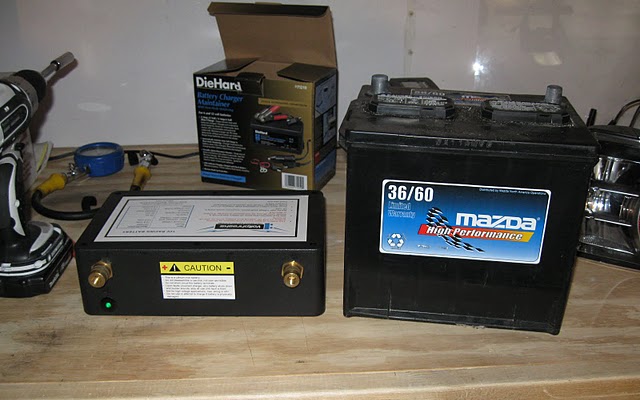
The battery arrived Thursday evening, and I had a practice event on Saturday. I could have run the practice on my stock battery and waited to install the VoltPhreaks, but I’m just not that patient. Luckily, the install was a breeze, and I wrapped it up in a couple hours after work on Friday.
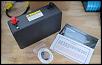
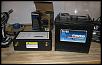
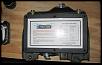
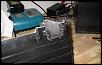
The first step was to pull out the old (heavy) lead acid battery. As you can see, the VPH900 is about a quarter the size of the old battery.
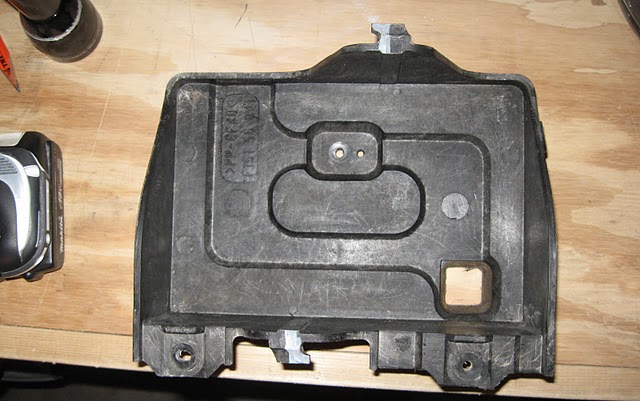
I next removed the stock battery tray and surround so I could decide on my mounting strategy without hunching over the hood of the car.
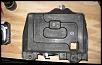
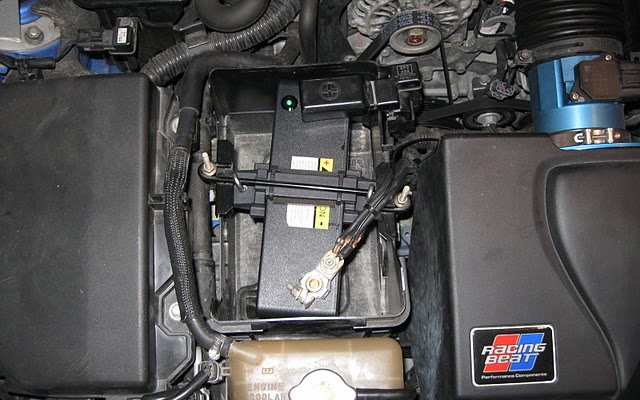
The dimensions are almost perfect to lay the battery down in the base of the OEM battery tray. However, this will not work with the SAE post option, as that places the positive battery terminal too close to the accessory pulleys on the front of the engine.
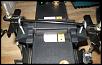
After scratching my head for a few minutes, I decided my best bet would be to replicate the OEM layout as much as possible. That would avoid the need for battery cable extensions and ensure no clearance issues.
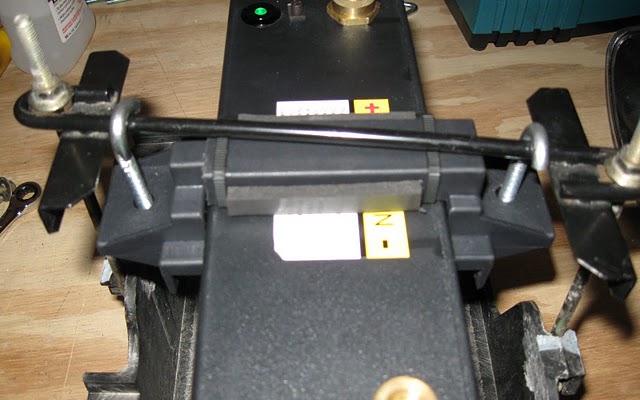
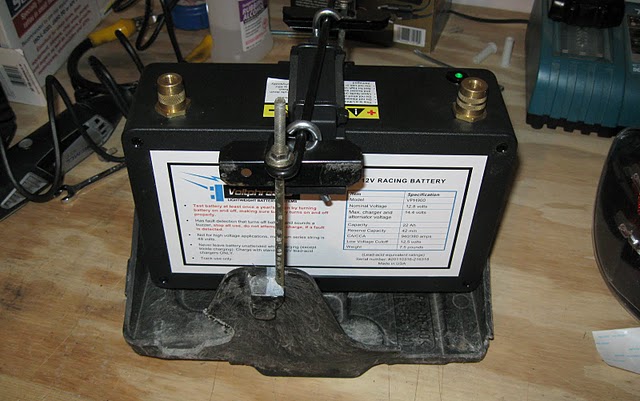
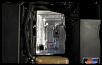
The OEM battery hold-down bracket is obviously designed for a much wider battery, so I ran out to AutoZone and picked up a universal bracket. The one I purchased was adjustable in width, and after some quick work with a hack-saw, it was the perfect size for my new battery. I glued and zip-tied the bracket at the desired width and applied some adhesive foam rubber to the bottom to keep the battery from sliding fore and aft.
Continued...

The first step was to pull out the old (heavy) lead acid battery. As you can see, the VPH900 is about a quarter the size of the old battery.
I next removed the stock battery tray and surround so I could decide on my mounting strategy without hunching over the hood of the car.
The dimensions are almost perfect to lay the battery down in the base of the OEM battery tray. However, this will not work with the SAE post option, as that places the positive battery terminal too close to the accessory pulleys on the front of the engine.
After scratching my head for a few minutes, I decided my best bet would be to replicate the OEM layout as much as possible. That would avoid the need for battery cable extensions and ensure no clearance issues.
The OEM battery hold-down bracket is obviously designed for a much wider battery, so I ran out to AutoZone and picked up a universal bracket. The one I purchased was adjustable in width, and after some quick work with a hack-saw, it was the perfect size for my new battery. I glued and zip-tied the bracket at the desired width and applied some adhesive foam rubber to the bottom to keep the battery from sliding fore and aft.
Continued...
Last edited by BRODA; 04-14-2011 at 02:31 PM. Reason: Updating Images
04-14-2011, 12:21 PM
#3
Continued from above
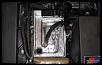
I could have drilled holes in the bottom of the battery box and called it a day, but I don’t trust the thin plastic to hold the battery during hard cornering. Rather than reinvent the wheel, I decided the OEM mounts were the obvious choice for keeping my battery in place.
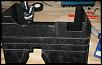
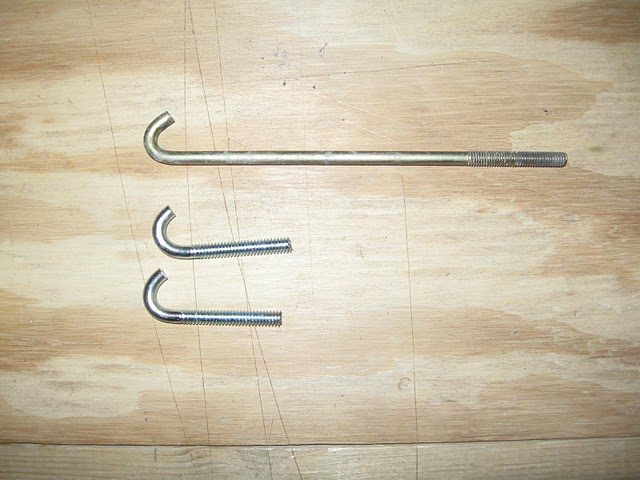
Some quick work with some pliers and a cut-off wheel, and I bent up two short clamps to securely attach my universal bracket to the underside of the OEM battery hold down.

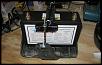
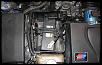
A quick test-fit inside the car revealed that the positive battery cable was interfering with the battery tray surround, so out came the Dremel to open up some clearance. I also found the cable reached easier if I clocked the battery slightly toward the driver’s side, so a slight adjustment was made before everything was tightened down.
It may not be the most elegant solution, but the battery is very secure in the mount. It past scrutiny at two different autocross clubs this weekend, where the tech inspectors threw their weight against the battery to check for free play. Both inspectors were satisfied it was not going anywhere. At the end of each day, I checked the battery again, and it was still where I left it. I will eventually have a custom aluminum bracket bent at the local race shop, but I am satisfied enough with the current arrangement that I am in no real hurry to change anything.
Impressions
Anyone who tells you they can feel a 30 lb difference from the driver’s seat has a much more sensitive keister than my own. However, I can tell you that the car felt great this weekend.
And, perhaps just as important, the battery didn’t skip a beat. The first time I tested the battery was Saturday morning at 6:45 AM when the temperature outside was a balmy 33 degrees (probably a few degrees warmer in my uninsulated garage). The car fired right up on the first try just like you would expect. No drama, just the sweet sound of the rotary engine coming to life.
During the course of the weekend, the car was turned off and on more than a dozen times, and there was some listening to the radio with the car off. Again, the car fired right up every time.
Also, I will mention that Tony from VoltPhreaks was a pleasure to do business with. He took the time to listen to my requirements and gave good feedback when I was trying to decide between two different models. He even took the time to check in with after I received the battery to see if I had any questions and to make sure I was satisfied.
Closing comments:
The battery has been installed just under a week now, and so far I am very happy with the experience. The next step will be to get the car corner balanced again (I’m overdue anyway) and build a better bracket to hold it in place. I’ll update this thread when I have some more experience with the battery, and since I don’t drive the car every day, I’ll report on how well it holds a charge when left unattended for a week or two.
I could have drilled holes in the bottom of the battery box and called it a day, but I don’t trust the thin plastic to hold the battery during hard cornering. Rather than reinvent the wheel, I decided the OEM mounts were the obvious choice for keeping my battery in place.
Some quick work with some pliers and a cut-off wheel, and I bent up two short clamps to securely attach my universal bracket to the underside of the OEM battery hold down.
A quick test-fit inside the car revealed that the positive battery cable was interfering with the battery tray surround, so out came the Dremel to open up some clearance. I also found the cable reached easier if I clocked the battery slightly toward the driver’s side, so a slight adjustment was made before everything was tightened down.

It may not be the most elegant solution, but the battery is very secure in the mount. It past scrutiny at two different autocross clubs this weekend, where the tech inspectors threw their weight against the battery to check for free play. Both inspectors were satisfied it was not going anywhere. At the end of each day, I checked the battery again, and it was still where I left it. I will eventually have a custom aluminum bracket bent at the local race shop, but I am satisfied enough with the current arrangement that I am in no real hurry to change anything.
Impressions
Anyone who tells you they can feel a 30 lb difference from the driver’s seat has a much more sensitive keister than my own. However, I can tell you that the car felt great this weekend.
And, perhaps just as important, the battery didn’t skip a beat. The first time I tested the battery was Saturday morning at 6:45 AM when the temperature outside was a balmy 33 degrees (probably a few degrees warmer in my uninsulated garage). The car fired right up on the first try just like you would expect. No drama, just the sweet sound of the rotary engine coming to life.
During the course of the weekend, the car was turned off and on more than a dozen times, and there was some listening to the radio with the car off. Again, the car fired right up every time.
Also, I will mention that Tony from VoltPhreaks was a pleasure to do business with. He took the time to listen to my requirements and gave good feedback when I was trying to decide between two different models. He even took the time to check in with after I received the battery to see if I had any questions and to make sure I was satisfied.
Closing comments:
The battery has been installed just under a week now, and so far I am very happy with the experience. The next step will be to get the car corner balanced again (I’m overdue anyway) and build a better bracket to hold it in place. I’ll update this thread when I have some more experience with the battery, and since I don’t drive the car every day, I’ll report on how well it holds a charge when left unattended for a week or two.
Last edited by BRODA; 04-14-2011 at 02:33 PM. Reason: Updated Images
04-14-2011, 12:31 PM
#5
I zoom therefore I am.

you can't use img links in the DIY thread. It's done to keep really useful DIY's from becoming trash because whatever hosting you're using goes away or you move them. Upload them here and you'll be golden.
04-14-2011, 12:34 PM
#6
Metatron
iTrader: (1)

We don't like links in the DIY forum - these threads tend to be long-lived and useful, whereas the links tend to be temporary and inevitably disappear.
You should download the pic, then upload to our server, where they can reside for all eternity........
You should download the pic, then upload to our server, where they can reside for all eternity........

 04-14-2011, 01:00 PM
#14
Broda, any information on the issues with a full drain and/or high heat? Naturally lithum cell packs deteriorate in high heat applications, and fully draining them destroys the cell capacities. Obviously these were made for use in vehicles, but in the even that your battery dies, are you risking killing off a 1400 purchase?
04-14-2011, 02:08 PM
#15
Broda, any information on the issues with a full drain and/or high heat? Naturally lithum cell packs deteriorate in high heat applications, and fully draining them destroys the cell capacities. Obviously these were made for use in vehicles, but in the even that your battery dies, are you risking killing off a 1400 purchase?
Good questions.
One reason I went with VoltPhreaks is that they have built-in over-discharge protection. If the battery drains below 12.5V (other options are available on request), it turns off to prevent damage. Push a button, and it turns back on. The idea is to shut the battery down with just enough capacity to still start the car once. So theoretically, it should never leave you stranded if you forget to turn your lights off.
More info on the over-discharge protection:
http://www.voltphreaks.com/technologyodp.php
Regarding heat, I had a good conversation with Tony from VoltPhreaks about this. The LiFePO4 battery should actually tolerate more heat than a lead acid battery. The stated specs show the working temperature as -22�F to 140�F (max 170�F). Still, I may decide to insulate the battery box just to be safe. Also, there is a cold air duct which blows on the battery when the car is in motion. That is why I am using the stock battery box (with lid).
04-14-2011, 02:16 PM
#16

I have their VPR-S40 race battery; full size reserve capacity with less weight than the Odyssey PC545 I used to have (and had to keep a charged jumper box on hand for 2 day events), it has exceeded all of my expectations and so far I'm extremely pleased with it.

.
.
Last edited by TeamRX8; 04-14-2011 at 05:38 PM. Reason: tipo
 04-14-2011, 04:50 PM
#19
Momentum Keeps Me Going

Nice! I'm with you on the battery weight reduction as one of the only things left to do. If only I had cash to burn for that like you did lol  .
.
Although expensive, you do get the OV and OD protection, which is wonderful if you leave it in for DD. I'd be worried and more than a bit concerned about underhood temps during no/slow speed operation however with our rotary's heat production. The BB ducting is only good at speed, and in summer ambient air can be 90-100 degrees. Beyond that, with the battery box is bathing in the radiator backwash exceeding boiling point, so 170 deg could just be the starting point for heat that that area sees under many situations
I'm currently designing a LIFePO4 battery option for track use that reduces OEM battery weight by 34lbs over stock, not subject to underhood heat problems, w/better weight distribution as installed, and 1/5th the cost of this unit. I'm about a week from testing (Fingers crossed).
LIFePO4 is the future
.Although expensive, you do get the OV and OD protection, which is wonderful if you leave it in for DD. I'd be worried and more than a bit concerned about underhood temps during no/slow speed operation however with our rotary's heat production. The BB ducting is only good at speed, and in summer ambient air can be 90-100 degrees. Beyond that, with the battery box is bathing in the radiator backwash exceeding boiling point, so 170 deg could just be the starting point for heat that that area sees under many situations
I'm currently designing a LIFePO4 battery option for track use that reduces OEM battery weight by 34lbs over stock, not subject to underhood heat problems, w/better weight distribution as installed, and 1/5th the cost of this unit. I'm about a week from testing (Fingers crossed).
LIFePO4 is the future
04-14-2011, 05:34 PM
#20
mine is in the trunk in the forward corner next to the RR shock mount, I even ran the positive cable down the passenger side
the charging and protection circuitry is the strength of the Voltphreaks design, Tony is great to work with too. He is involved on a number of forums ...
.
the charging and protection circuitry is the strength of the Voltphreaks design, Tony is great to work with too. He is involved on a number of forums ...
.
Last edited by TeamRX8; 04-14-2011 at 05:39 PM.
04-14-2011, 06:56 PM
#21
Hey Paimon,
Good questions.
One reason I went with VoltPhreaks is that they have built-in over-discharge protection. If the battery drains below 12.5V (other options are available on request), it turns off to prevent damage. Push a button, and it turns back on. The idea is to shut the battery down with just enough capacity to still start the car once. So theoretically, it should never leave you stranded if you forget to turn your lights off.
More info on the over-discharge protection:
http://www.voltphreaks.com/technologyodp.php
Regarding heat, I had a good conversation with Tony from VoltPhreaks about this. The LiFePO4 battery should actually tolerate more heat than a lead acid battery. The stated specs show the working temperature as -22�F to 140�F (max 170�F). Still, I may decide to insulate the battery box just to be safe. Also, there is a cold air duct which blows on the battery when the car is in motion. That is why I am using the stock battery box (with lid).
Thanks for answering my questions buddy
04-21-2011, 01:39 PM
#22
I was originally planning to take some temperature readings in the battery compartment before adding insulation, but I decided to pull the trigger and just get it done.
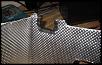
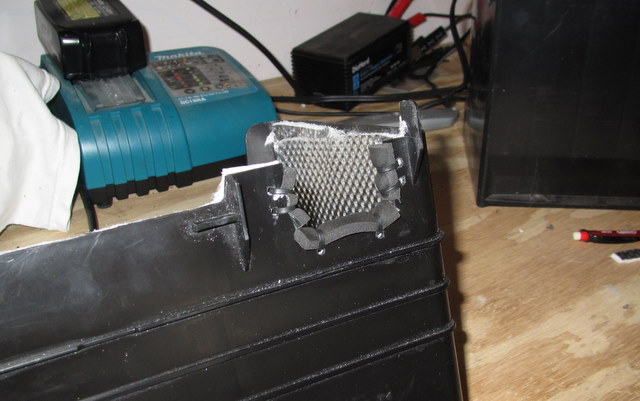
So... Today I insulated my battery tray and surround. There are many products on the market to chose from. I went with "Zero Clearance" from KoolMat because it checked all the right boxes. Unlike the popular reflective foil (i.e. gold) products which are designed only for radiant heat, this actually has 1/8 inch of fiberglass & polyester insulation to combat heat soak. The adhesive back and attractive aluminum top layer steered me toward this product rather than the traditional KoolMat. I will mention that KoolMat is great to deal with and very responsive to emails.
As a bonus, this stuff weighs next to nothing.
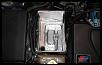
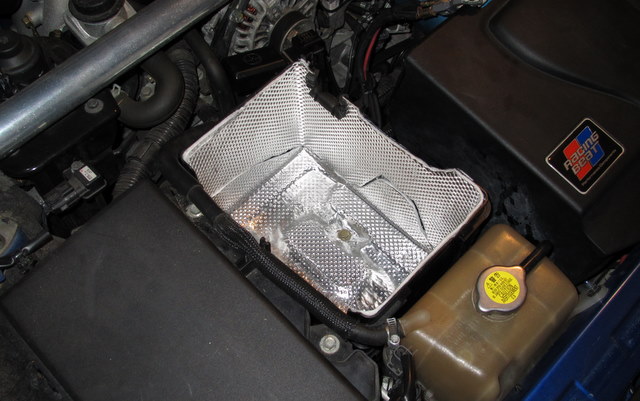
Here are some pics of the tray itself. I removed it from the car and made a paper template before trimming the material to shape. If you try this at home, wear gloves. The aluminum is SHARP
I also added some foam rubber insulation where the positive lead enters the battery compartment for a little extra insurance. Don't want to risk that shorting out.
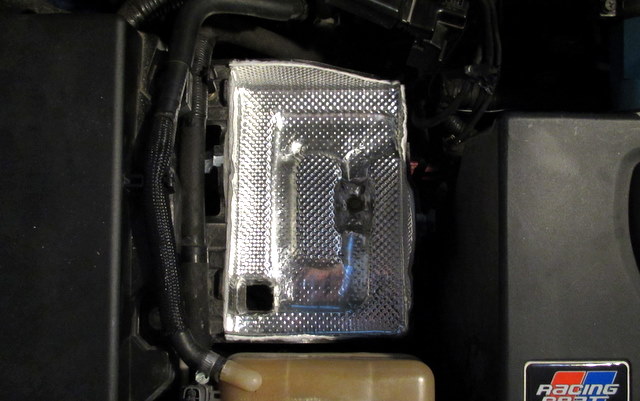
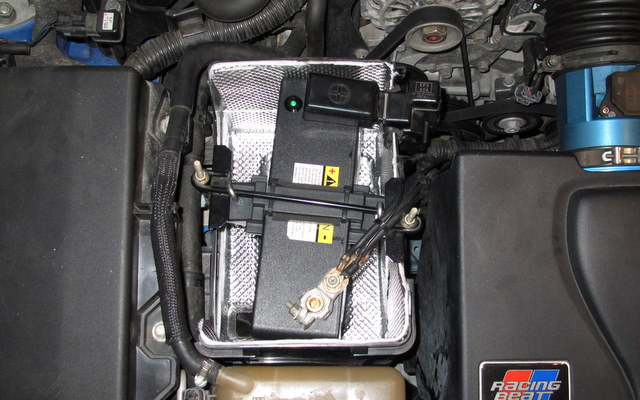
I insulated the surround in the same manner - building a template first, then trimming with some tin snips. Here it is installed in the car:
So... Today I insulated my battery tray and surround. There are many products on the market to chose from. I went with "Zero Clearance" from KoolMat because it checked all the right boxes. Unlike the popular reflective foil (i.e. gold) products which are designed only for radiant heat, this actually has 1/8 inch of fiberglass & polyester insulation to combat heat soak. The adhesive back and attractive aluminum top layer steered me toward this product rather than the traditional KoolMat. I will mention that KoolMat is great to deal with and very responsive to emails.
As a bonus, this stuff weighs next to nothing.
Here are some pics of the tray itself. I removed it from the car and made a paper template before trimming the material to shape. If you try this at home, wear gloves. The aluminum is SHARP
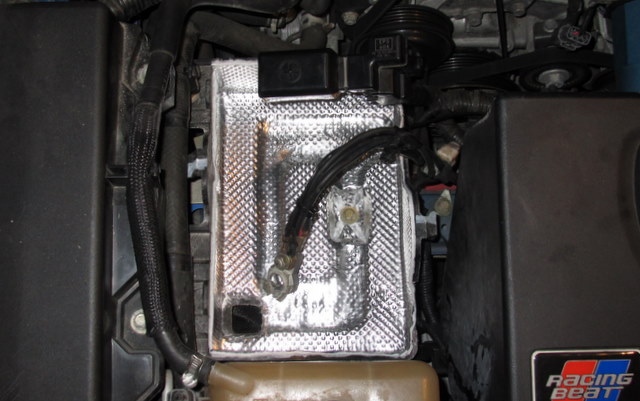
I also added some foam rubber insulation where the positive lead enters the battery compartment for a little extra insurance. Don't want to risk that shorting out.

I insulated the surround in the same manner - building a template first, then trimming with some tin snips. Here it is installed in the car:

Last edited by BRODA; 04-21-2011 at 03:32 PM.
 04-21-2011, 03:04 PM
#24
Momentum Keeps Me Going
I'm guessing you insulated the top cover too? I was playing around with all types of material to do something similar, but just gave up as it was turning out to be too much trouble, and in the end, with a day's heat soak on a race track with the hot sun in summer and the engine heat, I simply came to the conclusion it still wouldn't keep the heat out in the end. I know intake air is upwards of 200F and that's too hot and figured this would be in the same range eventually.
I hope this works for you...That material looks really nice BTW Are you planning on taking any measurements? Here's a tip I've used to test things...buy a cheap remote thermometer almost anywhere and put the transmitter in there and take the display unit in the car and see what happens for proof of concept.
I hope this works for you...That material looks really nice BTW
Are you planning on taking any measurements? Here's a tip I've used to test things...buy a cheap remote thermometer almost anywhere and put the transmitter in there and take the display unit in the car and see what happens for proof of concept.
04-21-2011, 03:40 PM
#25
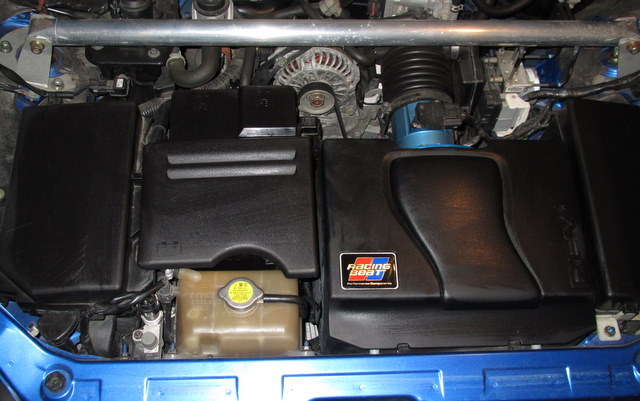
I actually did not insulate the lid since it is not directly facing a heat source. If the battery area gets really heat soaked when the car is stationary on hot days, I'll pop the hood and remove the lid between autocross runs. I do plan to pick up a wireless thermometer or at least borrow one once the summer rolls around.
Last edited by BRODA; 04-22-2011 at 02:00 PM.