When you click on links to various merchants on this site and make a purchase, this can result in this site earning a commission. Affiliate programs and affiliations include, but are not limited to, the eBay Partner Network.
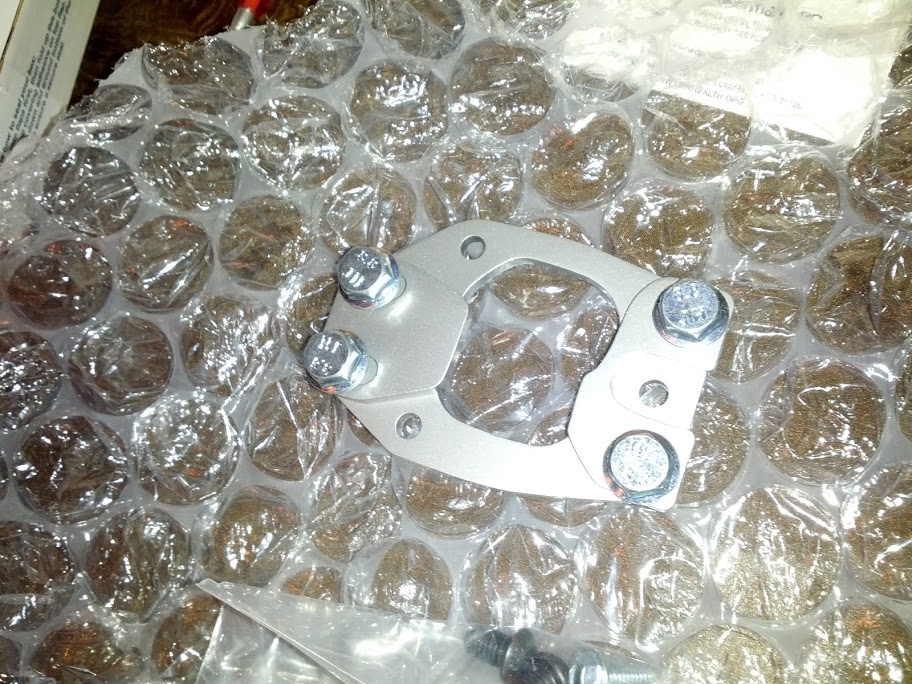
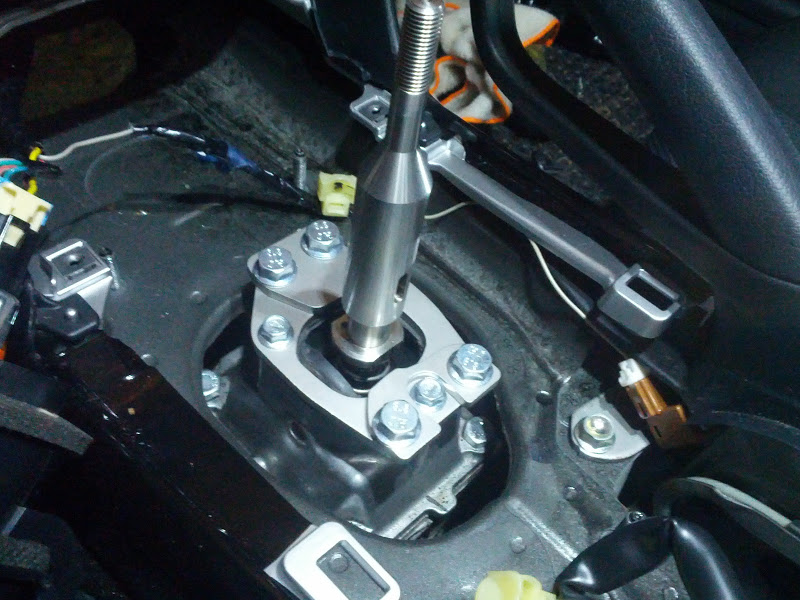
So I managed to get my hands on the Syncro Saver and took the plunge in installing it on the S2. The install is a lot more involved due to the design of the S2 transmission, but hopefully this will help anyone who is considering it.
What you will need to do is run to the hardware store with the enclosed 3 oem replacement bolts. What you need to do is get a set of bolts that is slightly longer. I wish i took measurements but unfortunately I was in a rush as the store was closing
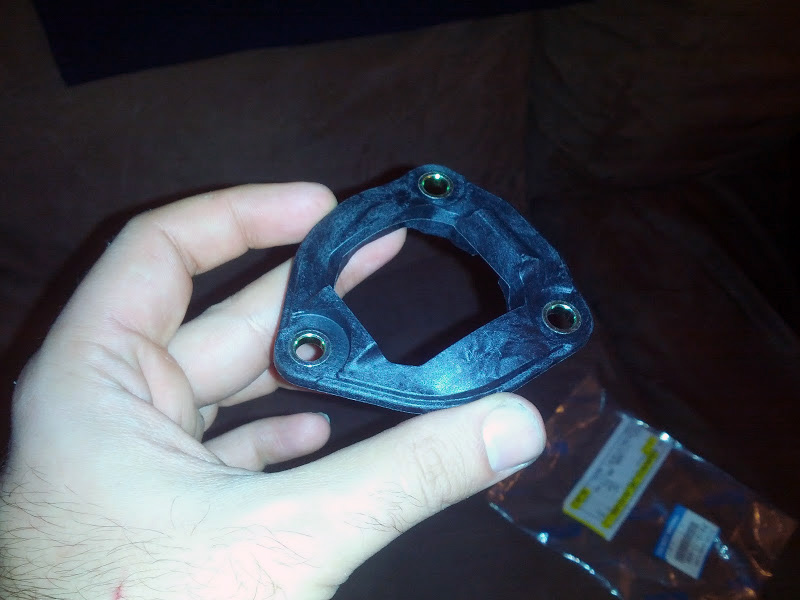
Working the Plastic Shift Gate
One of the most intricate parts of this install is modifying the OEM plastic shift gate. What you want to do is basically flatten it down to match the thickness of the metal spacers inside of the bolt holes.
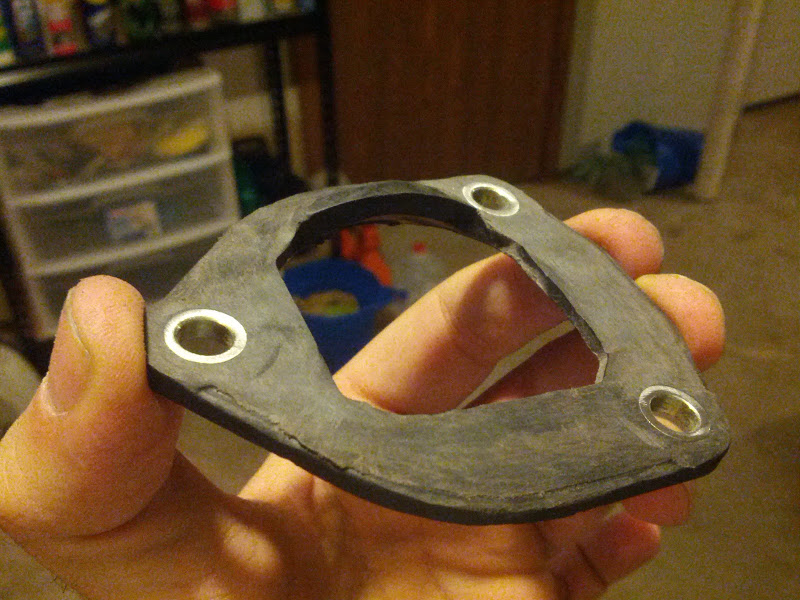
There is one thing you really need to remember though, and that is incorporating the reverse lockout into the trimming. What i did, was laid the syncro saver over the plastic gate and sketched out where I was cutting. Remember to really take your time, and make sure that the gate is nice and level throughout.
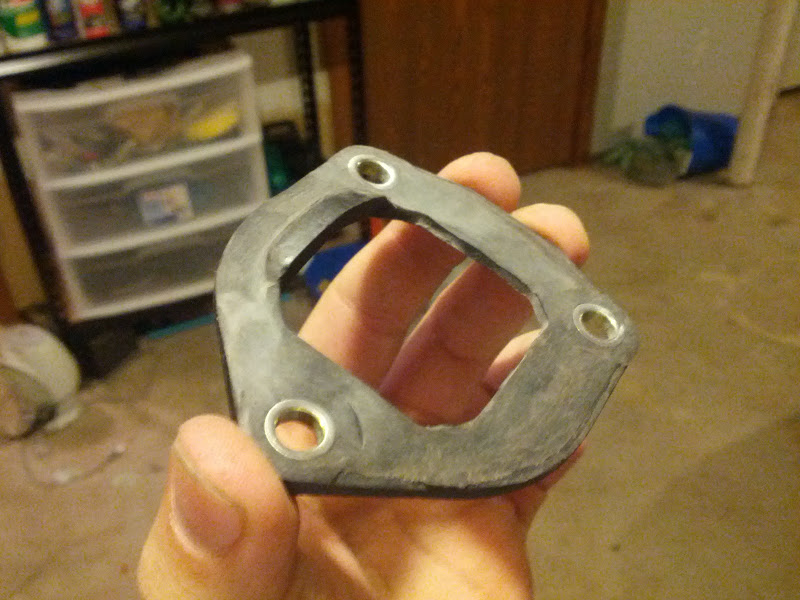
Finally Installing
It really came down to a long time of trimming, installing, measuring, trimming, installing, measuring etc. Eventually you will get the plastic gate trimmed just right and it should mate perfectly with the syncro saver. The longer bolts that you should have picked up at the store will make up for the added thickness of the syncro saver.
And lastly, a lot of people complain about putting the rubber boot back on. There some cases where people had to trim the boot, but in my case, i just had to muscle it over the syncro saver and it was good to go
did you trim the opening on the rubber boot underneath too? If not it will eventually tear and is only available with the bolt-down cover as a 2-pc assembly, not as a separate part.
edit: could be wrong, maybe the S2 boot is different than the S1. LMK.
I didn't have to trim the lower boot but it seemed to fit fine after i got it around the SynSaver (not sure if noticable in the last pic (4th attachment). Didn't look like it was stressed enough to tear, but i will keep an eye out. Thanks.
I didn't have to trim the lower boot but it seemed to fit fine after i got it around the SynSaver (not sure if noticable in the last pic (4th attachment). Didn't look like it was stressed enough to tear, but i will keep an eye out. Thanks.
That's what I thought too. Unfortunately I already tossed the torn boot I just bought the new replacement parts for. Rubber under duress has a much greater affinity to tear when also subjected to high temperature. I'll take some pics of my new both before and after so that you can see if the S2 boot is a similar arrangement.
need what? the product on this page? not sure if anyone needs it but I love the shift feel with it installed. Far more confidence when shifting aggressively. The OEM shift guard doesn't do squat.
haven't gotten back to mine yet so the boot pics are still pending until I get return next week from being ouut of town
on the S1 setup the boot fits over onto the top plate covering it except for a small shifter hole area and then also around the perimeter of the shift tower housing. It's designed to seal off the shifter top opening from any dirt getting into it from underneath the car. In order to have it seal only the perimeter of the shift tower housing you'd either have to stretch the top cover part over and around the shift tower housing which is what will eventually cause it to tear or cut that top cover part out.
I never considered it before, but I suppose you could punch the three holes into the top cover part of the boot such that you could set the top plate in place, put the boot on, and then bolt the Synchro saver plate on and sandwiching the top cover part of the rubber boot between it and the shifter top plate
I think that the S2 rubber boot and the S1's are just slightly different:
vs the S1:
Looks like the S1 "hole" in the middle is somewhat smaller.
Anyway, I will check in a week or so to see if there is any tearing significant wear.
I would still trim it to the perimeter fitment of the shifter tower housing. It may not tear in a week. The issue is that when/if it does tear then the transmission has the possibility of sand/dirt getting into it through the shifter opening. Mine was torn and there was dirt all up on the top of the trans tunnel in that console area. Found all this while swapping out the trans which appears to have a bad bearing. Not sure if this why it failed yet.
I may try punching the holes and sandwiching it on the new one.
I never considered it before, but I suppose you could punch the three holes into the top cover part of the boot such that you could set the top plate in place, put the boot on, and then bolt the Synchro saver plate on and sandwiching the top cover part of the rubber boot between it and the shifter top plate
I did this last night and it worked better than I had hoped. Squeezed the top plate into the rubber boot, marked the hole pattern onto the boot with a white paint pen, then popped the holes in the rubber boot with a hole punch. Took some finagling to get the holes aligned to the shifter housing and the screws started, not too bad though. Made for a better than OE fit because it has the metal SS plate bolted down on top of it and can't come loose or pop off to allow dirt into the shifter housing.
So i realized why i couldn't completely imitate what you did, and that is because of the way that the AF SS is designed for the S2. We had to install like a quarter inch thick spacer between the transmission and the shift tower. Because of that, even without the SyncS the rubber boot didn't exactly seal like OEM. Add the minute complexity of having the SyncS and i had to take a different avenue of approach.
what i did was simply cut the pattern of the shift tunnel out at the center of the boot which i think is similar to what you said in one of the previous posts.
in regards to what portion of the installation? The rubber boot fitment? Unfortunately not. Actually no part of this installation is hindered by the type of bolt used, just the length of the oem shift gate bolts (for S2 owners), the plastic gate itself (for s2 owners), and the overall area of the product.

 02-11-2013, 01:45 PM