
DIY: Air intake window
 03-08-2015, 08:47 PM
#1
Registered
Thread Starter

Join Date: Mar 2015
Location: Central Wisconsin
Posts: 67
Likes: 0
Received 0 Likes
on
0 Posts
DIY: Air intake window
This is only a "how to" If you want to argue my use of the cone filter do it here.
https://www.rx8club.com/series-i-tec...ication-43636/
This is only a "how to" If you want to argue the AIR INTAKE WINDOW do it here.
https://www.rx8club.com/series-i-aft...ke-pics-42631/
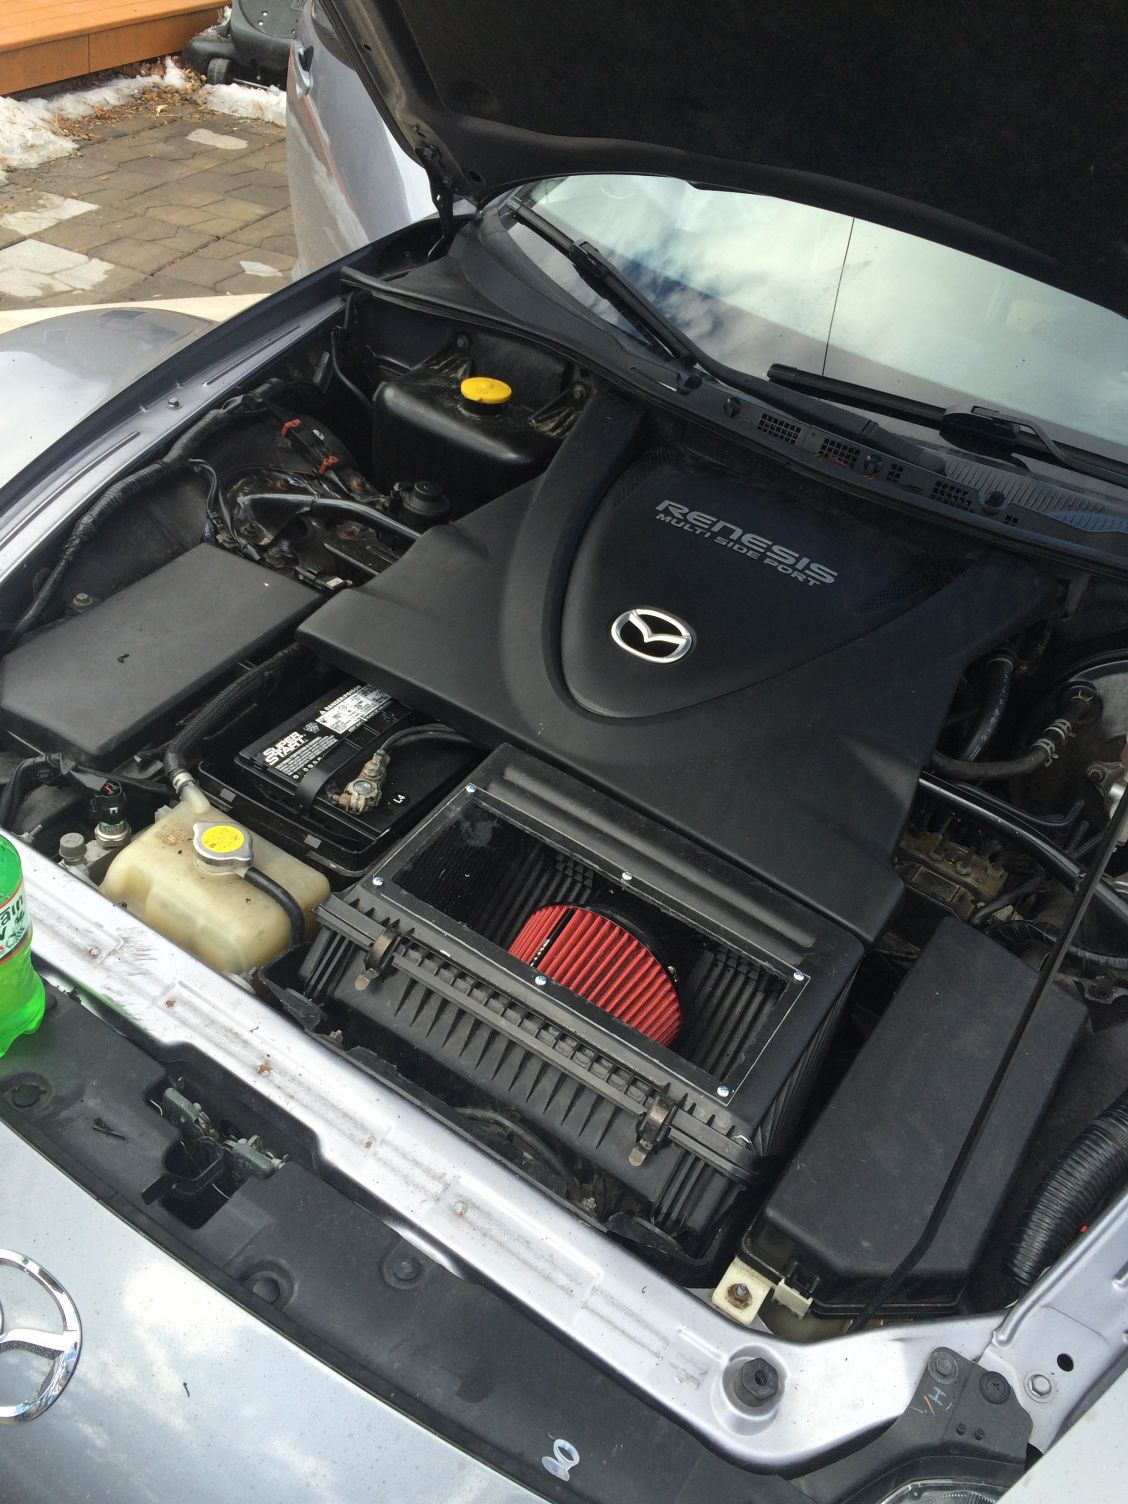
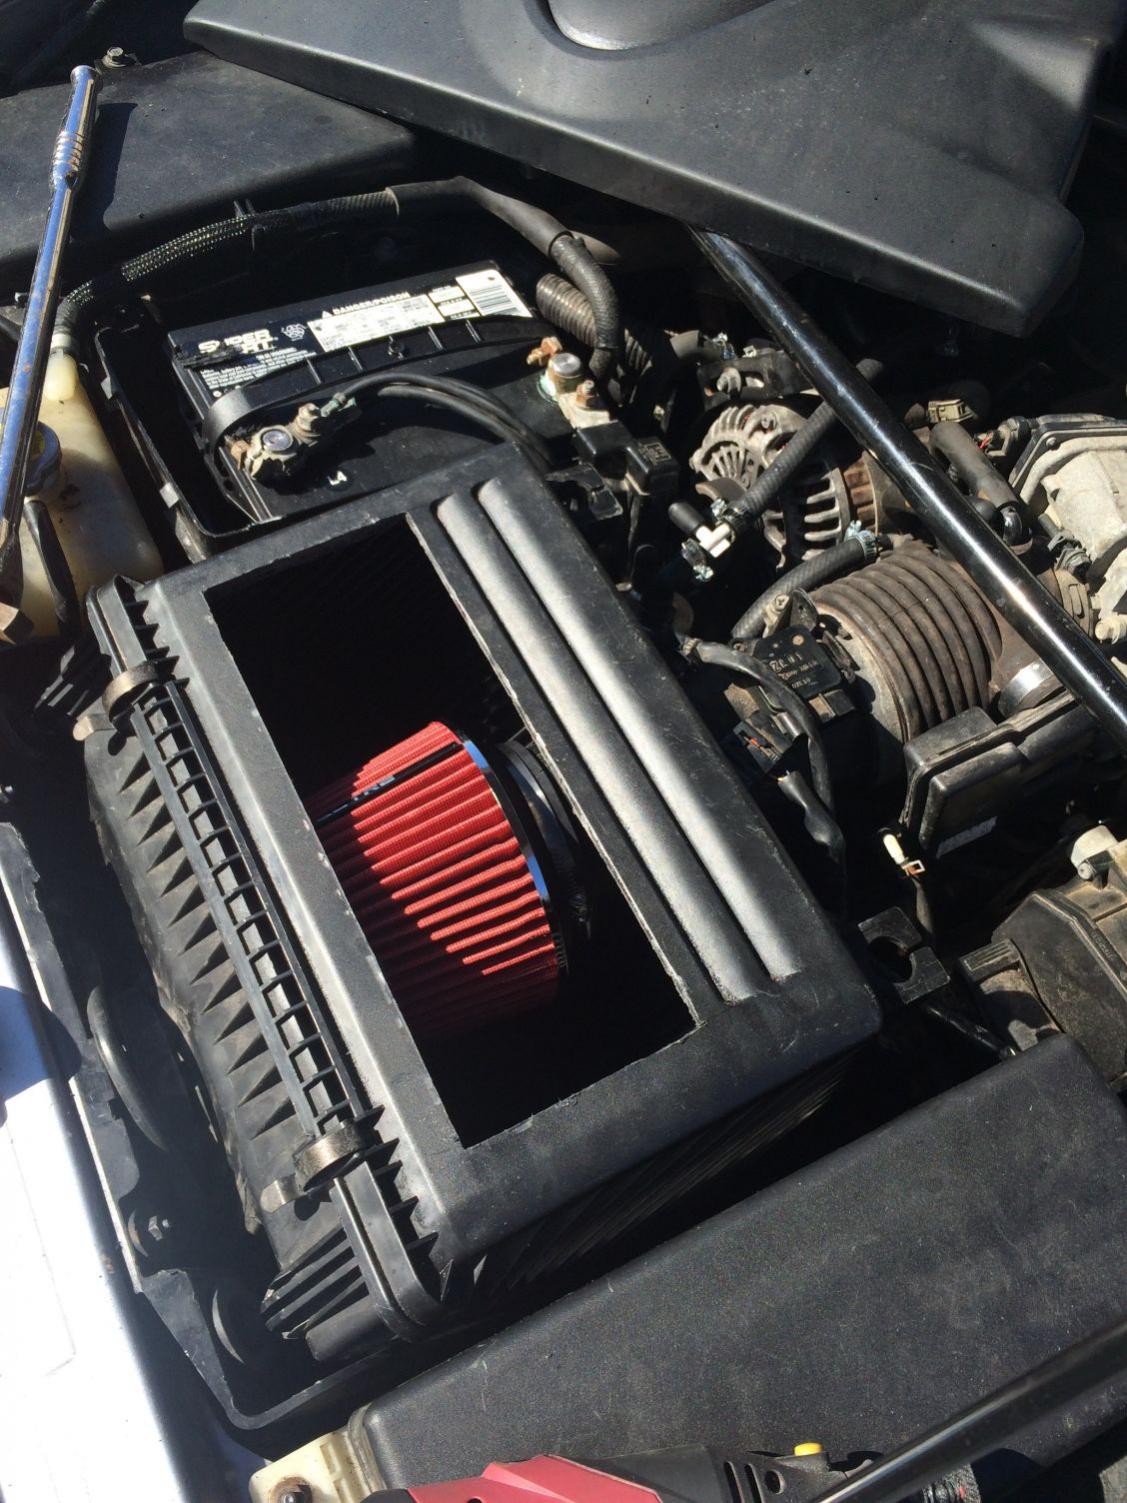
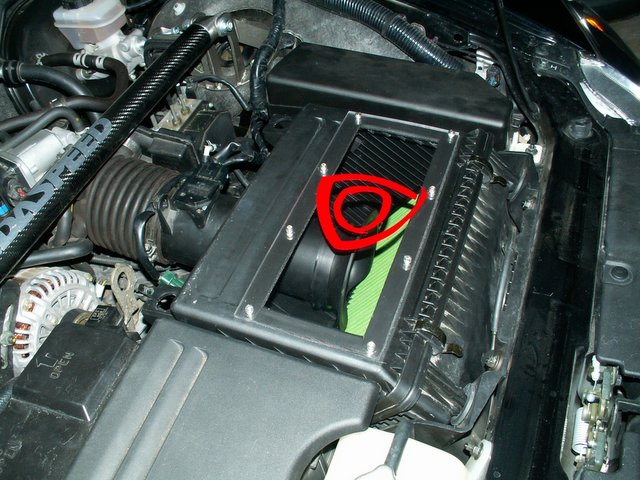
In the pictures you will see a cone filter inside my intake. You may choose for yourself what you would like to do. This window modification works perfect with stock or cone set up. This modification is for looks only and has no performance benefits.
The intake should be seeled at some point, otherwise the intake can suck air between the plexiglass and the air box, also it can suck in contaminated air and water.
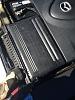
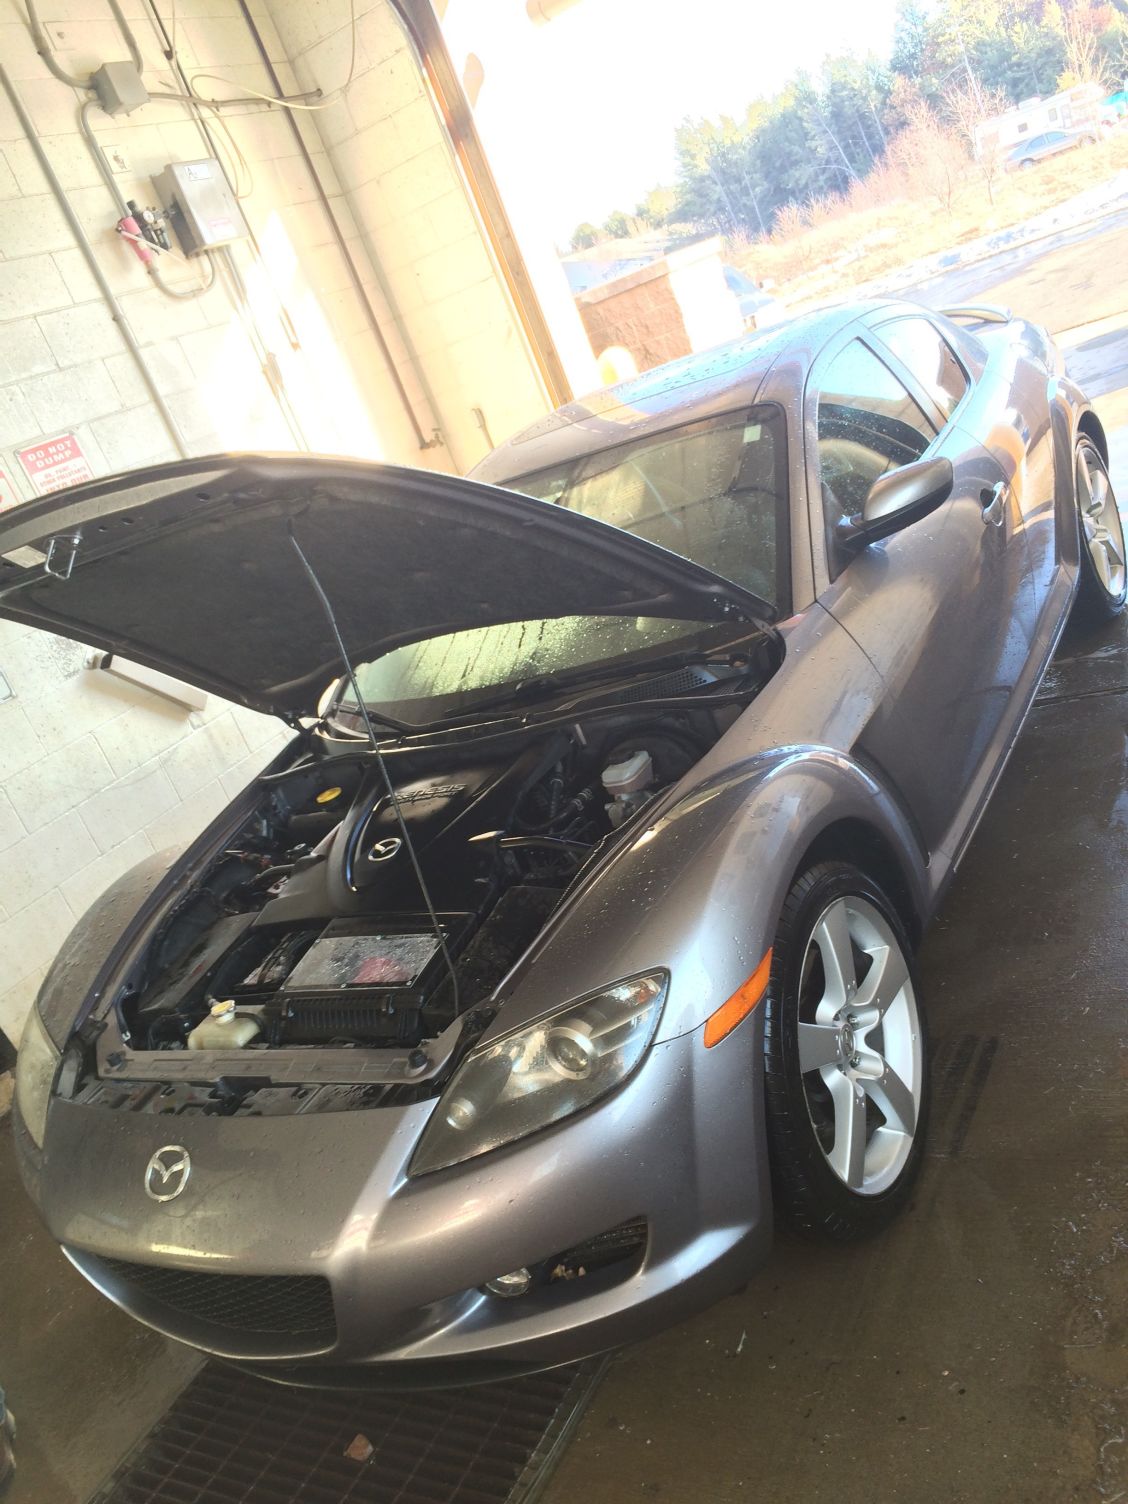
The finished intake

What you will need
Dremmel is the best tool for cutting the intake box and the plexi glass
Plexiglass - for the intake window
Screw driver - to remove intake from vehicle
Drill - to drill pilot holes in plexiglass so it doesn't crack
Drill bit and driver bit
Permanent marker - to mark the intake and plexiglass for cutting
File- used to take down the burrs from the melted plastic and smooth the edges
Straight edge - used to mark out some nice straight lines
You may or may not want to remove your air intake. I removed mine in order to get into the inside to make the cut and so I didn't cut my filter. My way of removing air intake is to unscrew and unplug MAF sensor. Unplug that emissions sensor attached to the front of the intake. Then pull that cylinder of back of the intake. I then take a pry bar and pry up on intake until it pops up. Be careful to make sure you don't damage that vacuum line on the front for the intake actuator valve.
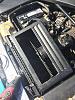
Step 1 Marking out the stock intake air box
Use the straight edge when marking out your lines
The side lines run parallel to each other and use the existing indents in the air box for a guide.
The top line is exactly a 1/2" from the top set of indents in the air box
The bottom line uses the bottom indent as its guide
After everything is marked out on the air box go ahead and measure it. Then you need to add a 1/2" all the way around to those measurements so you can use them to mark out the plexiglass.
I don't have a picture from before I started cutting. But this picture should give you the gist of it as I only had made one cut.
Step two Making the first cut
The bigger the cutting wheel you can get for the dremmel the better. The fins on the inside of the air box make it very difficult to cut through it. I only had a very tiny wheel so I had to cut on the inside of the air box and the outside.
Making a straight cut is very very important, and for most people that can be very hard to do. You will need to hold the dremmel with both hands and use your pinky or the side of your hand as a guide. Go slow to be sure that you make a nice straight cut.
Step three Cleaning up the cuts
This is a very simple process, all you need to do it use a wood file to straighten up and clean up and edges to make everything a little bit prettier. Do the same on the plexiglass after you cut it.
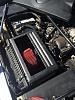
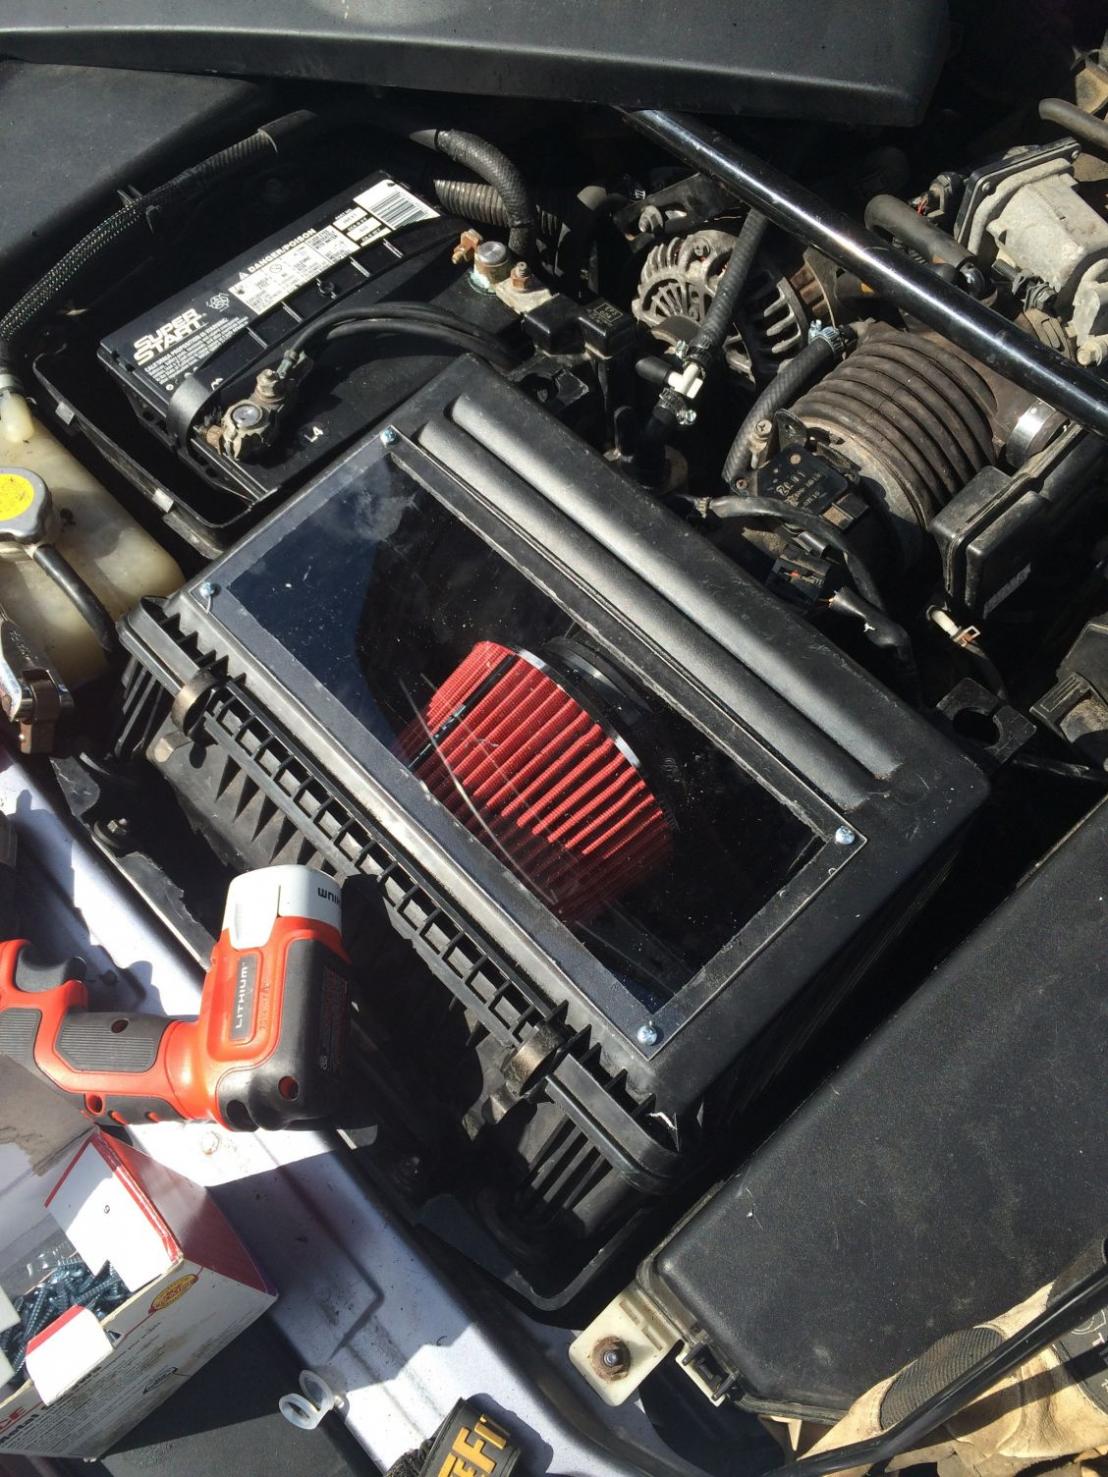
Step four Attaching the plexiglass
For this step I lay the plexiglass in place where I want it.
I then take the cordless drill with a drill bit slightly smaller then the self tappers and drill a hole in the first corner. Right through the plexiglass and the air box.
I then attach a screw driver head to drill and slowly screw in the self tapper. Be very careful, too much torque will crack the plexiglass
Then switch back to the drill bit and hold plexiglass in place and drill out the rest of the holes you want to secure it down.
You will then need to attach screw bit again and back the self tapper back out and make sure there are no pieces of plastic or anything under the plexiglass.
Once the plexiglass and area under neath it clear you can screw the plexiglass down to the air intake.
This doesn't make a complete water proof seal. If you want to completely seel you can use some sort of gasket maker or even use double sided weather stripping.
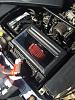
Obviously four screws wasn't enough
So I did add two more screws, which isn't enough still for this thin of glass, it flexes really easy. I may add a few more.
https://www.rx8club.com/series-i-tec...ication-43636/
This is only a "how to" If you want to argue the AIR INTAKE WINDOW do it here.
https://www.rx8club.com/series-i-aft...ke-pics-42631/
In the pictures you will see a cone filter inside my intake. You may choose for yourself what you would like to do. This window modification works perfect with stock or cone set up. This modification is for looks only and has no performance benefits.
The intake should be seeled at some point, otherwise the intake can suck air between the plexiglass and the air box, also it can suck in contaminated air and water.
The finished intake
What you will need
Dremmel is the best tool for cutting the intake box and the plexi glass
Plexiglass - for the intake window
Screw driver - to remove intake from vehicle
Drill - to drill pilot holes in plexiglass so it doesn't crack
Drill bit and driver bit
Permanent marker - to mark the intake and plexiglass for cutting
File- used to take down the burrs from the melted plastic and smooth the edges
Straight edge - used to mark out some nice straight lines
You may or may not want to remove your air intake. I removed mine in order to get into the inside to make the cut and so I didn't cut my filter. My way of removing air intake is to unscrew and unplug MAF sensor. Unplug that emissions sensor attached to the front of the intake. Then pull that cylinder of back of the intake. I then take a pry bar and pry up on intake until it pops up. Be careful to make sure you don't damage that vacuum line on the front for the intake actuator valve.
Step 1 Marking out the stock intake air box
Use the straight edge when marking out your lines
The side lines run parallel to each other and use the existing indents in the air box for a guide.
The top line is exactly a 1/2" from the top set of indents in the air box
The bottom line uses the bottom indent as its guide
After everything is marked out on the air box go ahead and measure it. Then you need to add a 1/2" all the way around to those measurements so you can use them to mark out the plexiglass.
I don't have a picture from before I started cutting. But this picture should give you the gist of it as I only had made one cut.

Step two Making the first cut
The bigger the cutting wheel you can get for the dremmel the better. The fins on the inside of the air box make it very difficult to cut through it. I only had a very tiny wheel so I had to cut on the inside of the air box and the outside.
Making a straight cut is very very important, and for most people that can be very hard to do. You will need to hold the dremmel with both hands and use your pinky or the side of your hand as a guide. Go slow to be sure that you make a nice straight cut.

Step three Cleaning up the cuts
This is a very simple process, all you need to do it use a wood file to straighten up and clean up and edges to make everything a little bit prettier. Do the same on the plexiglass after you cut it.
Step four Attaching the plexiglass
For this step I lay the plexiglass in place where I want it.
I then take the cordless drill with a drill bit slightly smaller then the self tappers and drill a hole in the first corner. Right through the plexiglass and the air box.
I then attach a screw driver head to drill and slowly screw in the self tapper. Be very careful, too much torque will crack the plexiglass
Then switch back to the drill bit and hold plexiglass in place and drill out the rest of the holes you want to secure it down.
You will then need to attach screw bit again and back the self tapper back out and make sure there are no pieces of plastic or anything under the plexiglass.
Once the plexiglass and area under neath it clear you can screw the plexiglass down to the air intake.
This doesn't make a complete water proof seal. If you want to completely seel you can use some sort of gasket maker or even use double sided weather stripping.
Obviously four screws wasn't enough
So I did add two more screws, which isn't enough still for this thin of glass, it flexes really easy. I may add a few more.
Last edited by PowerBound; 03-09-2015 at 10:16 AM.
 03-08-2015, 08:55 PM
#2
Registered
Thread Starter
Join Date: Mar 2015
Location: Central Wisconsin
Posts: 67
Likes: 0
Received 0 Likes
on
0 Posts
You can use a stock filter or a cone filter.
If your having issues getting your cone filter to fit you may have to take and grind out some of the fins inside the air intake. I did this to mine, and now mine closes and fits together perfect.
If your having issues getting your cone filter to fit you may have to take and grind out some of the fins inside the air intake. I did this to mine, and now mine closes and fits together perfect.
 03-08-2015, 08:57 PM
#4

1. Let me start by saying this mod will not be very well received here.
2. There is one VERY important concept that was missed when adding a cone filter into the filter box. Take a look at the Racing Beat (heck, take a look at the OEM design) to realize the flaw in your design. It will become far more apparent when you monitor your fuel trims and air flow rate.
3. Acrylic and plastic do not make for a tight seal. Something interesting happens inside of that intake box during load that your modification doesn't allow to properly occur...it isn't just about sealing from water.
03-08-2015, 08:58 PM
#5
Registered
iTrader: (2)

Join Date: Oct 2007
Location: Pacific Northwest
Posts: 16,684
Likes: 0
Received 253 Likes
on
110 Posts
I will move this to the DIY section once you give me a more appropriate title for the thread. As in, it needs to be descriptive, rule #14 says that people shouldn't have to open the thread to know what it's about.
But yes, Paimon is right. There are some engineering flaws here that are hurting the performance, not helping.
But yes, Paimon is right. There are some engineering flaws here that are hurting the performance, not helping.
03-08-2015, 09:07 PM
#6
Registered
Thread Starter
Join Date: Mar 2015
Location: Central Wisconsin
Posts: 67
Likes: 0
Received 0 Likes
on
0 Posts
1. Let me start by saying this mod will not be very well received here.
2. There is one VERY important concept that was missed when adding a cone filter into the filter box. Take a look at the Racing Beat (heck, take a look at the OEM design) to realize the flaw in your design. It will become far more apparent when you monitor your fuel trims and air flow rate.
3. Acrylic and plastic do not make for a tight seal. Something interesting happens inside of that intake box during load that your modification doesn't allow to properly occur...it isn't just about sealing from water.
2. There is one VERY important concept that was missed when adding a cone filter into the filter box. Take a look at the Racing Beat (heck, take a look at the OEM design) to realize the flaw in your design. It will become far more apparent when you monitor your fuel trims and air flow rate.
3. Acrylic and plastic do not make for a tight seal. Something interesting happens inside of that intake box during load that your modification doesn't allow to properly occur...it isn't just about sealing from water.
I said you should seel the box. Water being a huge issue when washing unser the hood. I figured the air seal would have been more of common sense.
I said you can leave it entirely stock inside it as well
Also this was already done a very long time ago and everyone that did it reported zero issues with theirs.
Also the cone filter inside the stock box is a very common modification
03-08-2015, 09:08 PM
#7
Registered
Thread Starter
Join Date: Mar 2015
Location: Central Wisconsin
Posts: 67
Likes: 0
Received 0 Likes
on
0 Posts
I will move this to the DIY section once you give me a more appropriate title for the thread. As in, it needs to be descriptive, rule #14 says that people shouldn't have to open the thread to know what it's about.
But yes, Paimon is right. There are some engineering flaws here that are hurting the performance, not helping.
But yes, Paimon is right. There are some engineering flaws here that are hurting the performance, not helping.
03-08-2015, 09:10 PM
#8
I said you should seel the box. Water being a huge issue when washing unser the hood. I figured the air seal would have been more of common sense.
I said you can leave it entirely stock inside it as well
Also this was already done a very long time ago and everyone that did it reported zero issues with theirs.
Also the cone filter inside the stock box is a very common modification
I said you can leave it entirely stock inside it as well
Also this was already done a very long time ago and everyone that did it reported zero issues with theirs.
Also the cone filter inside the stock box is a very common modification
03-08-2015, 09:19 PM
#9
Registered
Thread Starter
Join Date: Mar 2015
Location: Central Wisconsin
Posts: 67
Likes: 0
Received 0 Likes
on
0 Posts
I'll never claim gains on a rotary, with around 70% thermal efficiency it's almost impossible to make a bunch of power naturally aspirated. Where most piston engines are between 25-35% thermal efficient.
03-08-2015, 09:24 PM
#10
Registered
Thread Starter
Join Date: Mar 2015
Location: Central Wisconsin
Posts: 67
Likes: 0
Received 0 Likes
on
0 Posts
I will move this to the DIY section once you give me a more appropriate title for the thread. As in, it needs to be descriptive, rule #14 says that people shouldn't have to open the thread to know what it's about.
But yes, Paimon is right. There are some engineering flaws here that are hurting the performance, not helping.
But yes, Paimon is right. There are some engineering flaws here that are hurting the performance, not helping.
03-08-2015, 09:33 PM
#11
Registered
iTrader: (2)
Join Date: Oct 2007
Location: Pacific Northwest
Posts: 16,684
Likes: 0
Received 253 Likes
on
110 Posts
The DIY section has hot-linking images from outside sources turned off, and have always had it that way. This is done to encourage people to attach the images directly, since eventually other hosting locations go dead, effectively disabling the entire DIY thread.
03-08-2015, 09:54 PM
#12
Registered
Thread Starter
Join Date: Mar 2015
Location: Central Wisconsin
Posts: 67
Likes: 0
Received 0 Likes
on
0 Posts
Well they were directly uploaded to the forum lol they didn't become hot linked until the thread got moved.
No big deal I'll log on tomorrow and redo them. Have a good night everyone.
03-08-2015, 10:12 PM
#14
Registered
Thread Starter
Join Date: Mar 2015
Location: Central Wisconsin
Posts: 67
Likes: 0
Received 0 Likes
on
0 Posts
03-08-2015, 11:22 PM
#16
Registered
Thread Starter
Join Date: Mar 2015
Location: Central Wisconsin
Posts: 67
Likes: 0
Received 0 Likes
on
0 Posts
Nobody claimed performance increase. More dirt in the engine would be a opinion. The filter would have to be proven to filter less then oem. Also when sealed it wouldn't be exposed to any more contaminates then it was before I put the window in.
If people would use their beloved search, they could go to the original threads on the cone filter inside the stock air box and the intake window and argue all they want. There is page after page of information, including fuel trims and air temperature readings.
If people would use their beloved search, they could go to the original threads on the cone filter inside the stock air box and the intake window and argue all they want. There is page after page of information, including fuel trims and air temperature readings.
03-08-2015, 11:28 PM
#17
SARX Legend
iTrader: (46)

It's not an opinion. It is a cheap *** high flow filter so it will not filter nearly as well as an OEM one because not even the high end high flow filters can filter anywhere near as well as the OEM style "paper" filters. And the funnel and screens serve a purpose, I hope you didn't delete any screens.
As for the window, well if you think it looks cool that is fine. But after a year in the engine bay of a rotary we shall see.
As for the window, well if you think it looks cool that is fine. But after a year in the engine bay of a rotary we shall see.
Last edited by 9krpmrx8; 03-08-2015 at 11:39 PM.
 03-09-2015, 08:25 AM
#19
Registered
Thread Starter
Join Date: Mar 2015
Location: Central Wisconsin
Posts: 67
Likes: 0
Received 0 Likes
on
0 Posts
It's not an opinion. It is a cheap *** high flow filter so it will not filter nearly as well as an OEM one because not even the high end high flow filters can filter anywhere near as well as the OEM style "paper" filters. And the funnel and screens serve a purpose, I hope you didn't delete any screens.
As for the window, well if you think it looks cool that is fine. But after a year in the engine bay of a rotary we shall see.
As for the window, well if you think it looks cool that is fine. But after a year in the engine bay of a rotary we shall see.
Also for like the 4th time I will say it again. Read the write up it says you can keep everything stock inside the box as well.
Last edited by PowerBound; 03-09-2015 at 08:39 AM.
03-09-2015, 08:33 AM
#20
Registered
Thread Starter
Join Date: Mar 2015
Location: Central Wisconsin
Posts: 67
Likes: 0
Received 0 Likes
on
0 Posts
I don't run the screens on anything. People have reported that when using the cone filter and no screens they have no idle issues. Where s stock filter with both screens gone some have said they got a bad idle right after taking them out.


Thread
Thread Starter
Forum
Replies
Last Post